
How to Make a Sock Bunny (and a cute fabric carrot!)
Are you an all-out Easter decor type of person?? I traditionally haven’t been, but I felt like livening up the house this season, so starting with my Easter tree, I made a few new decorations.
I recently updated my post on how to make a sock monkey and thought a sock bunny for Easter would be SO CUTE! I didn’t I’d find socks very easily, but lo and behold, I found a perfectly striped springy pair at Target on the first try.
And of course, I made a tutorial for you! While the sock monkey post is a video tutorial, this one will be the traditional style, which photos and step by step instructions. The steps are very similar, so if you need clarification on something like hand stitching the arms on, refer to the video version for help.
Be sure not to miss the bonus little carrot tutorial at the end!
Enjoy :)

This post may contain affiliate links, which means that while I am not paid to promote certain items, I will earn a small commission should you purchase items through these links. For more info, see my disclosure policy.
How to make a sock bunny:
Before we start, note that I sew part of the bunny by machine, but that you can make the bunny totally by hand also. Most of is it hand sewn anyway, so it won’t be too much more work.
And one more thing, you need two socks, one pair. Make sure you don’t choose a directional print on your socks because the design will be upside down.
Let’s start!
First, turn your socks wrong side out. We’ll work with one sock at a time. With one sock, while inside out, refold it and place it so that the heel is facing up. This will be the main body and legs of your bunny.

Next, draw two legs as shown (I used a chalk marking tool, but a pencil works too). Leave a gap of 1/2” in between, curve them toward the fold at the toes and stop them about 1” from the heel. You’ll leave the top of the legs open for turning and stuffing. Stitch the legs on the sewing machine, then cut them apart.
They should look like this when sewn:

After you cut the legs apart between the centers and trim the toe areas, you can turn the body and legs right side out through the opening. If you need to, snip a tiny bit past where the leg stitching stops in order to make the hole bigger, but it really doesn’t need to be very big! The sock stretches more than you might think.

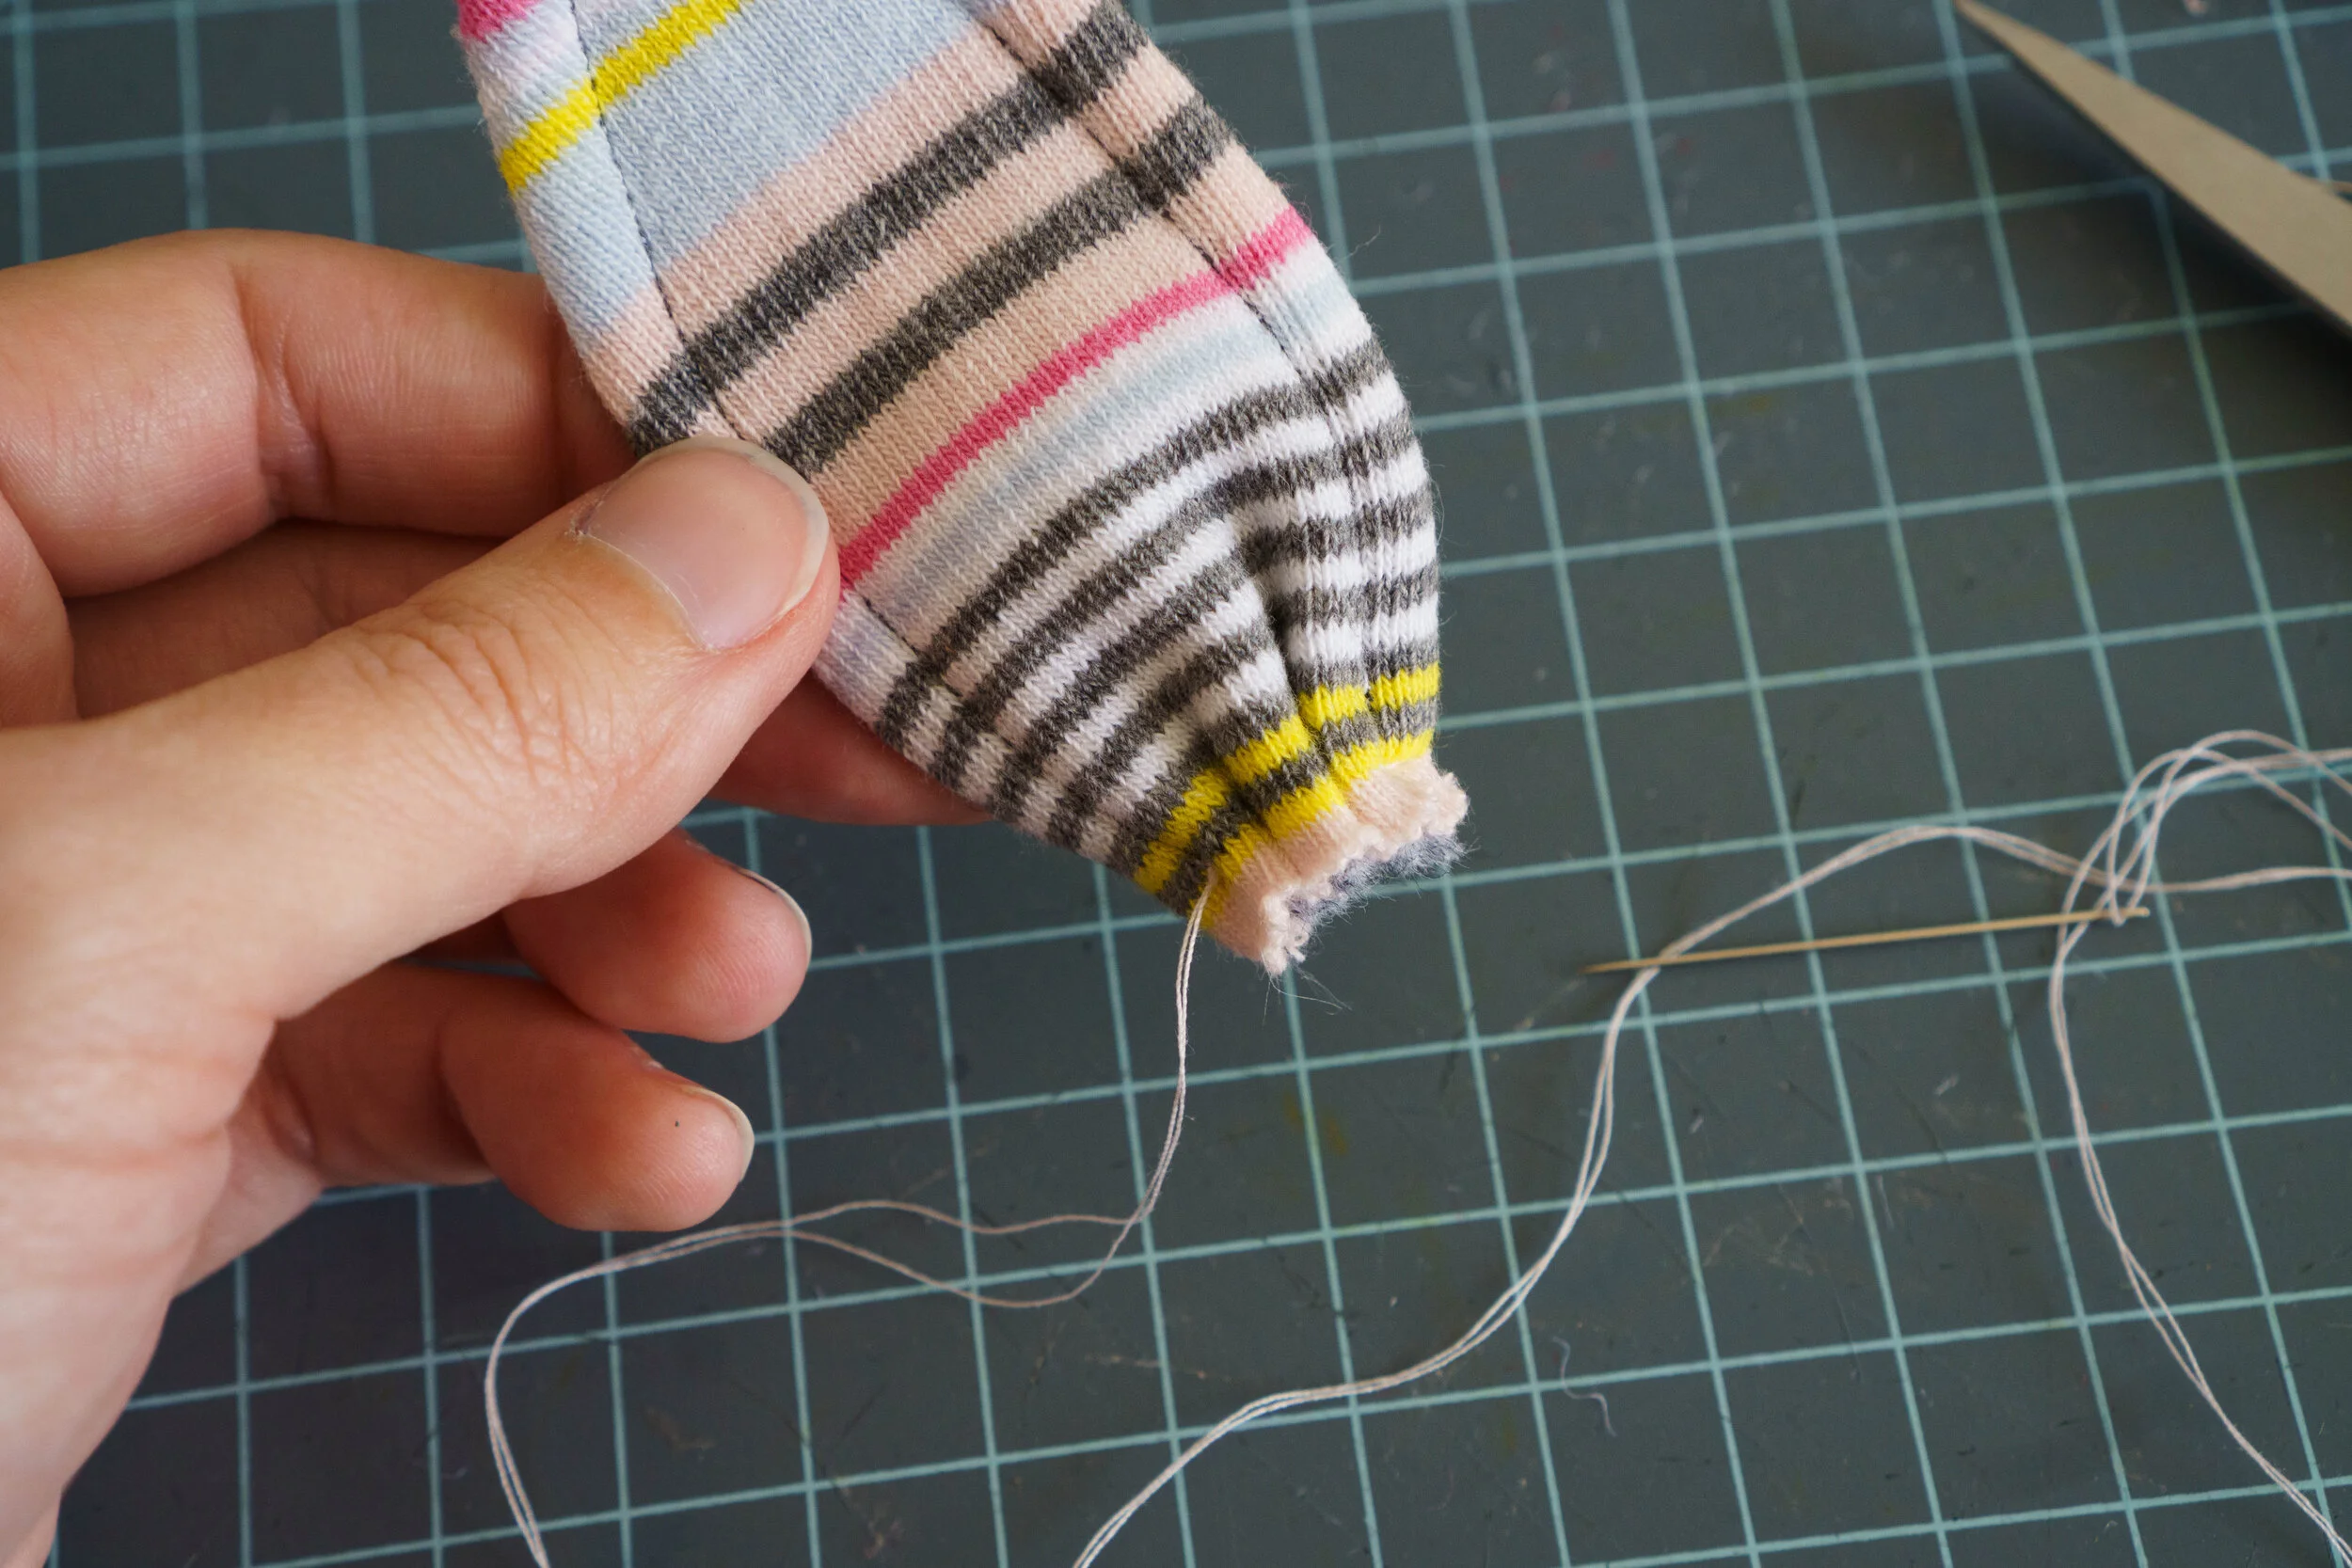
Now you’re ready to stuff the bunny. Use small pieces of stuffing for the legs and push them all the way to the bottom, one at a time. If they’re a little lumpy, just roll them between your hands like a play-doh snake. This isn’t one of those projects you want to overstuff. Like I said, the sock will stretch and can look weird if stuffed too full, so just stuff it until it looks cute.
When you’re done, hand sew the opening closed.

Now for the other sock.
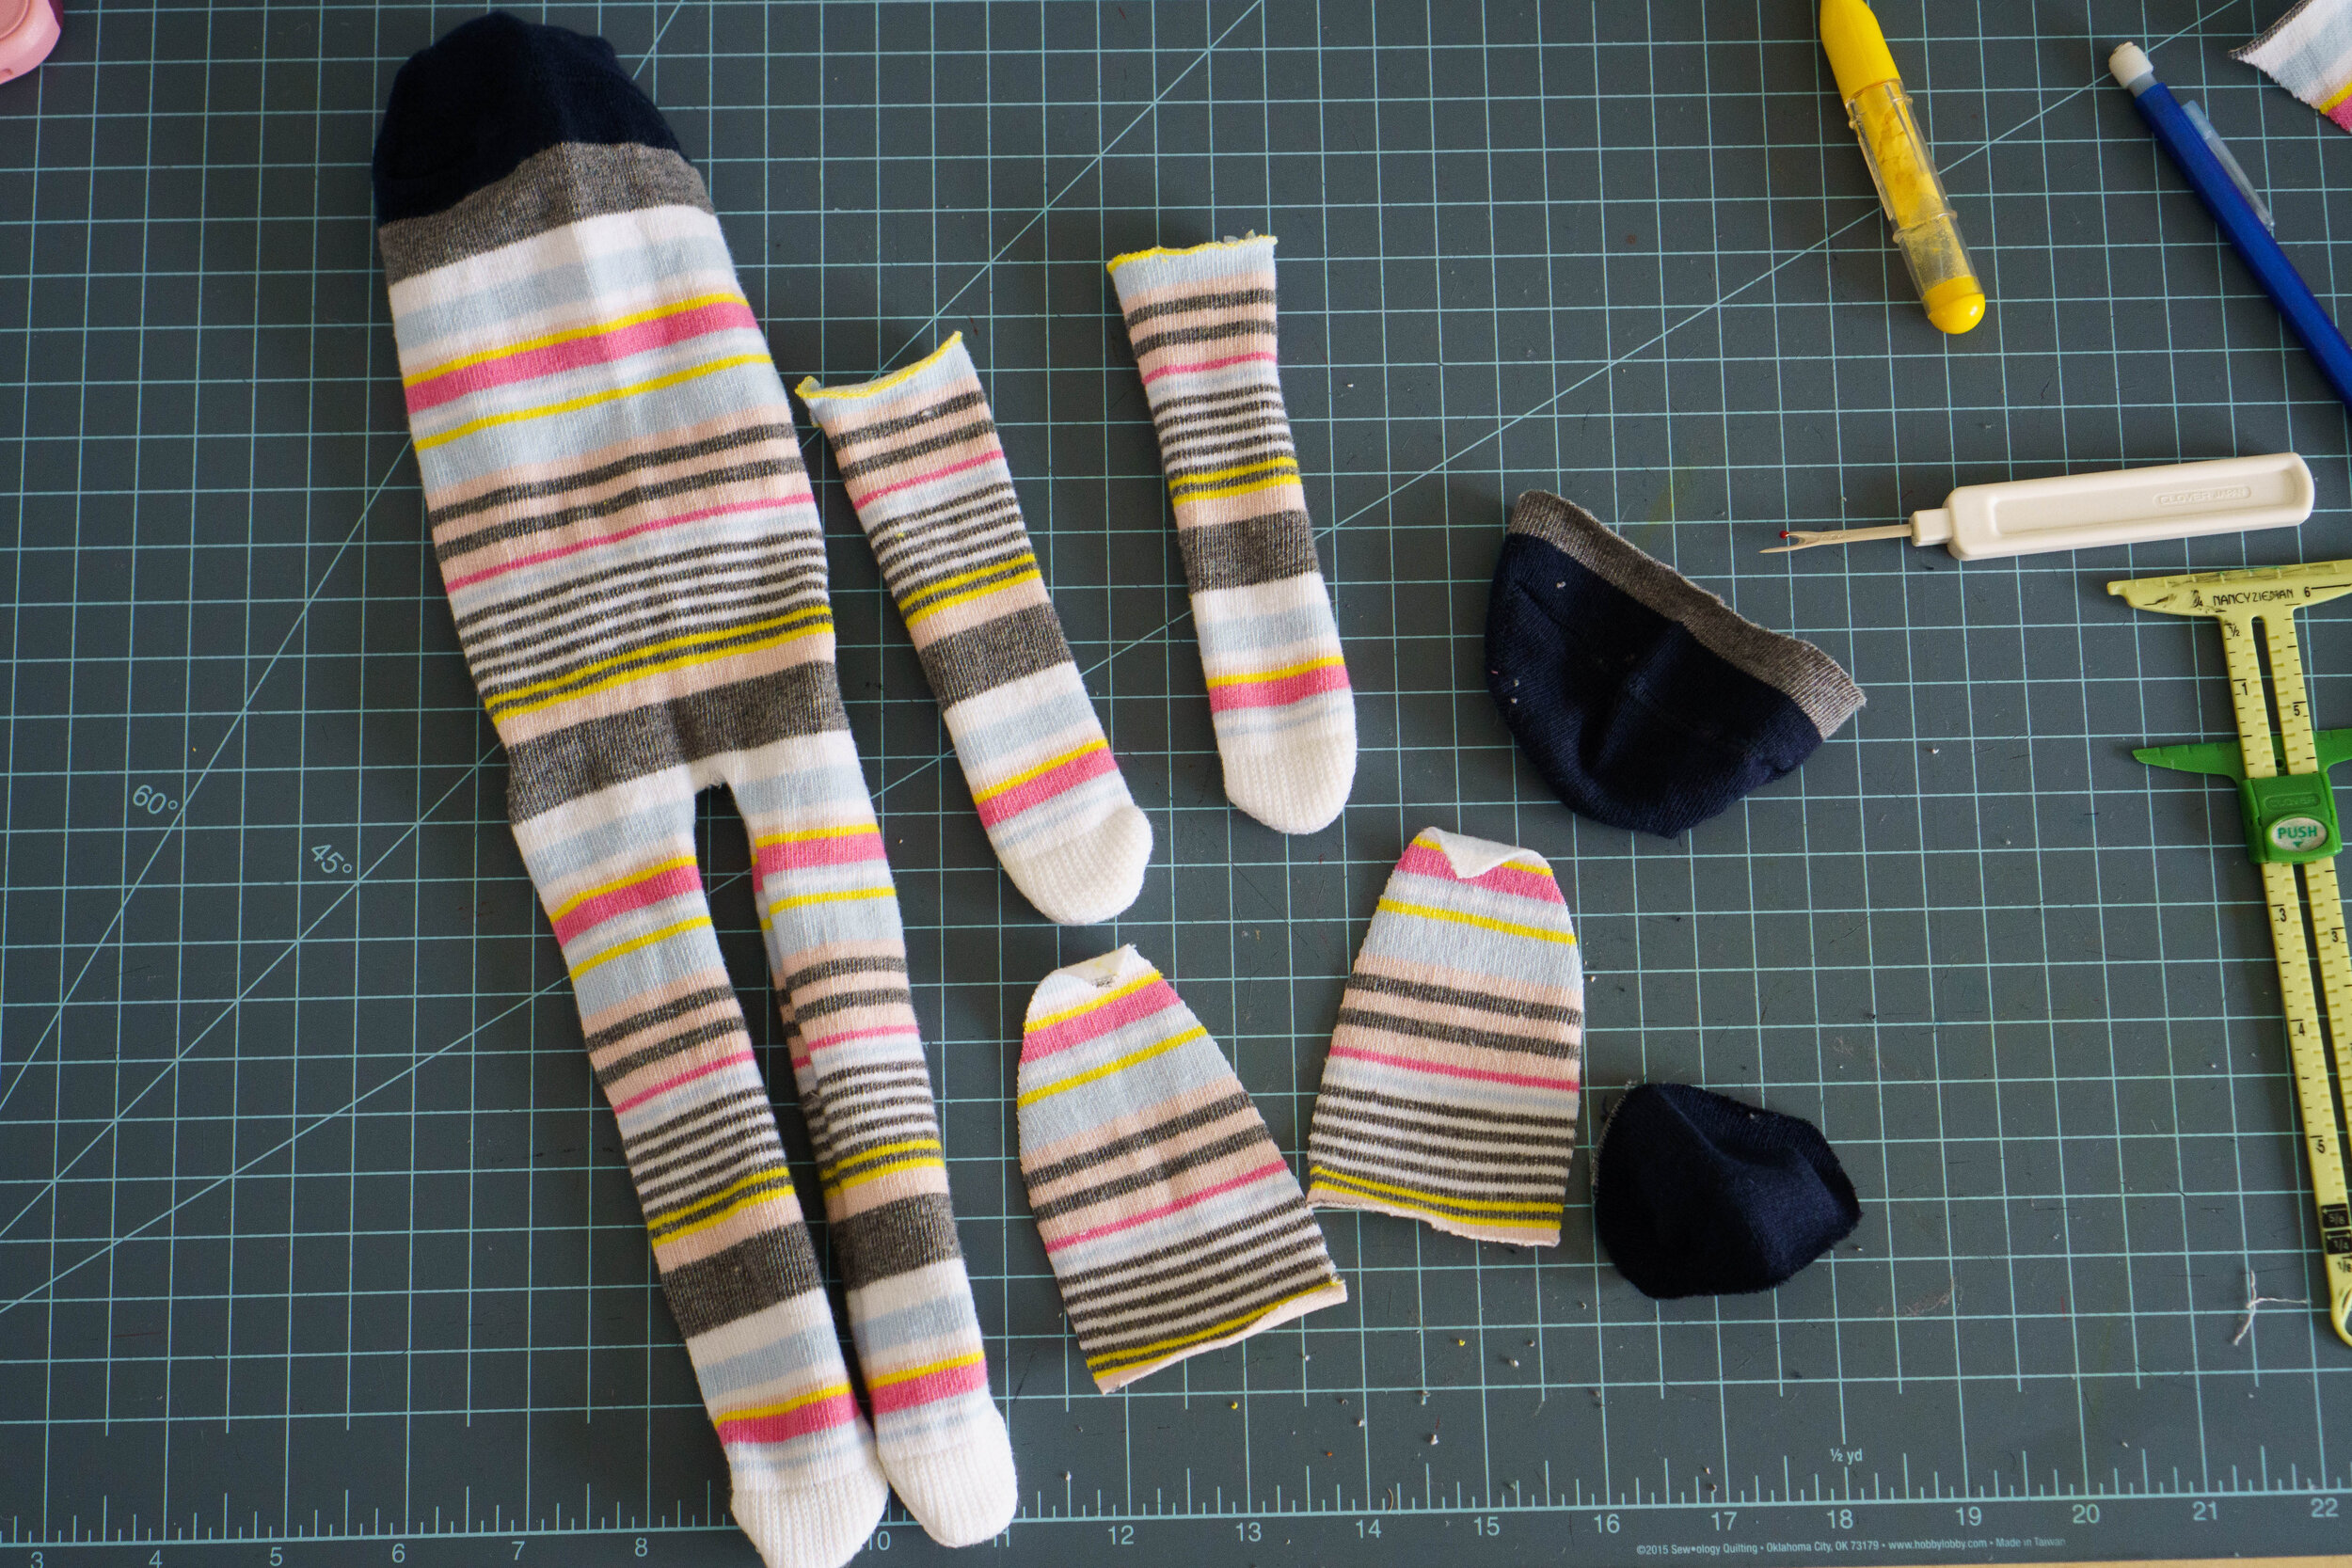
It was difficult to get a photo of this, but here’s the breakdown: First you’re going to use your pencil to draw two arms using the height/leg portion of the sock just like you did the legs, leaving them open at the top. You can stitch the arms by machine. Next, cut off the toe portion, which is probably a different color, making it easy. This is the muzzle that gets attached to the face. Next, with the foot portion of the sock, draw an ear shape, as tall as you can make it with what sock you have left. The ears will get backed with felt. Lastly, you can use the heel portion for a tail by cutting a half circle from it on the fold. (I later decided to make a pom pom for mine).
Here are all the pieces you should have:
Time to start putting your bunny together!
First, stuff the arms and hand sew them onto the body. If you need more of a visual on how exactly to do this, you can refer to my sock monkey video and watch the entire process. Play around with the placement until you think it looks cute, folding under the raw edge, and then stitch on all the way around it.

Next, attach the muzzle onto the face, trimming it if you need to (bunnies don’t have as prominent muzzles as monkies) and stretching the corners across the face. Pin it in place and then hand stitch around it with thread that matches the muzzle. When you have about an inch left to go, add some stuffing and then finish stitching it.

Time to finish up the face! You can get creative with this. I used buttons for eyes, but locking animal eyes are another option and are what I would use if I were making this for a small child since they don’t present a choking hazard. Cut a nose from a bit of pink felt or fleece and create a smile with embroidery floss. It only occurred to me later to add buck teeth, that would have been so cute!!! Whiskers too. Oh well, next time.

Next up, my favorite part: the ears. Using the ears you already cut as a pattern, cut two more ears out of felt. I used gray wool felt. Sew them right sides together, then turn them right side out and top stitch 1/4” from the edges. The felt gives the ears substance so they both stick up and bend forward at the tips.


With a needle and thread, run long gathering stitches along the bottom edge, then pull them tight to gather the bottom edge of the ear, and make a knot to secure it. Don’t cut the thread, though.

Position the ears close together on top of the head and stitch them on. Because of the top stitching, you can’t really turn under the raw edges, and I thought that would make it look messy, but it really didn’t. If yours does look a little messy, you could put a bow on your bunny to cover it.

The last step is to make your bunny’s tail. I chose to make a pom pom as a tail, using my medium pom pom maker. But, you can also use the piece you cut from the heal of your sock. I don’t have photos of that method, but you’ll just use the same gathering stitch technique around the edges of your circular piece, add stuffing and cinch it up. Then sew it onto his rear.
Done!

For a little something extra, I made my bunny a little carrot to hold. Since for me, he’s a decor item and not a toy, the carrot also helps the bunny sit up on his own. It was really easy!

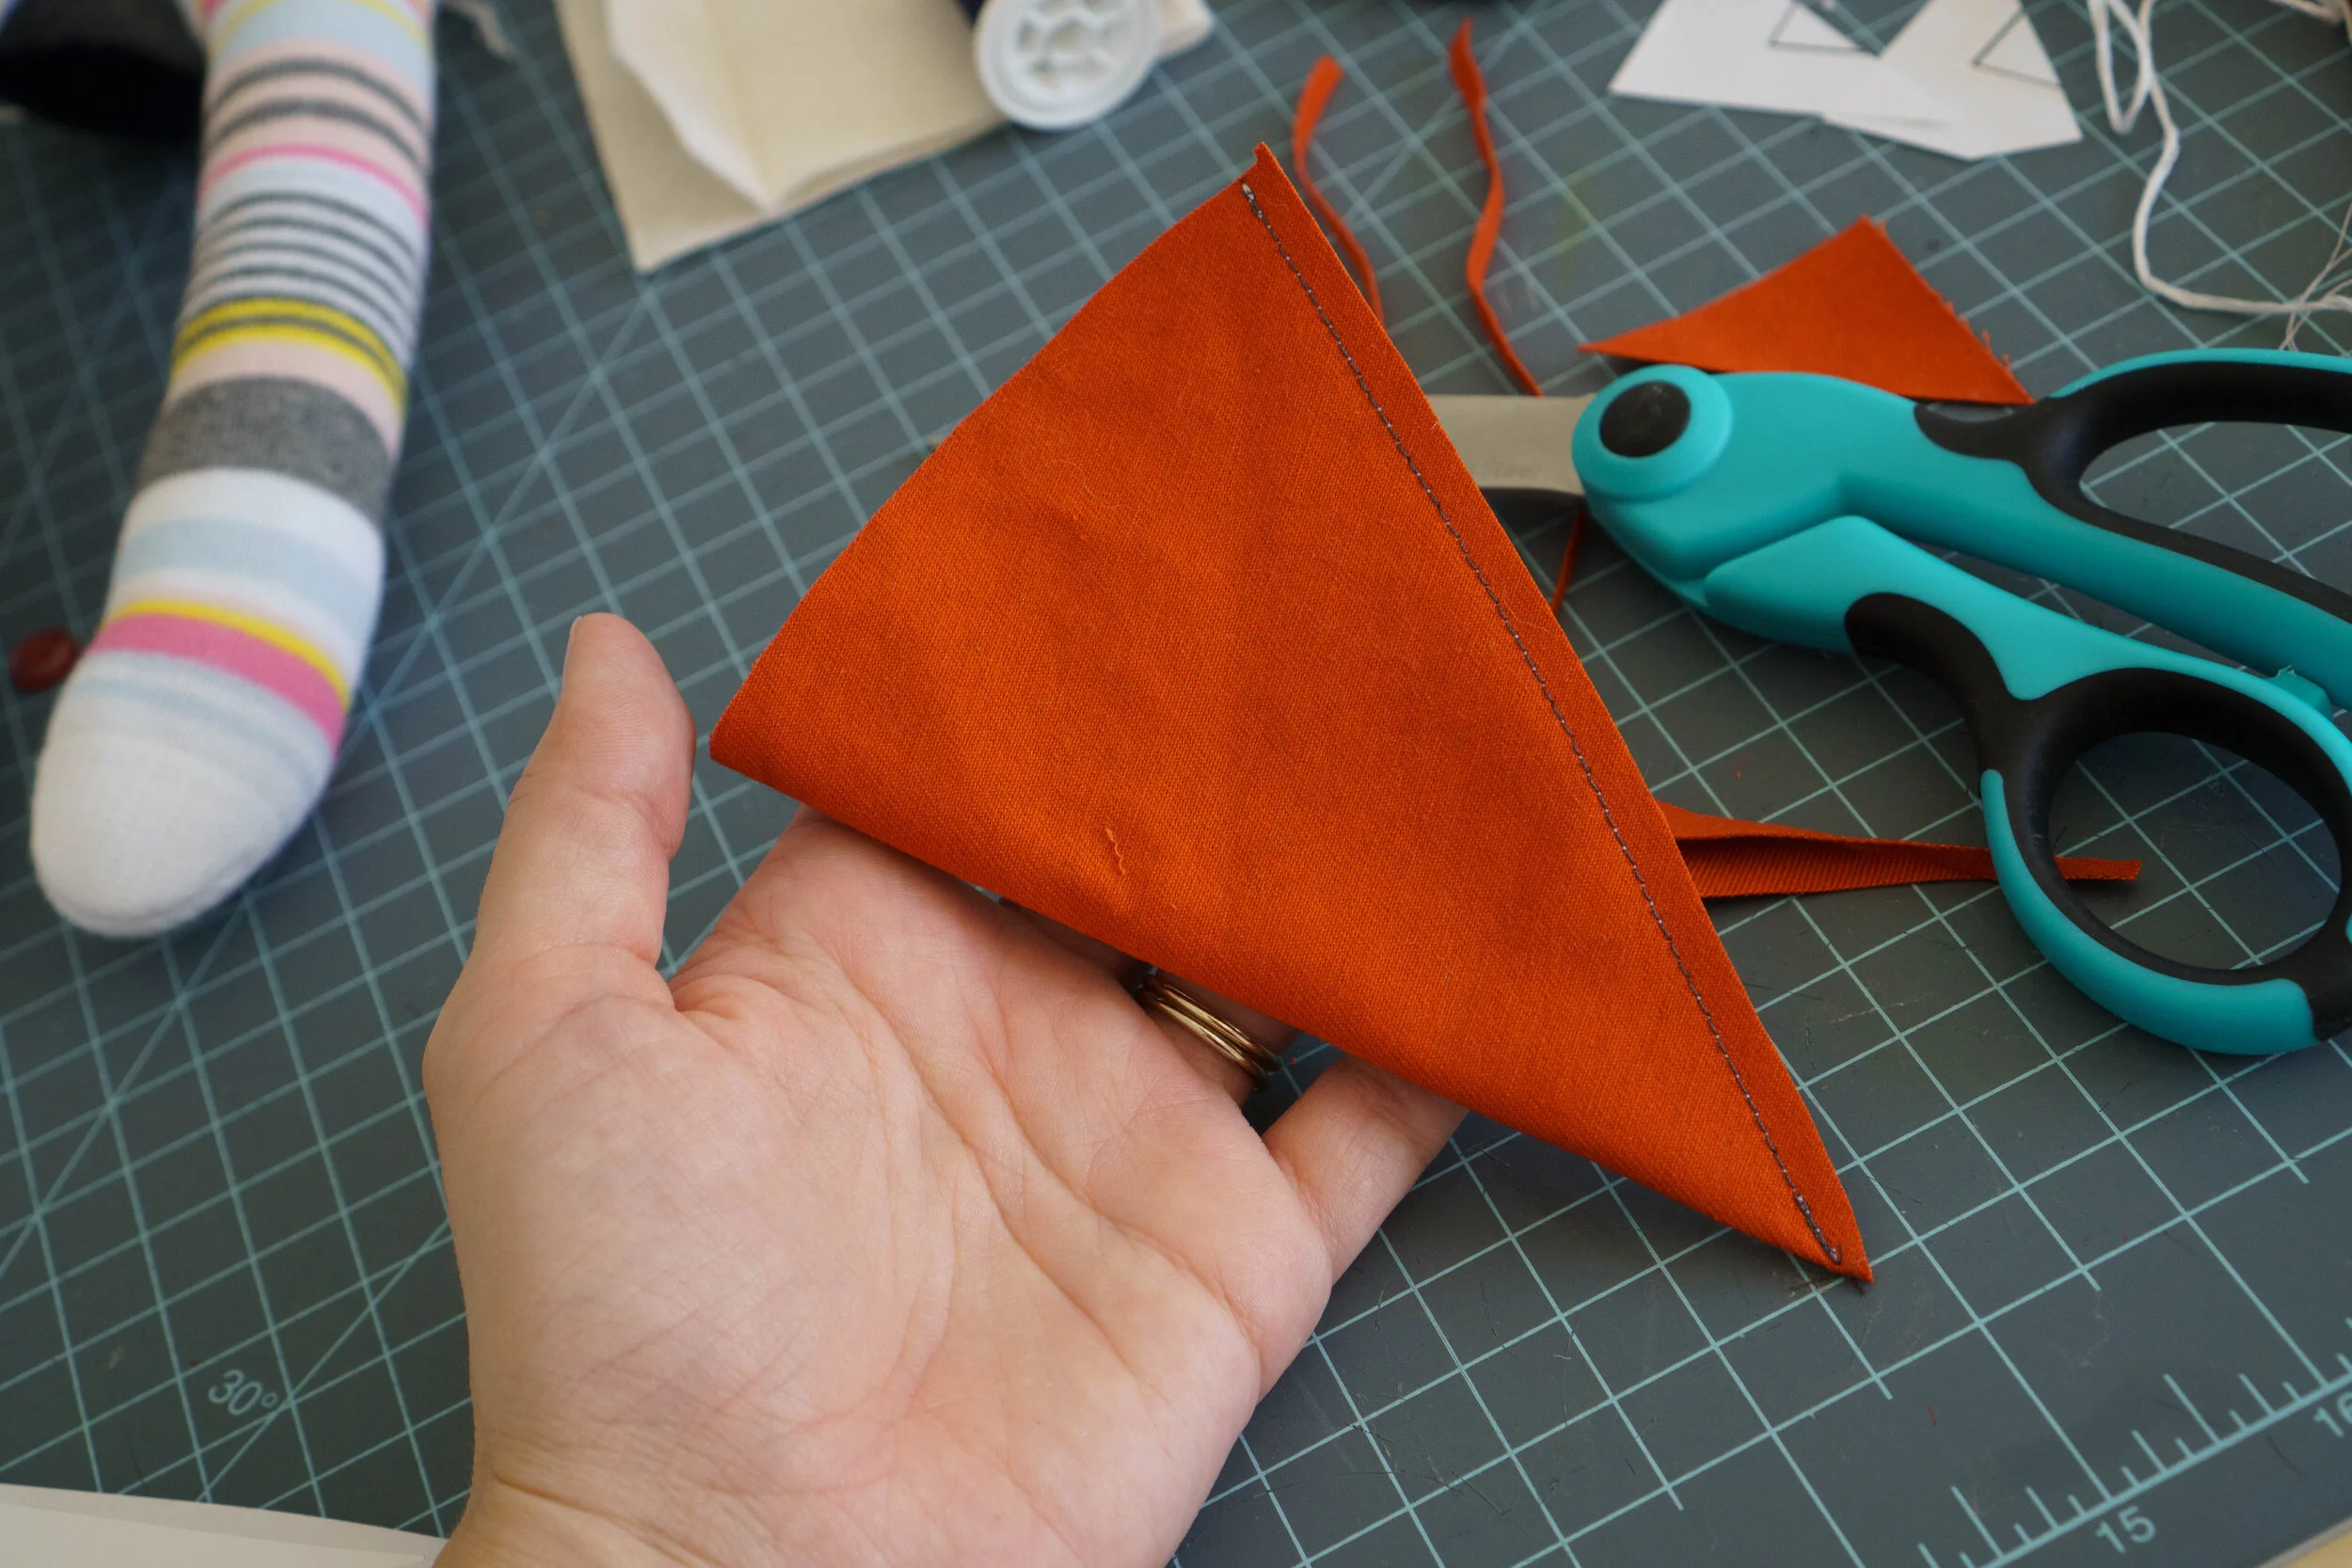
Cut a cone shape on the fold of a piece of orange fabric and sew the raw side together. The size is really up to you on this, but mine measures about 5” high. Use a scrap of paper to get the size you want before cutting your fabric.
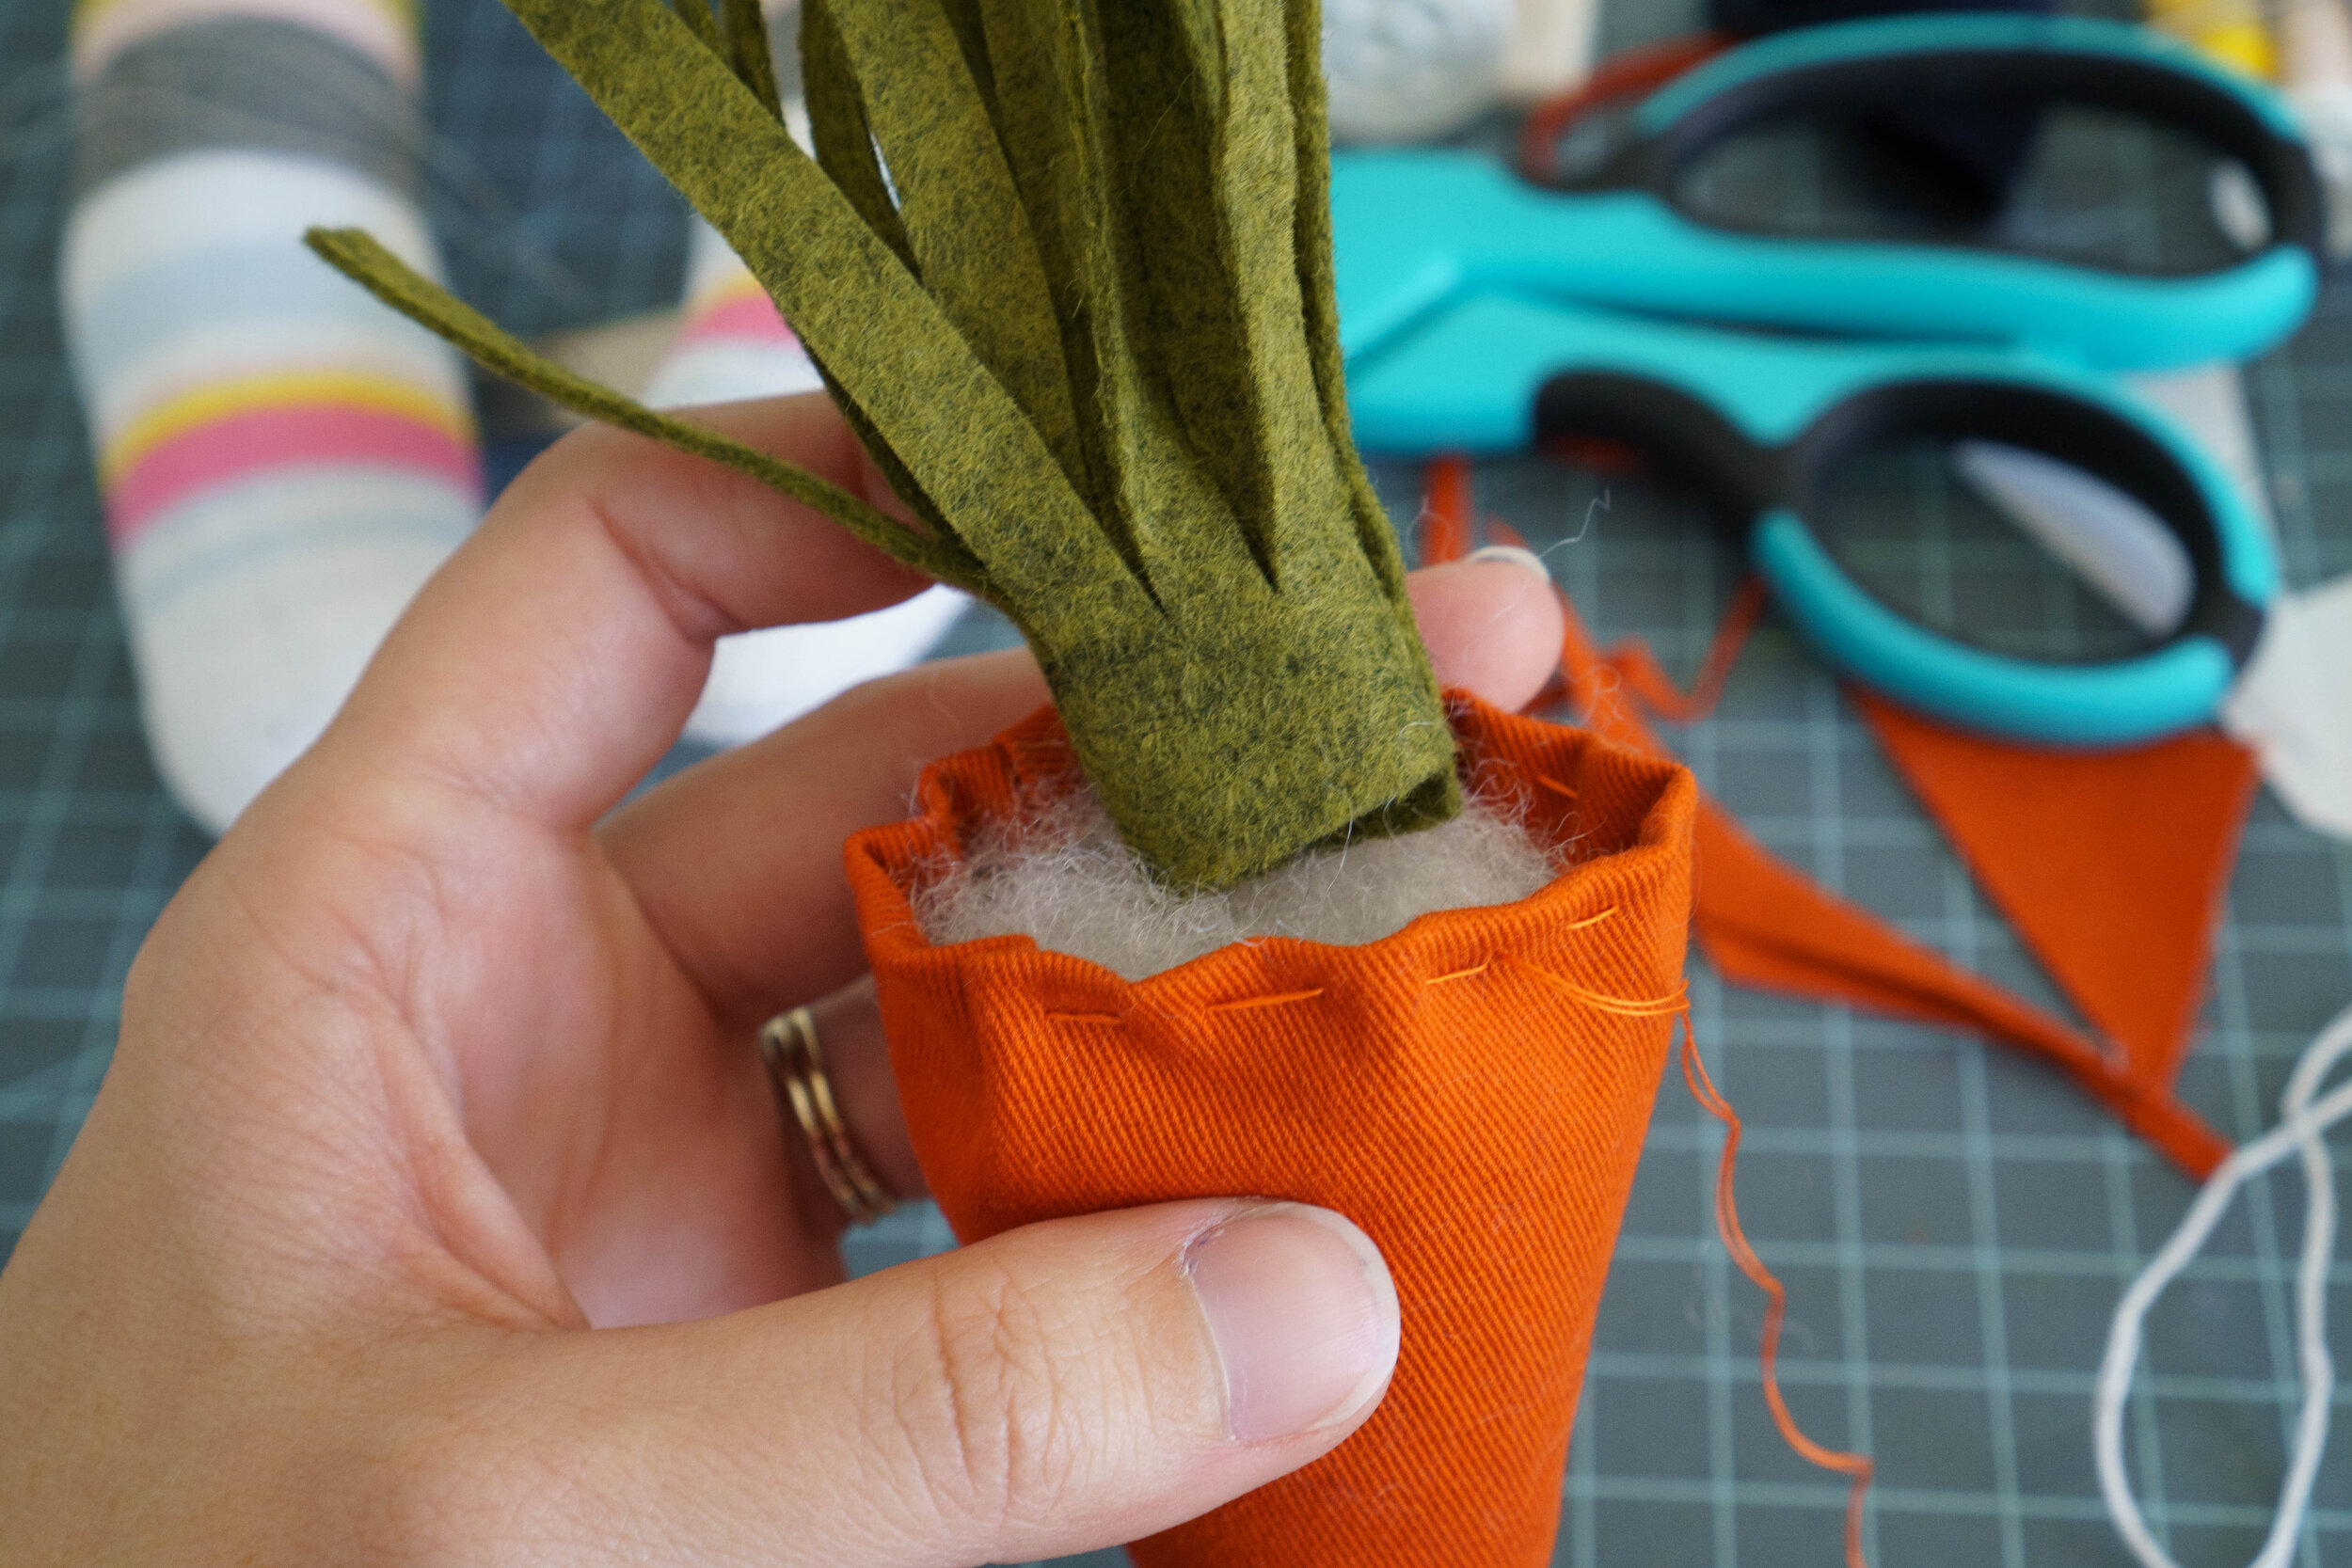
Turn your carrot right side out. Use some green felt, or whatever green scraps you have, and cut a rectangle, then snip it into fringe. I think my green rectangle was about 4” long and 3” high, but you can use whatever size you think looks cute.

Stuff the carrot. Then, fold the raw edge of the carrot top to the inside and sew a gathering stitch all the way around. Roll up the green fringe strip and tuck it inside the carrot before cinching it up tight. After knotting to secure the stitches, sut a few stitches back and forth through all the layers, securing the green fringe in place.
I attached the carrot to my bunny at an angle with small stitches.

That’s it! I hope you have fun making your sock bunnies! I’d love to see someone play withe other face and ear ideas, or maybe put different accessories in his arms :) If you make one, be sure and show me!
Cheers,
Nikki


10 Great Gifts to Sew for Mother’s Day