DIY Cottage Core Hair Bows
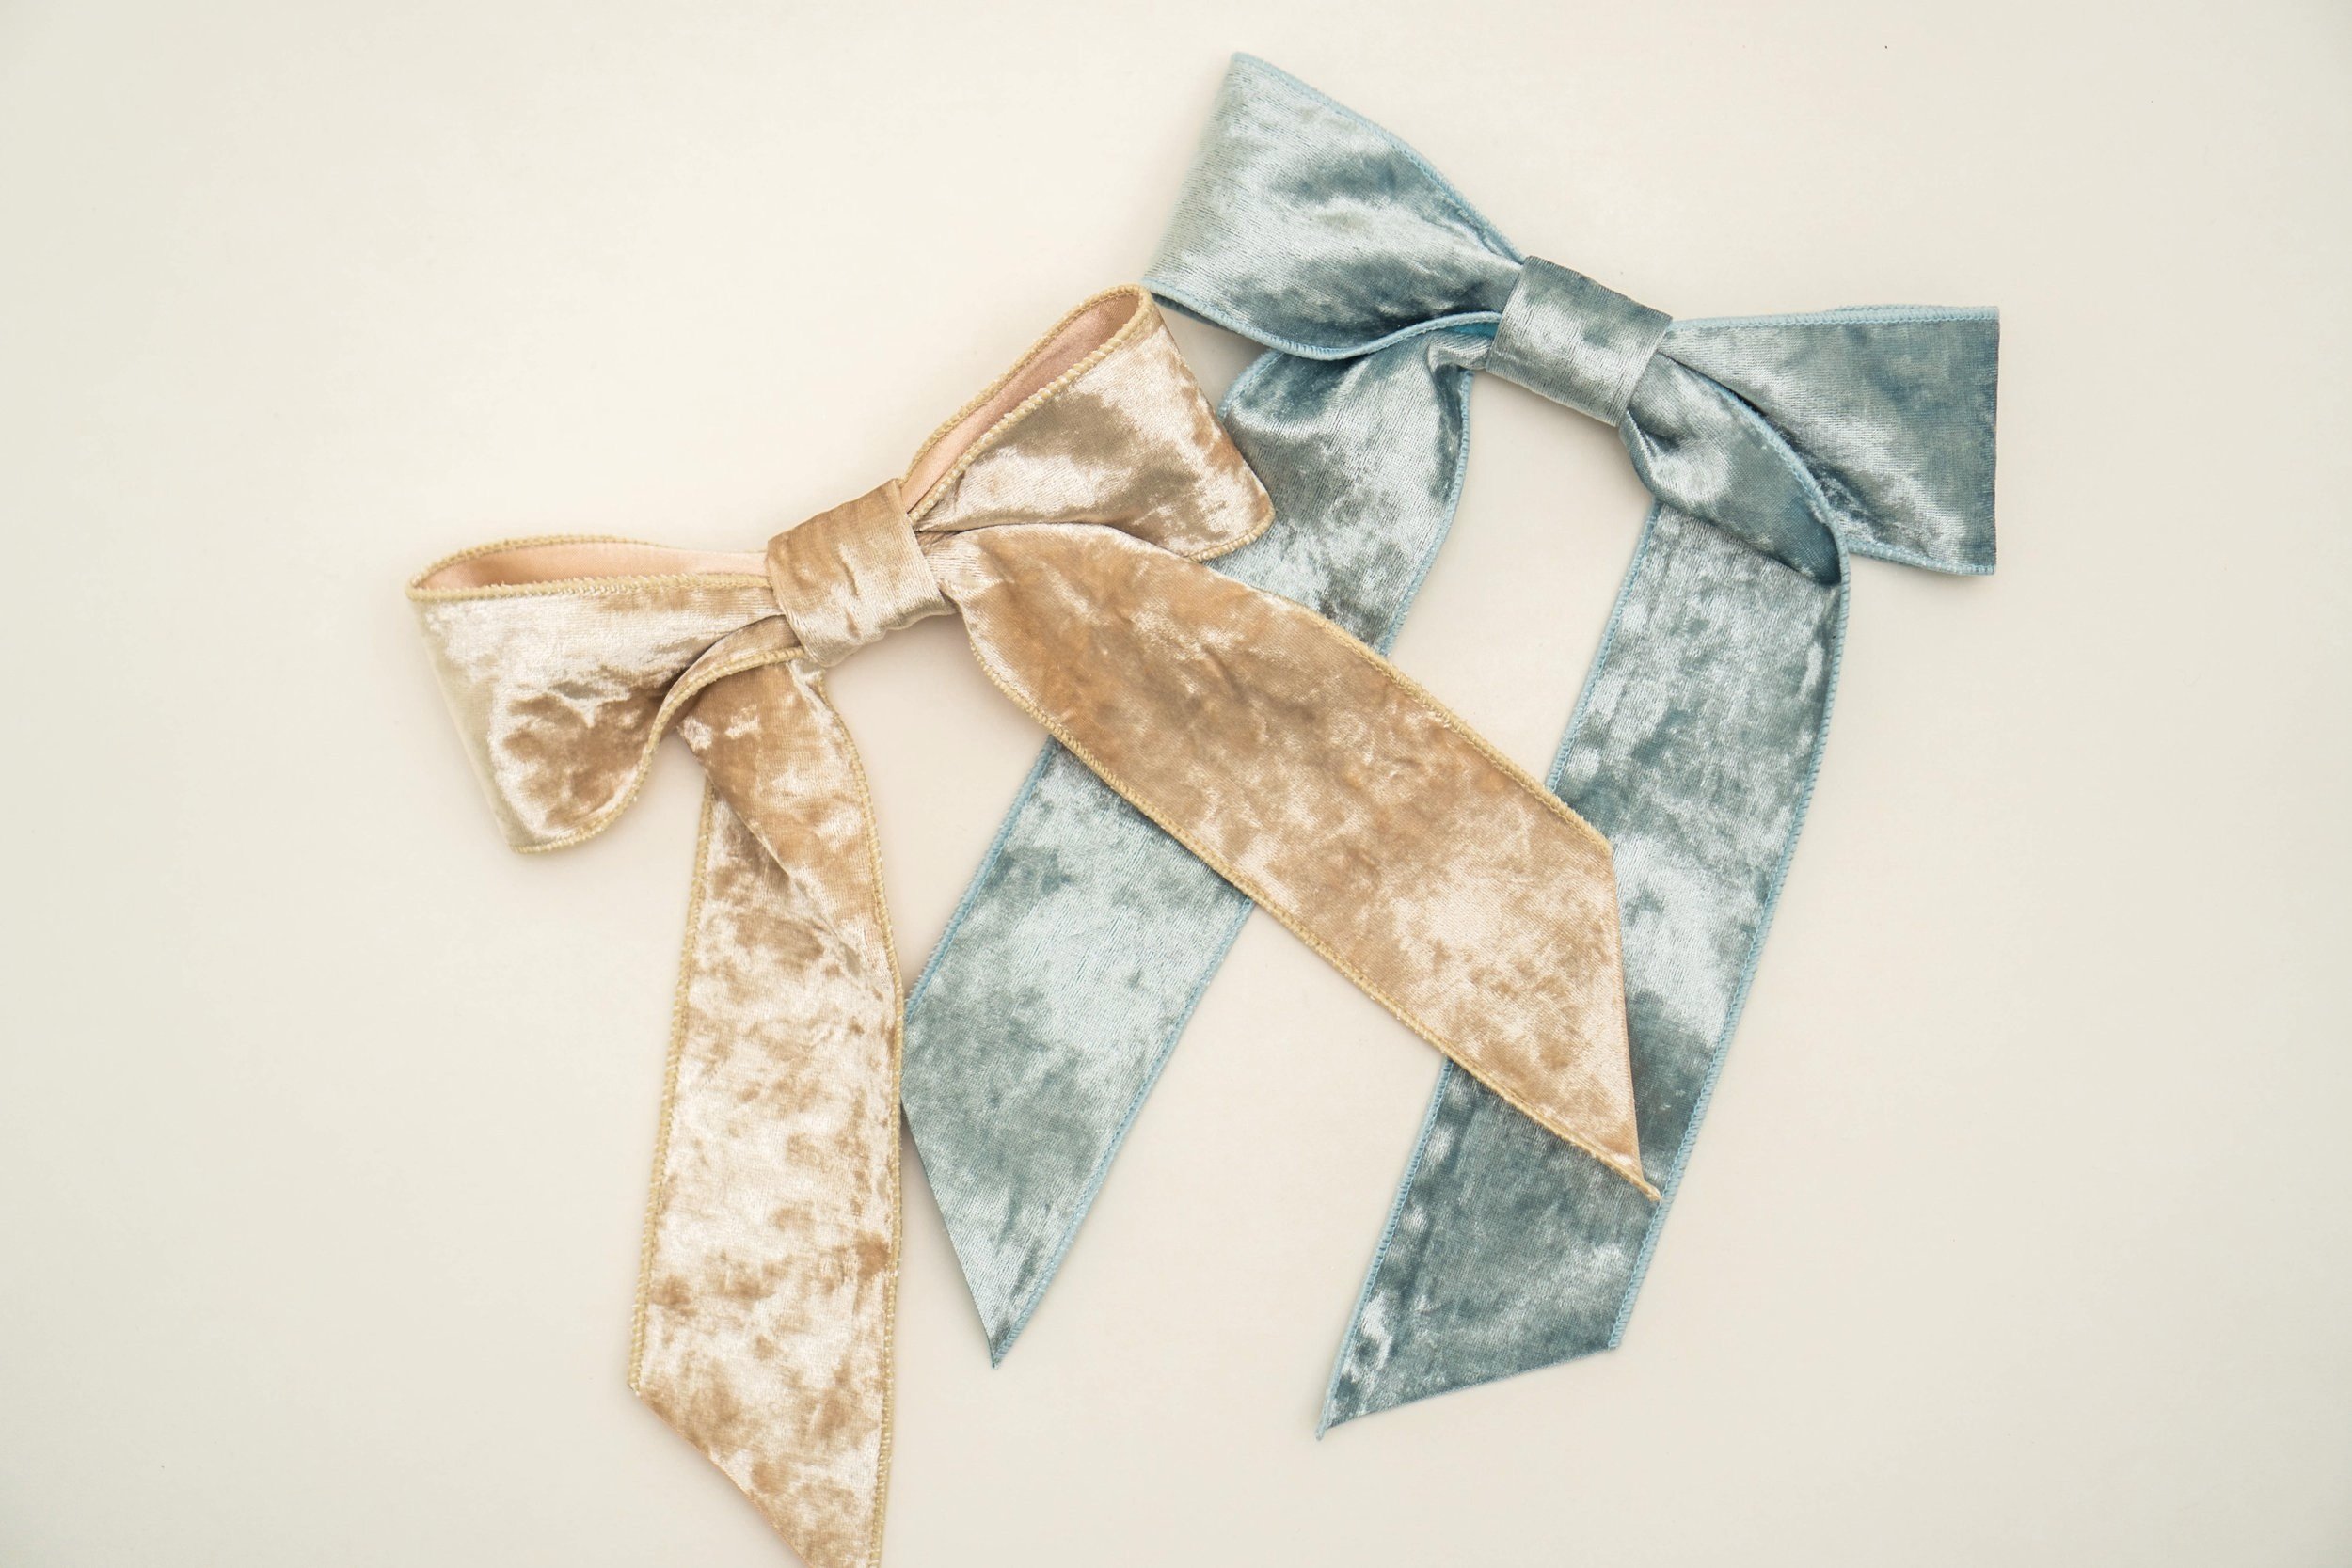
My teen daughters are into cottage core style hair accessories lately and asked if I could copy a few that we’ve seen. One of those were some pretty, velvet bows we spotted at Target the other day. They were larger hair bows with long tails and so cute! But at $14 a piece, we knew we could DIY them for a fraction of the cost.
Sure enough, after spending just $2.50 for each spool of velvet ribbon and the same for a bag of hair clips, we have the cutest set of velvet hair bows! And I’m going to teach you how, so you can have some too :)

How to Make a Big Bow
If you’ve never made a large bow before, you might think the way to do it is just to … tie a bow. These bigs bows, though, are actually assembled differently in order to lay nicely and stay in place the way you want them.
This hair bow method is actually the same method I used to make the giant bow on the back of my daughter’s prom dress that one time! Except of course, I made a sash first instead of just buying premade ribbon.
Here’s a video tutorial for these cottage core hair bows for those of you who like to watch your tutorials. But keep reading for the photo version of the instructions if that’s your preference.
This post may contain affiliate links, which means that while I am not paid to promote certain items, I will earn a small commission should you purchase items through these links. For more info, see my disclosure policy.
Supplies:
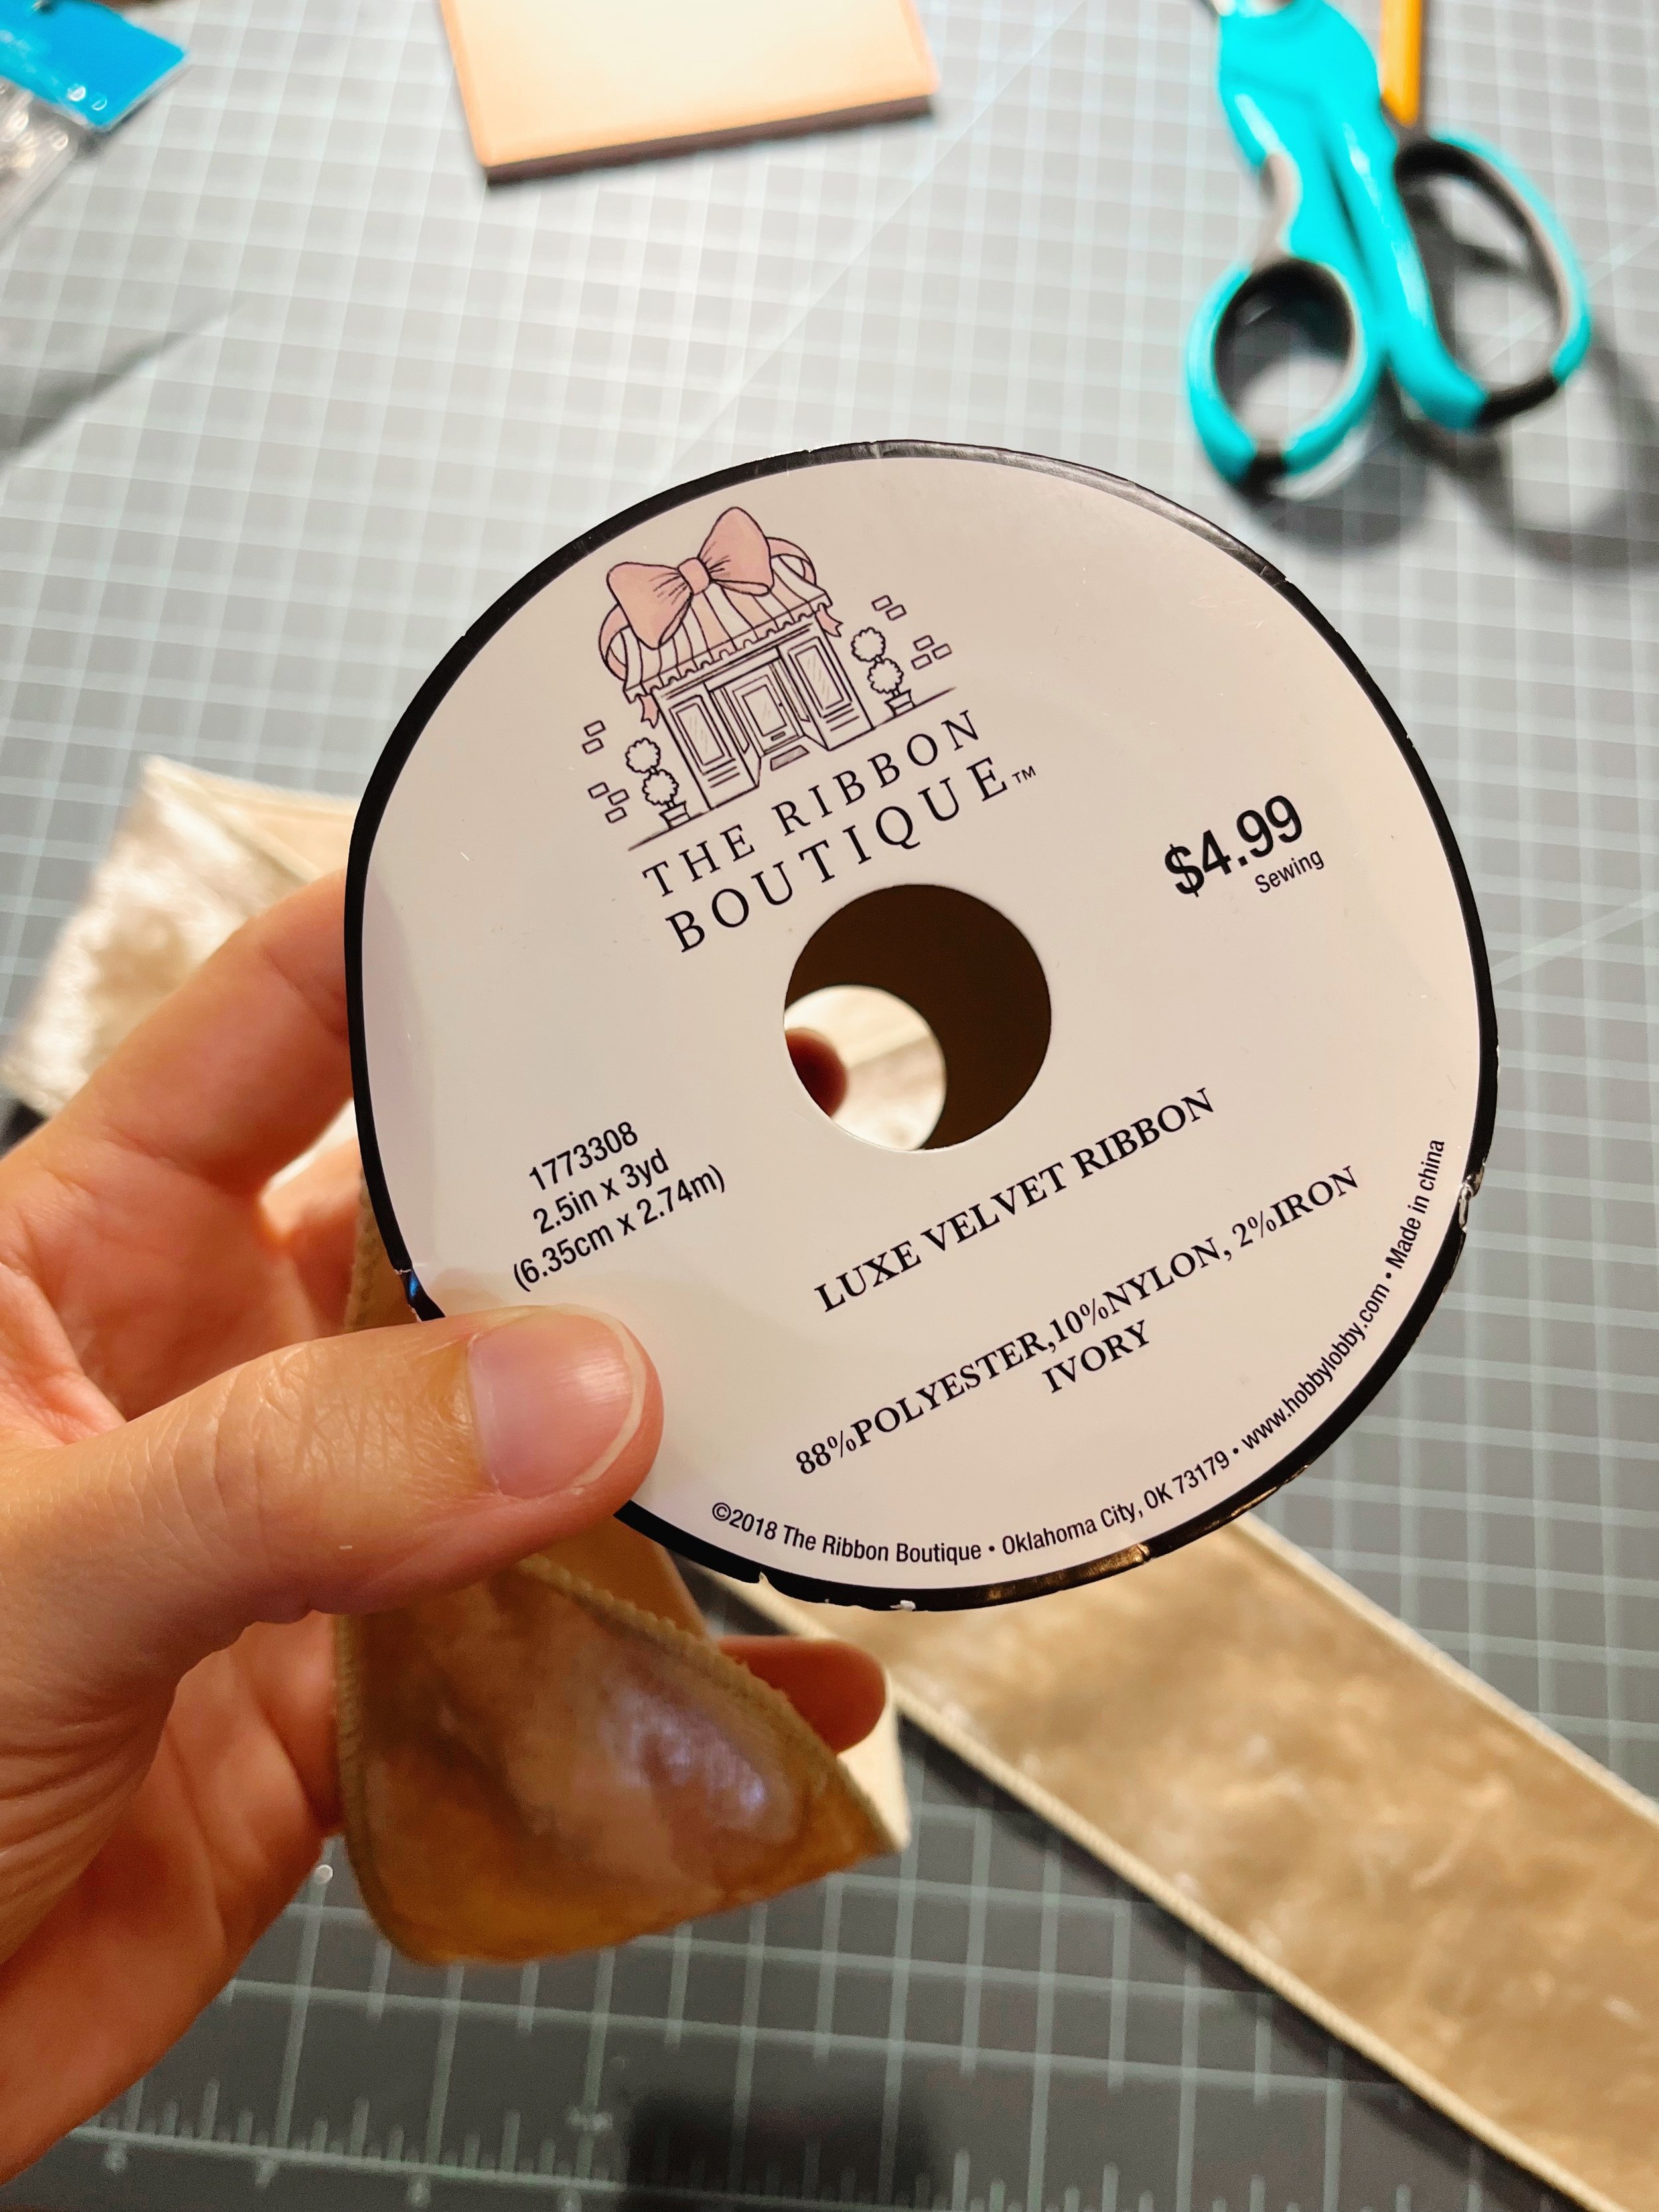
You need some velvet ribbon (or any ribbon of your choice, of course). Mine is 2.5” wide, but you can get wider if you’d like. My ribbon spools were on sale at Hobby for 1/2 off, so I only paid $2.50 per spool! It’s ok if the ribbon has wire in it, you can just remove it like I did.
You also need some hair clips. I use this kind, but a comb would also work, of whatever your preferred hair clip is. Mine were on sale, also at Hobby Lobby, for $2.50 a pack.
Fray Check is a handy thing to have around! All those things you use clear nail polish for, like runs in your tights, Fray Check does a better job of and dries clear. You need it for these bows to keep the ends looking nice.
Instructions:
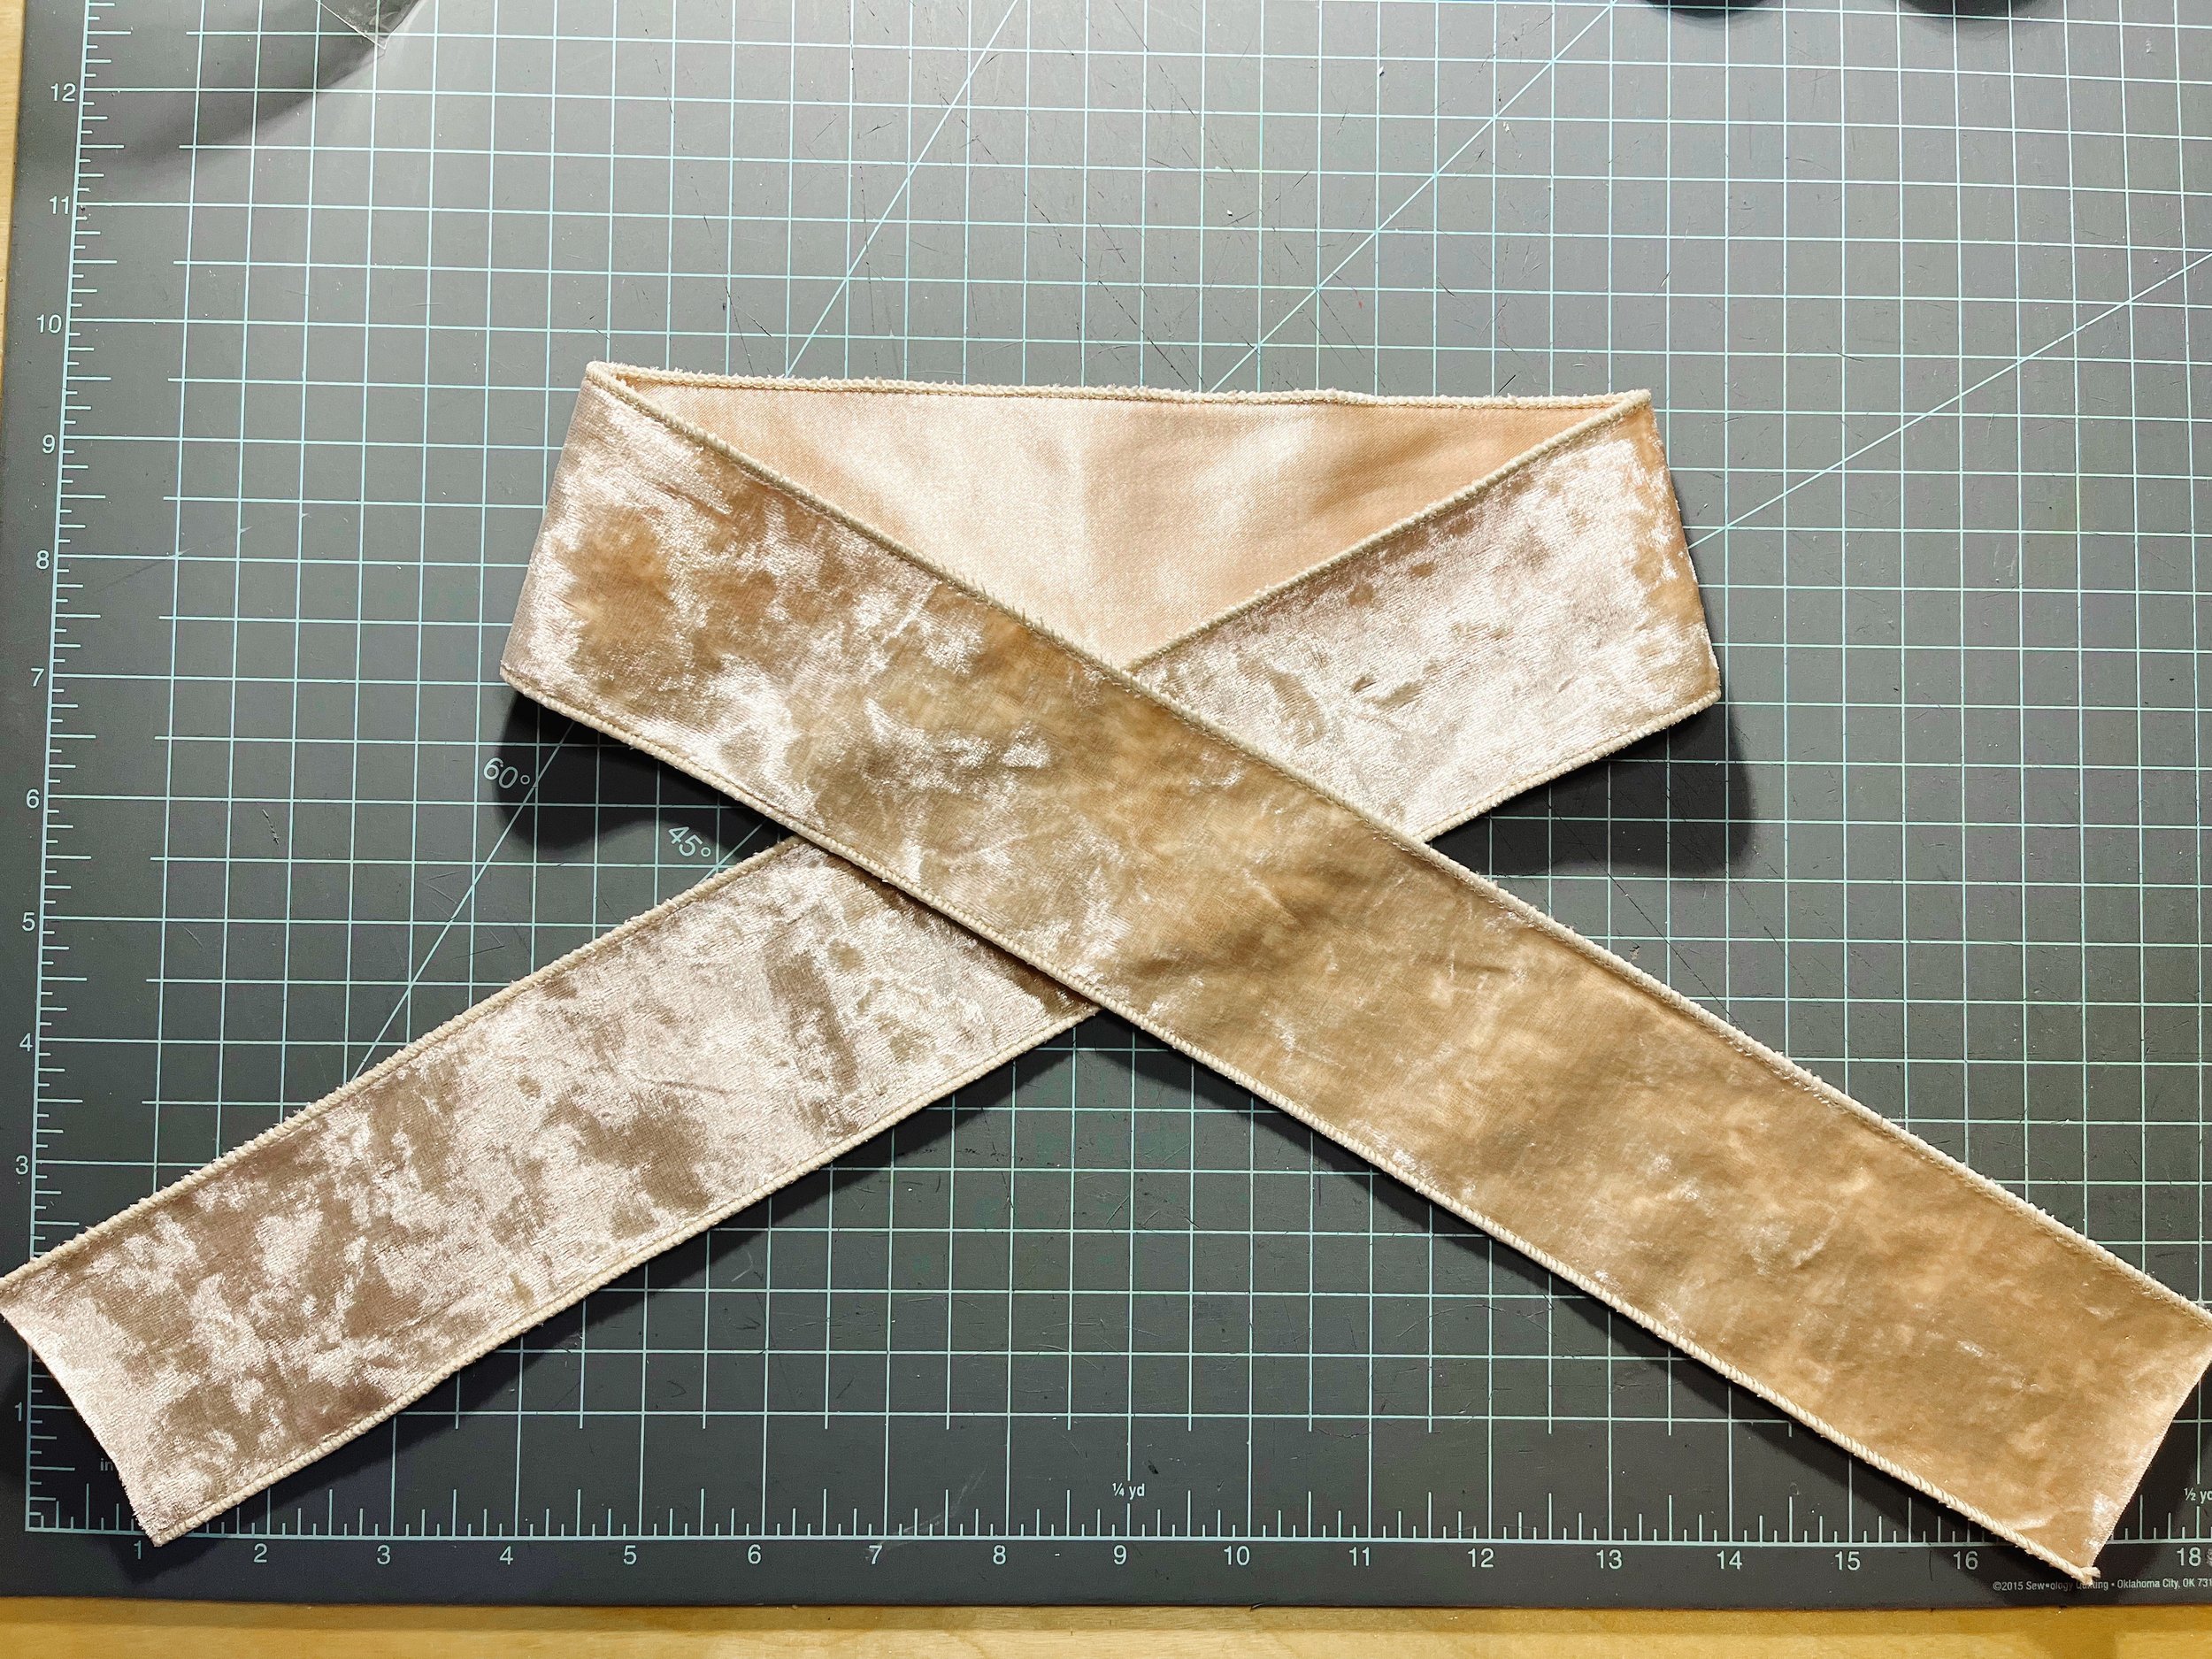
These bows are constructed in two pieces. The first forms the bow and the other forms the center. So cut a length of your ribbon 40”-45” long, and cut another just 4.5” long. If your ribbon is wired like mine was, remove the wire by simply pulling it out. It will come out easily.
Then, mark the center of the long piece by folding and finger pressing it in half. Lay it out on your work surface and lap the ends over each other until you have the shape shown below. The bow loops should measure about 7” apart.
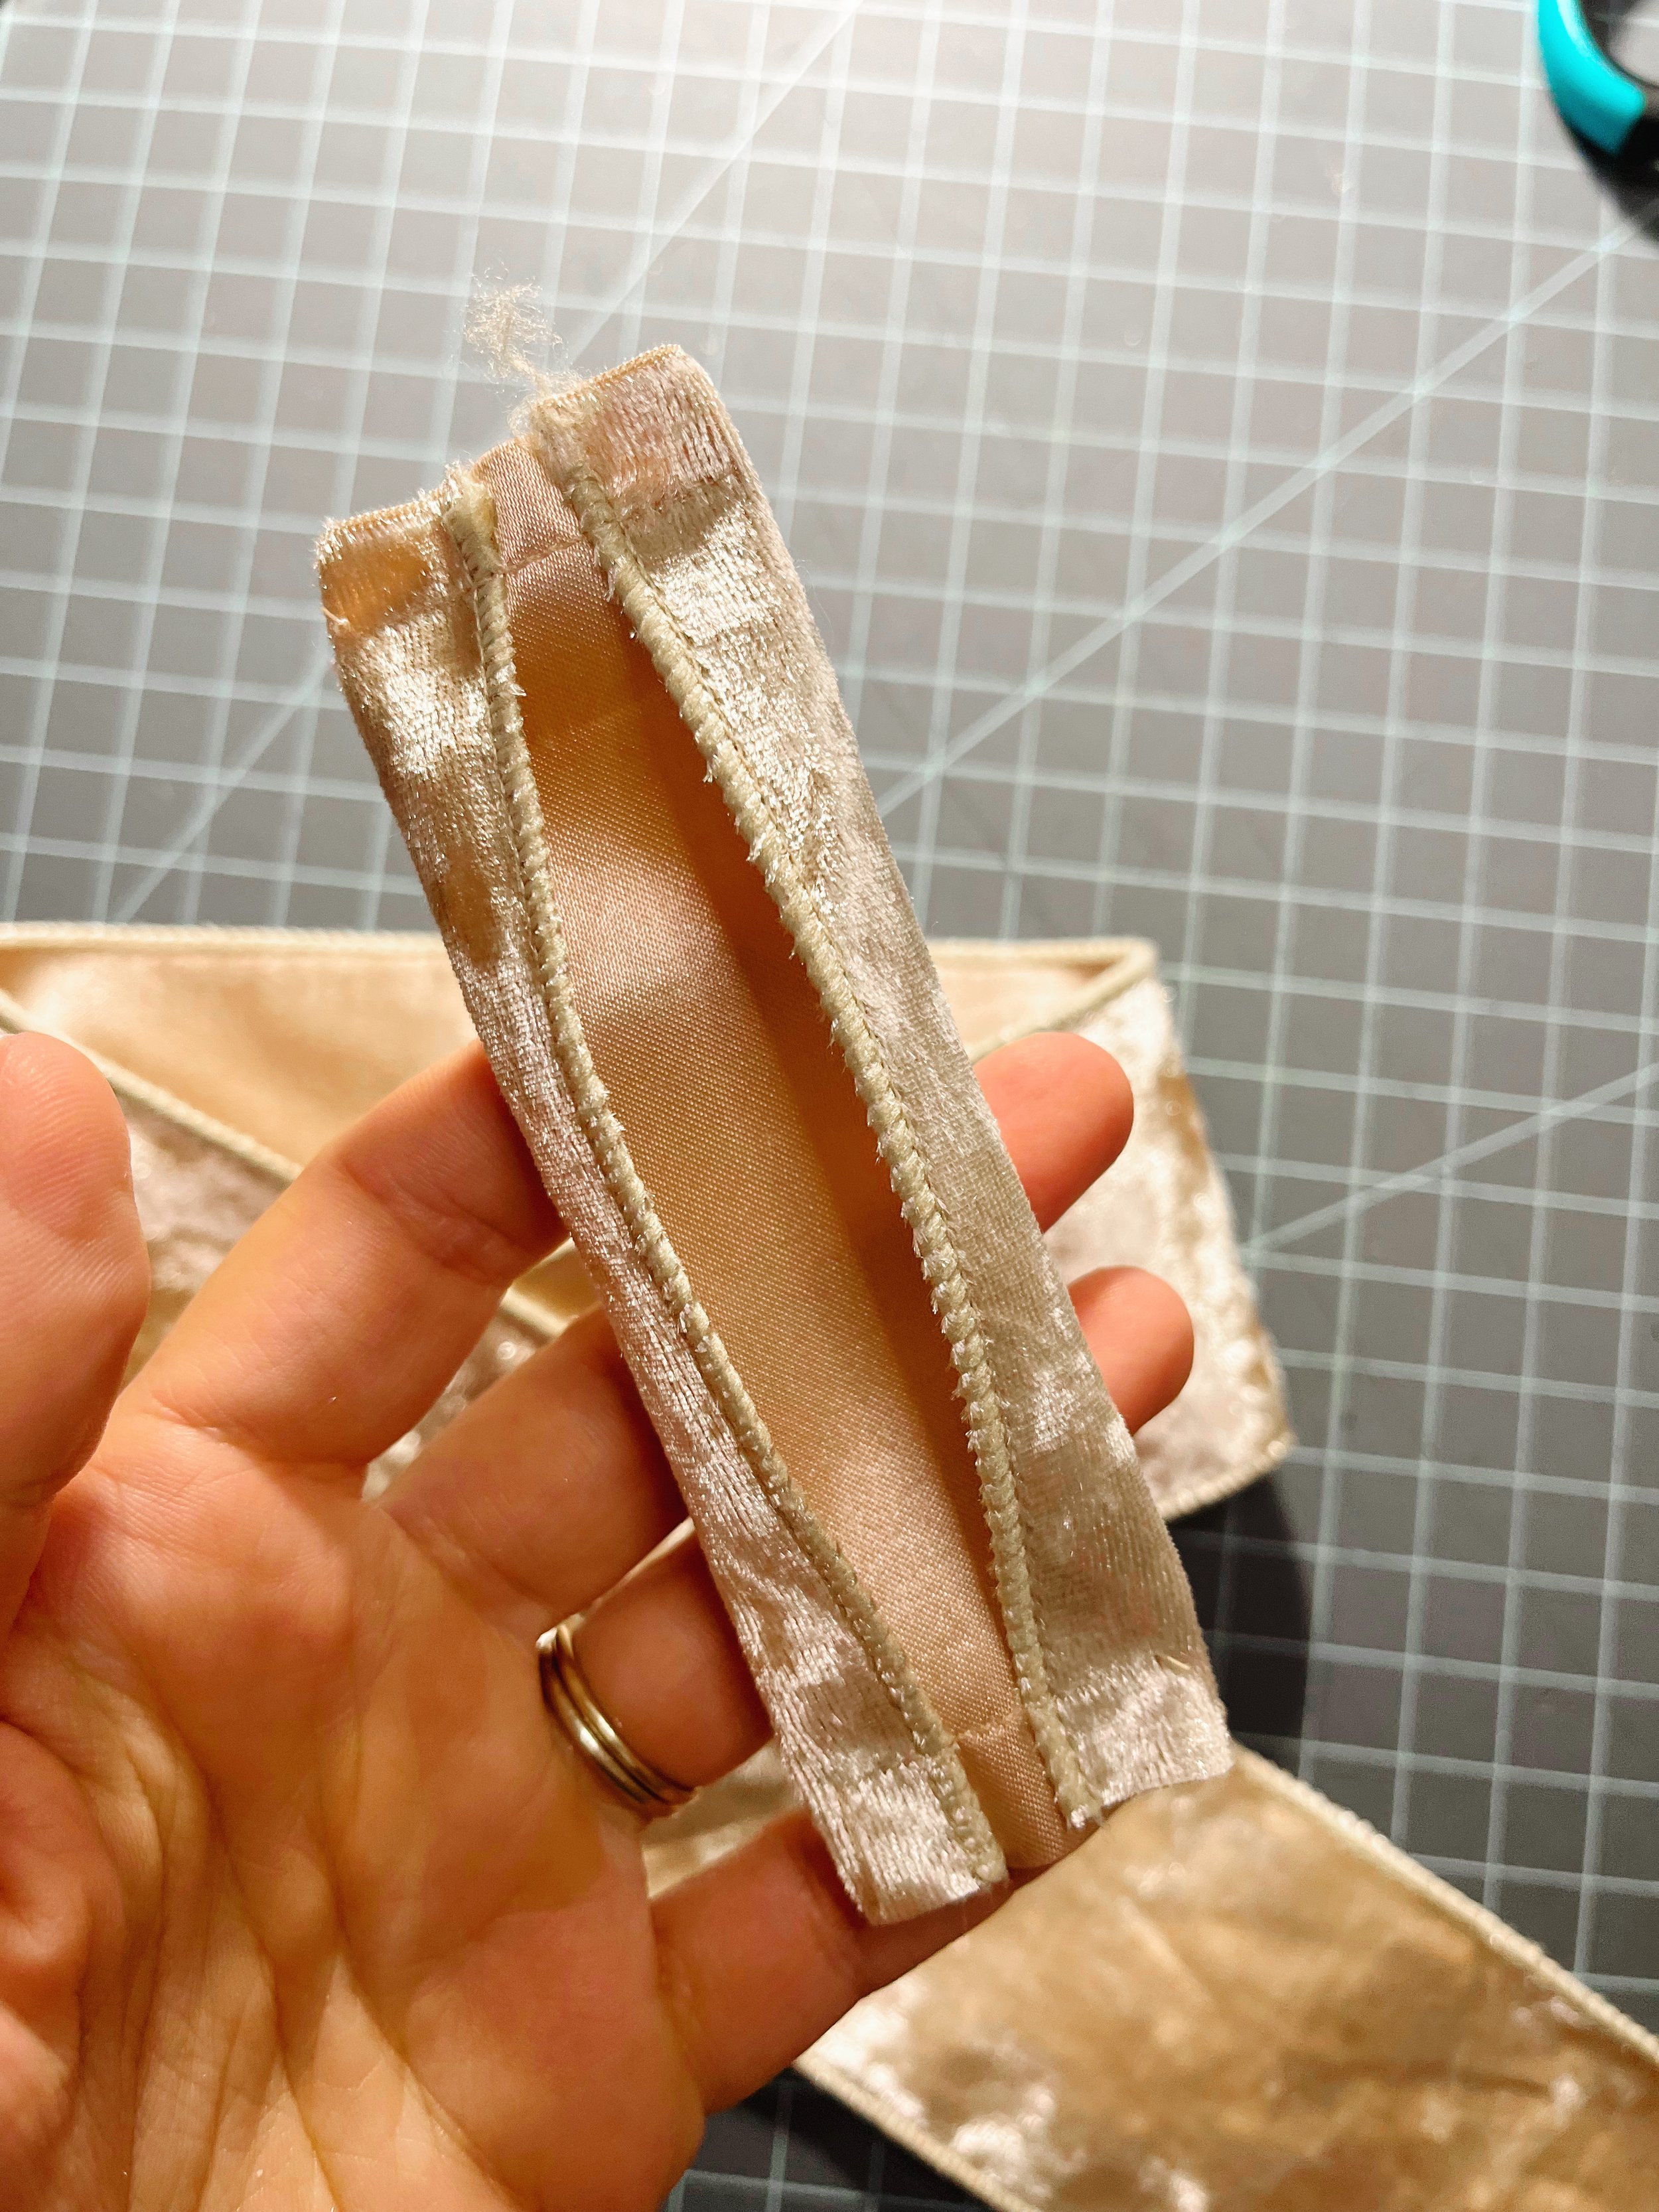
Next we’ll prep the smaller, center ribbon by folding the long ends inward about 1/2” and stitching or gluing across the short ends to hold them in place. This makes the center the right size. If you use the full width of the ribbon for the center, it looks weird and makes the bow loops too skinny.
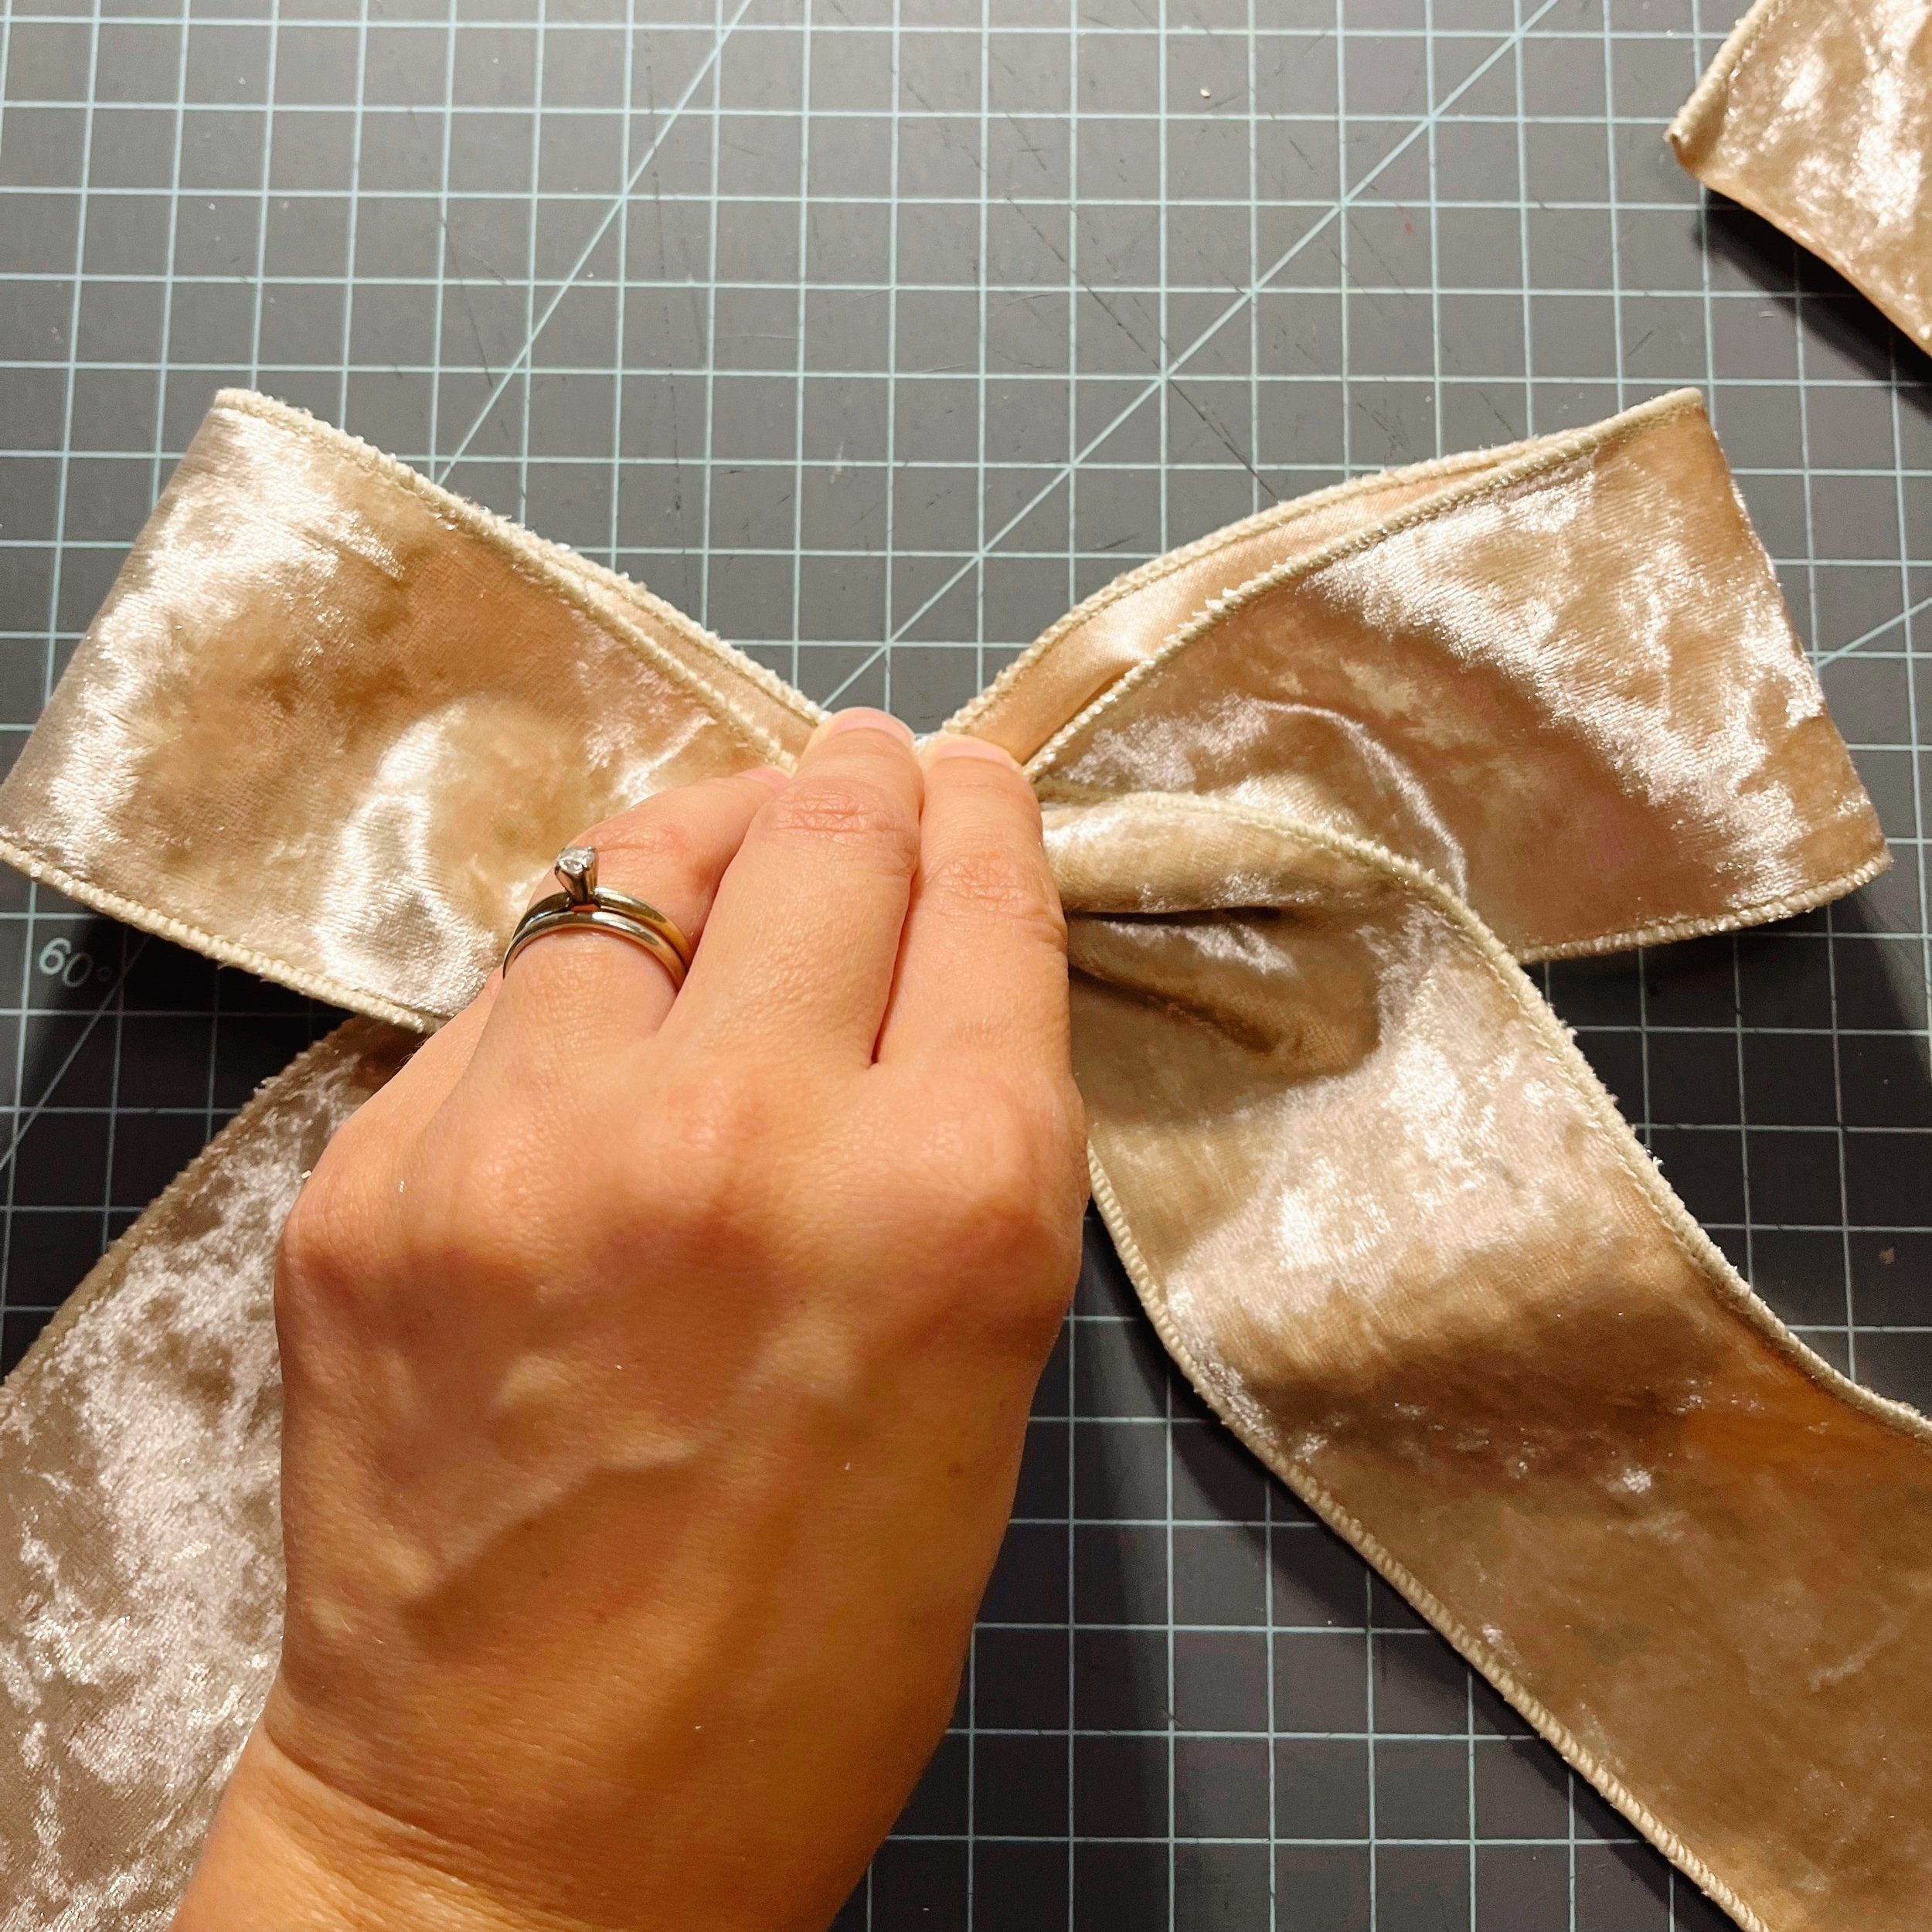
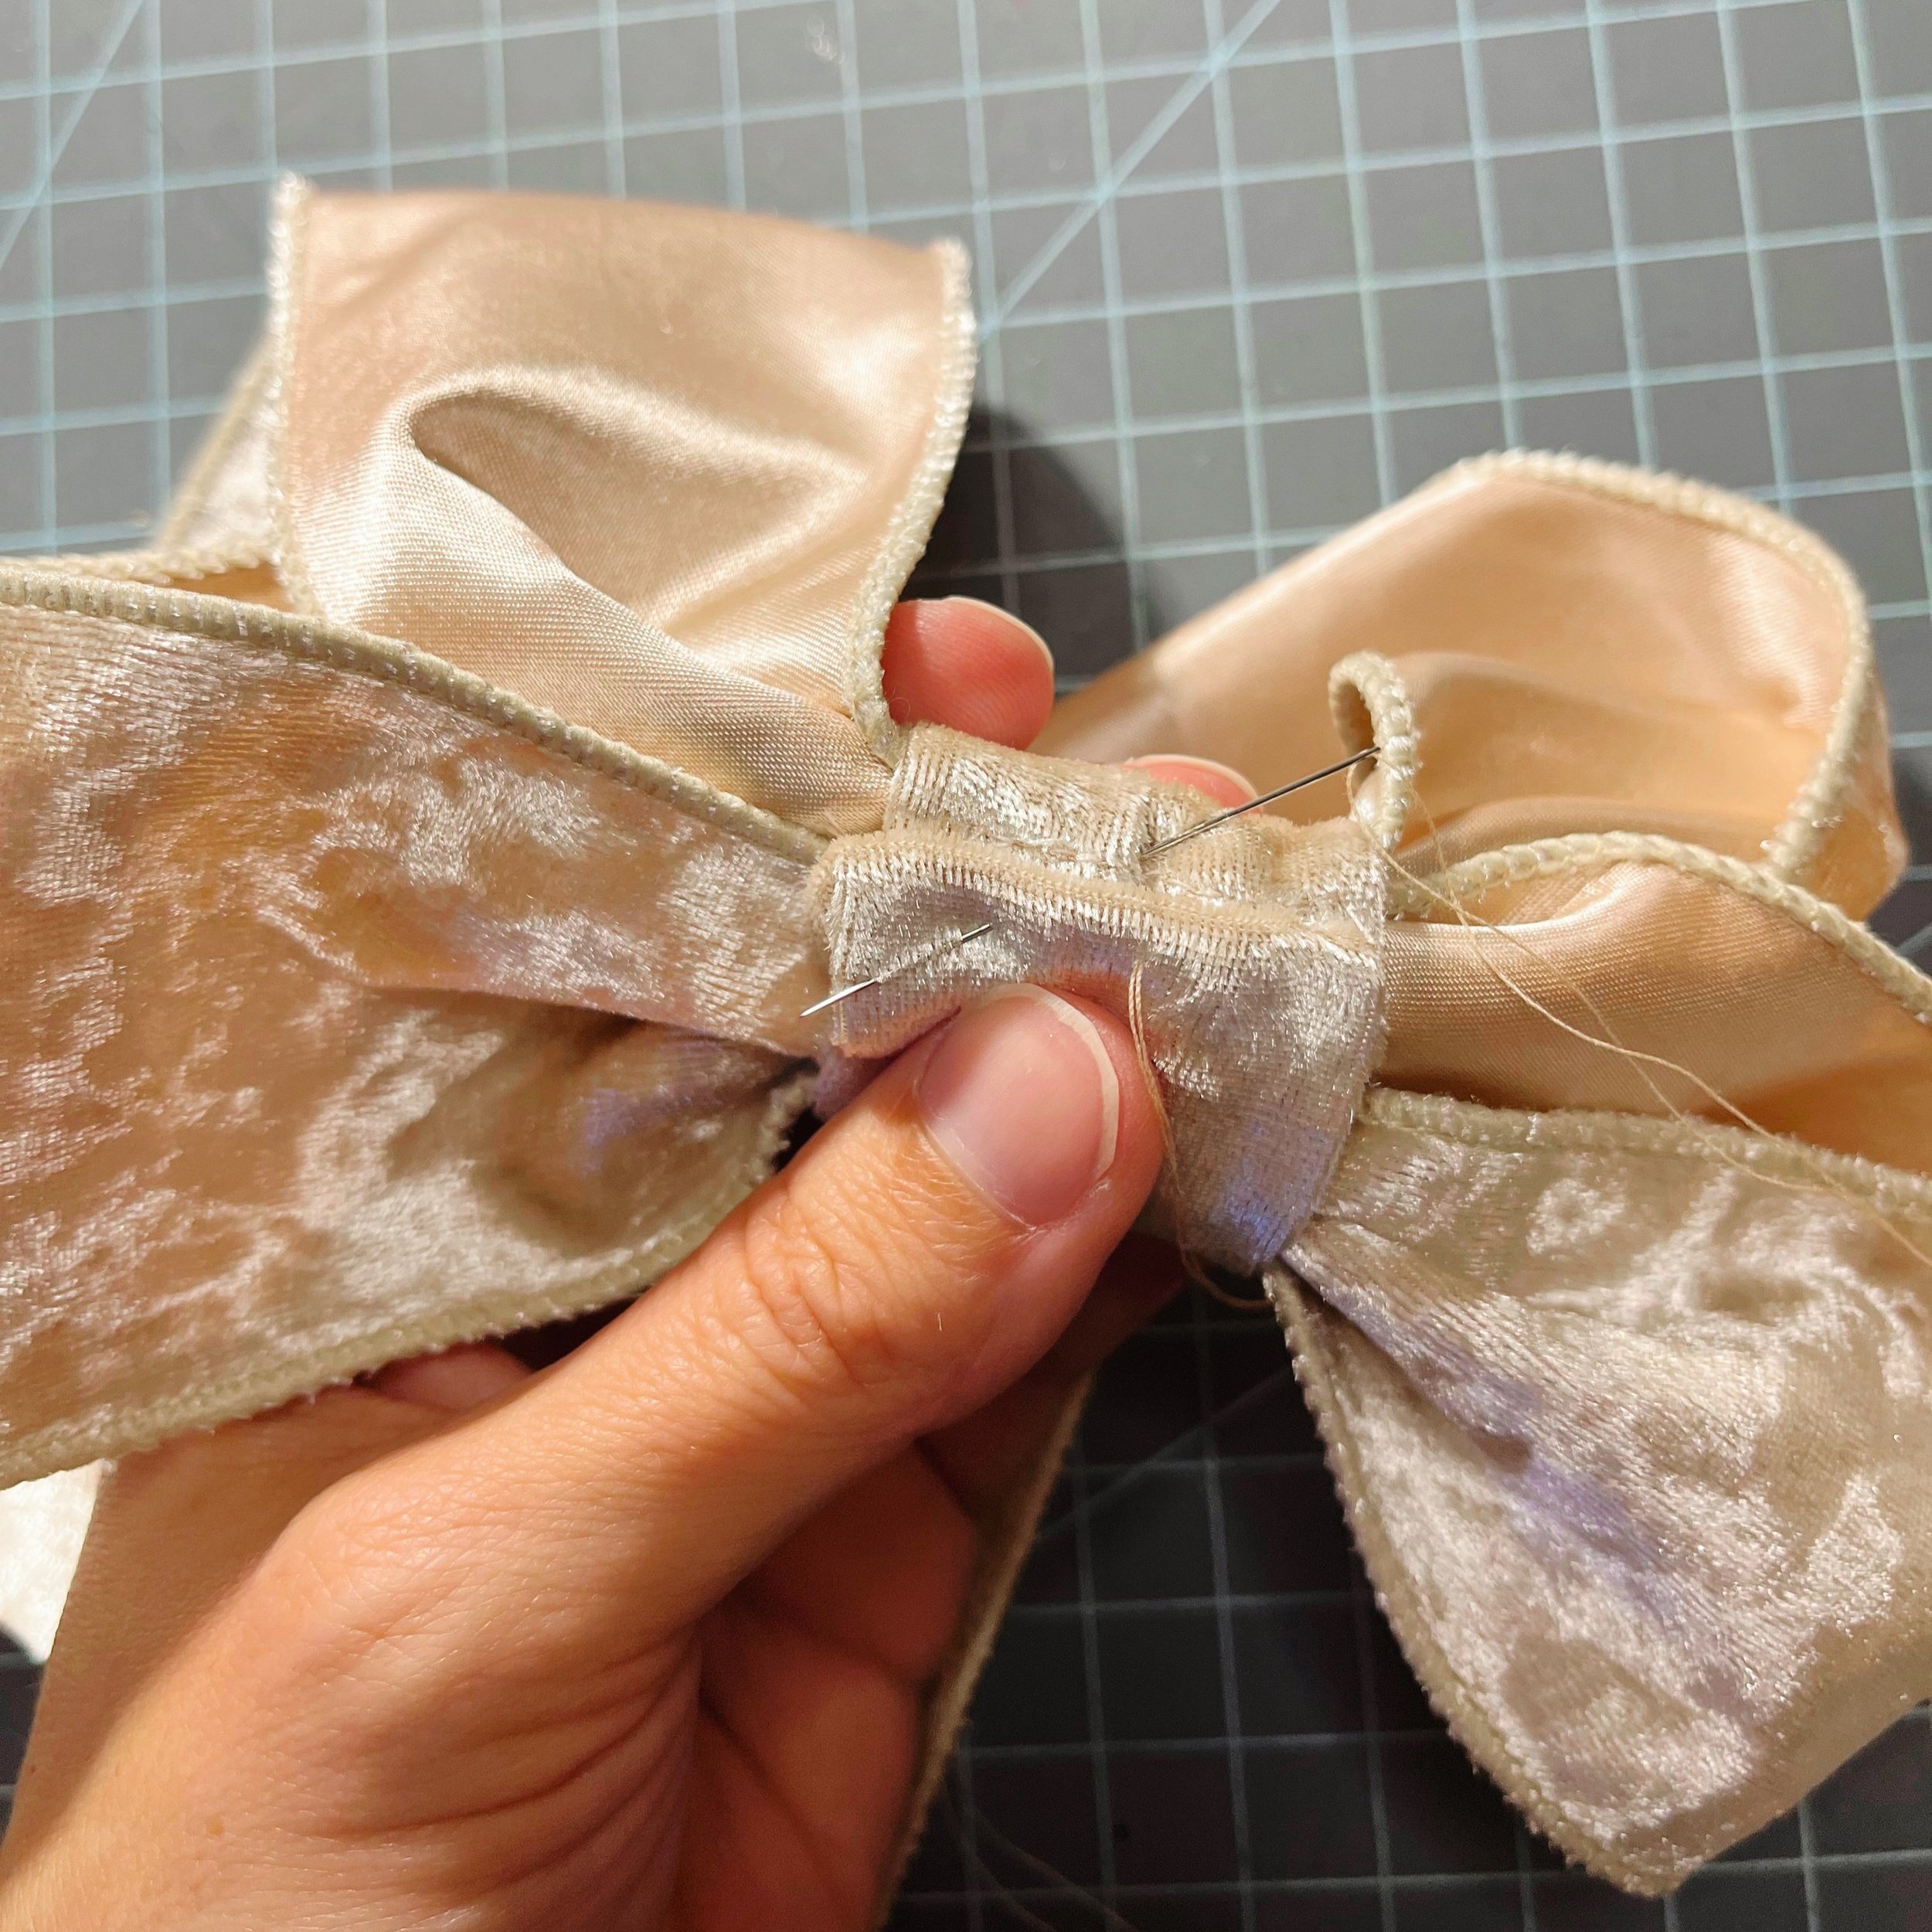
Next, pinch your bow in the middle so that it looks nice from the front, then place the center piece over it and flip the whole thing to the back. Wrap the center piece around to the back, lapping the ends, folding one short end under to hide the raw edge. Pin it in place and just arrange and play with your bow until it looks perfect from the front.
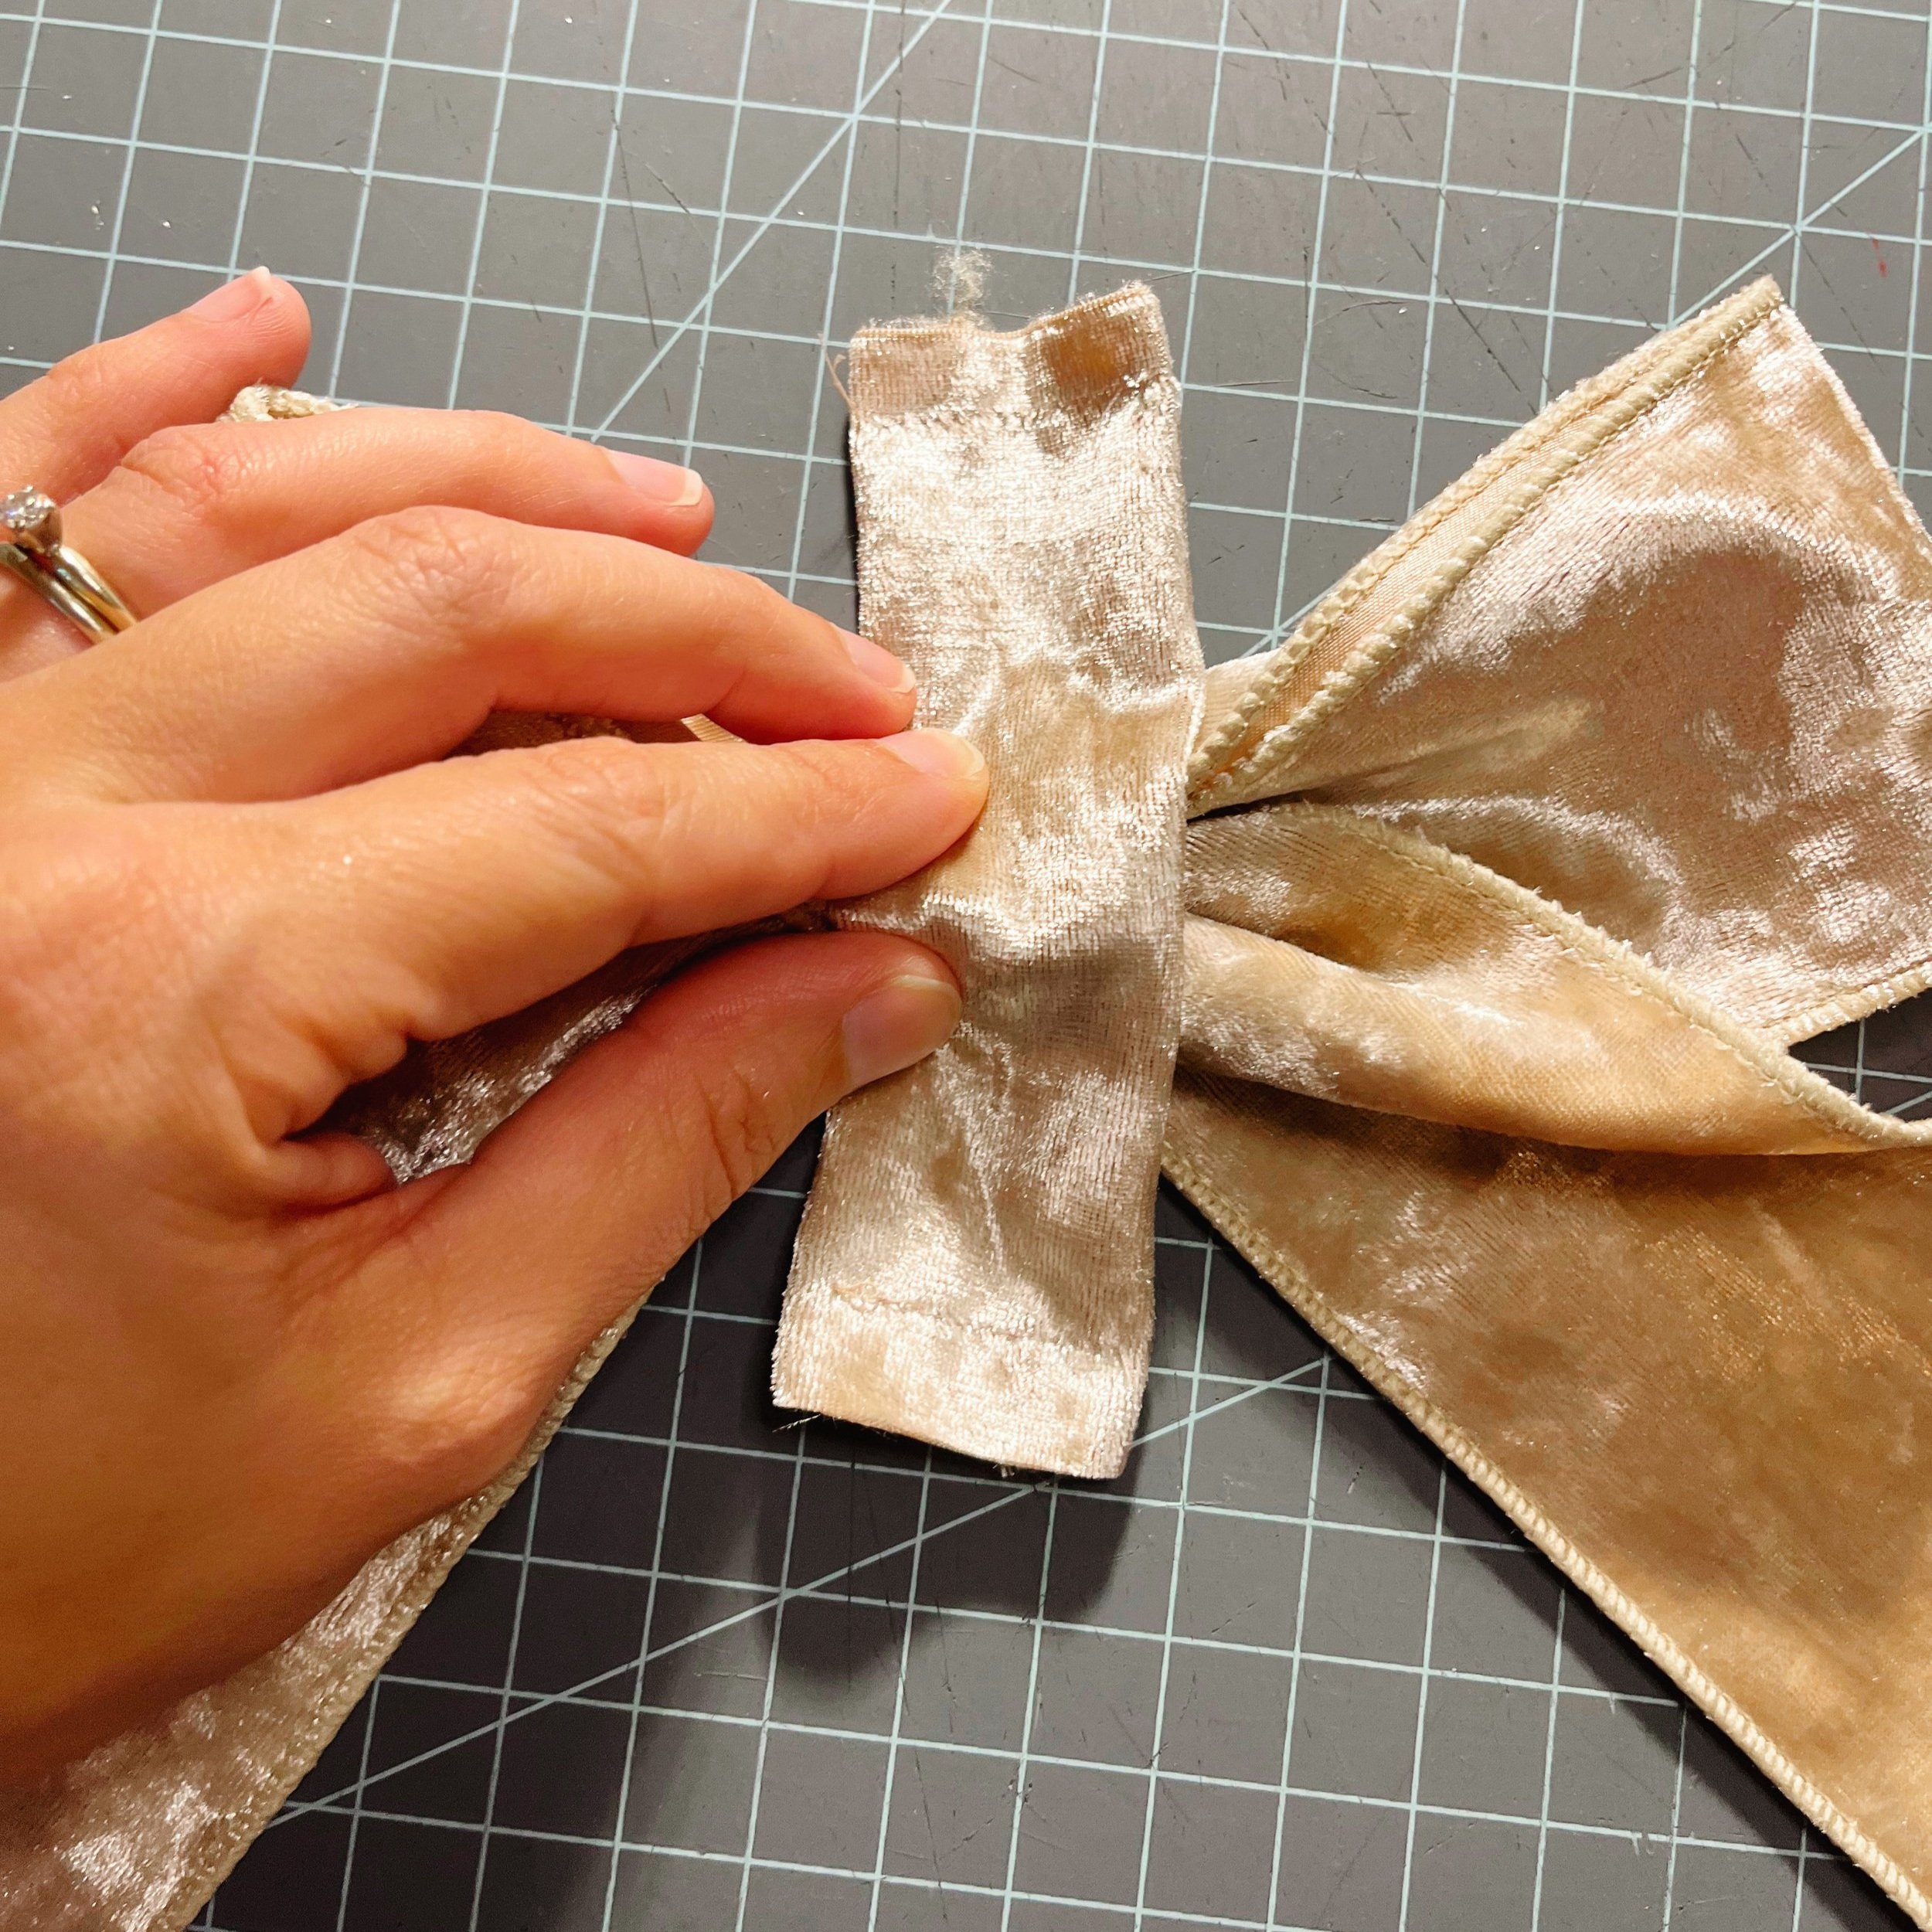

Using a needle and thread, stitch the back of the bow’s center piece in place, up one side, across the folded under short end, and up the other side, catching the bow in so that it can’t shift around. Knot, but don’t clip the threads yet.
You can hot glue this bow together also, just make sure you put some glue underneath the center piece so everything is stuck together.
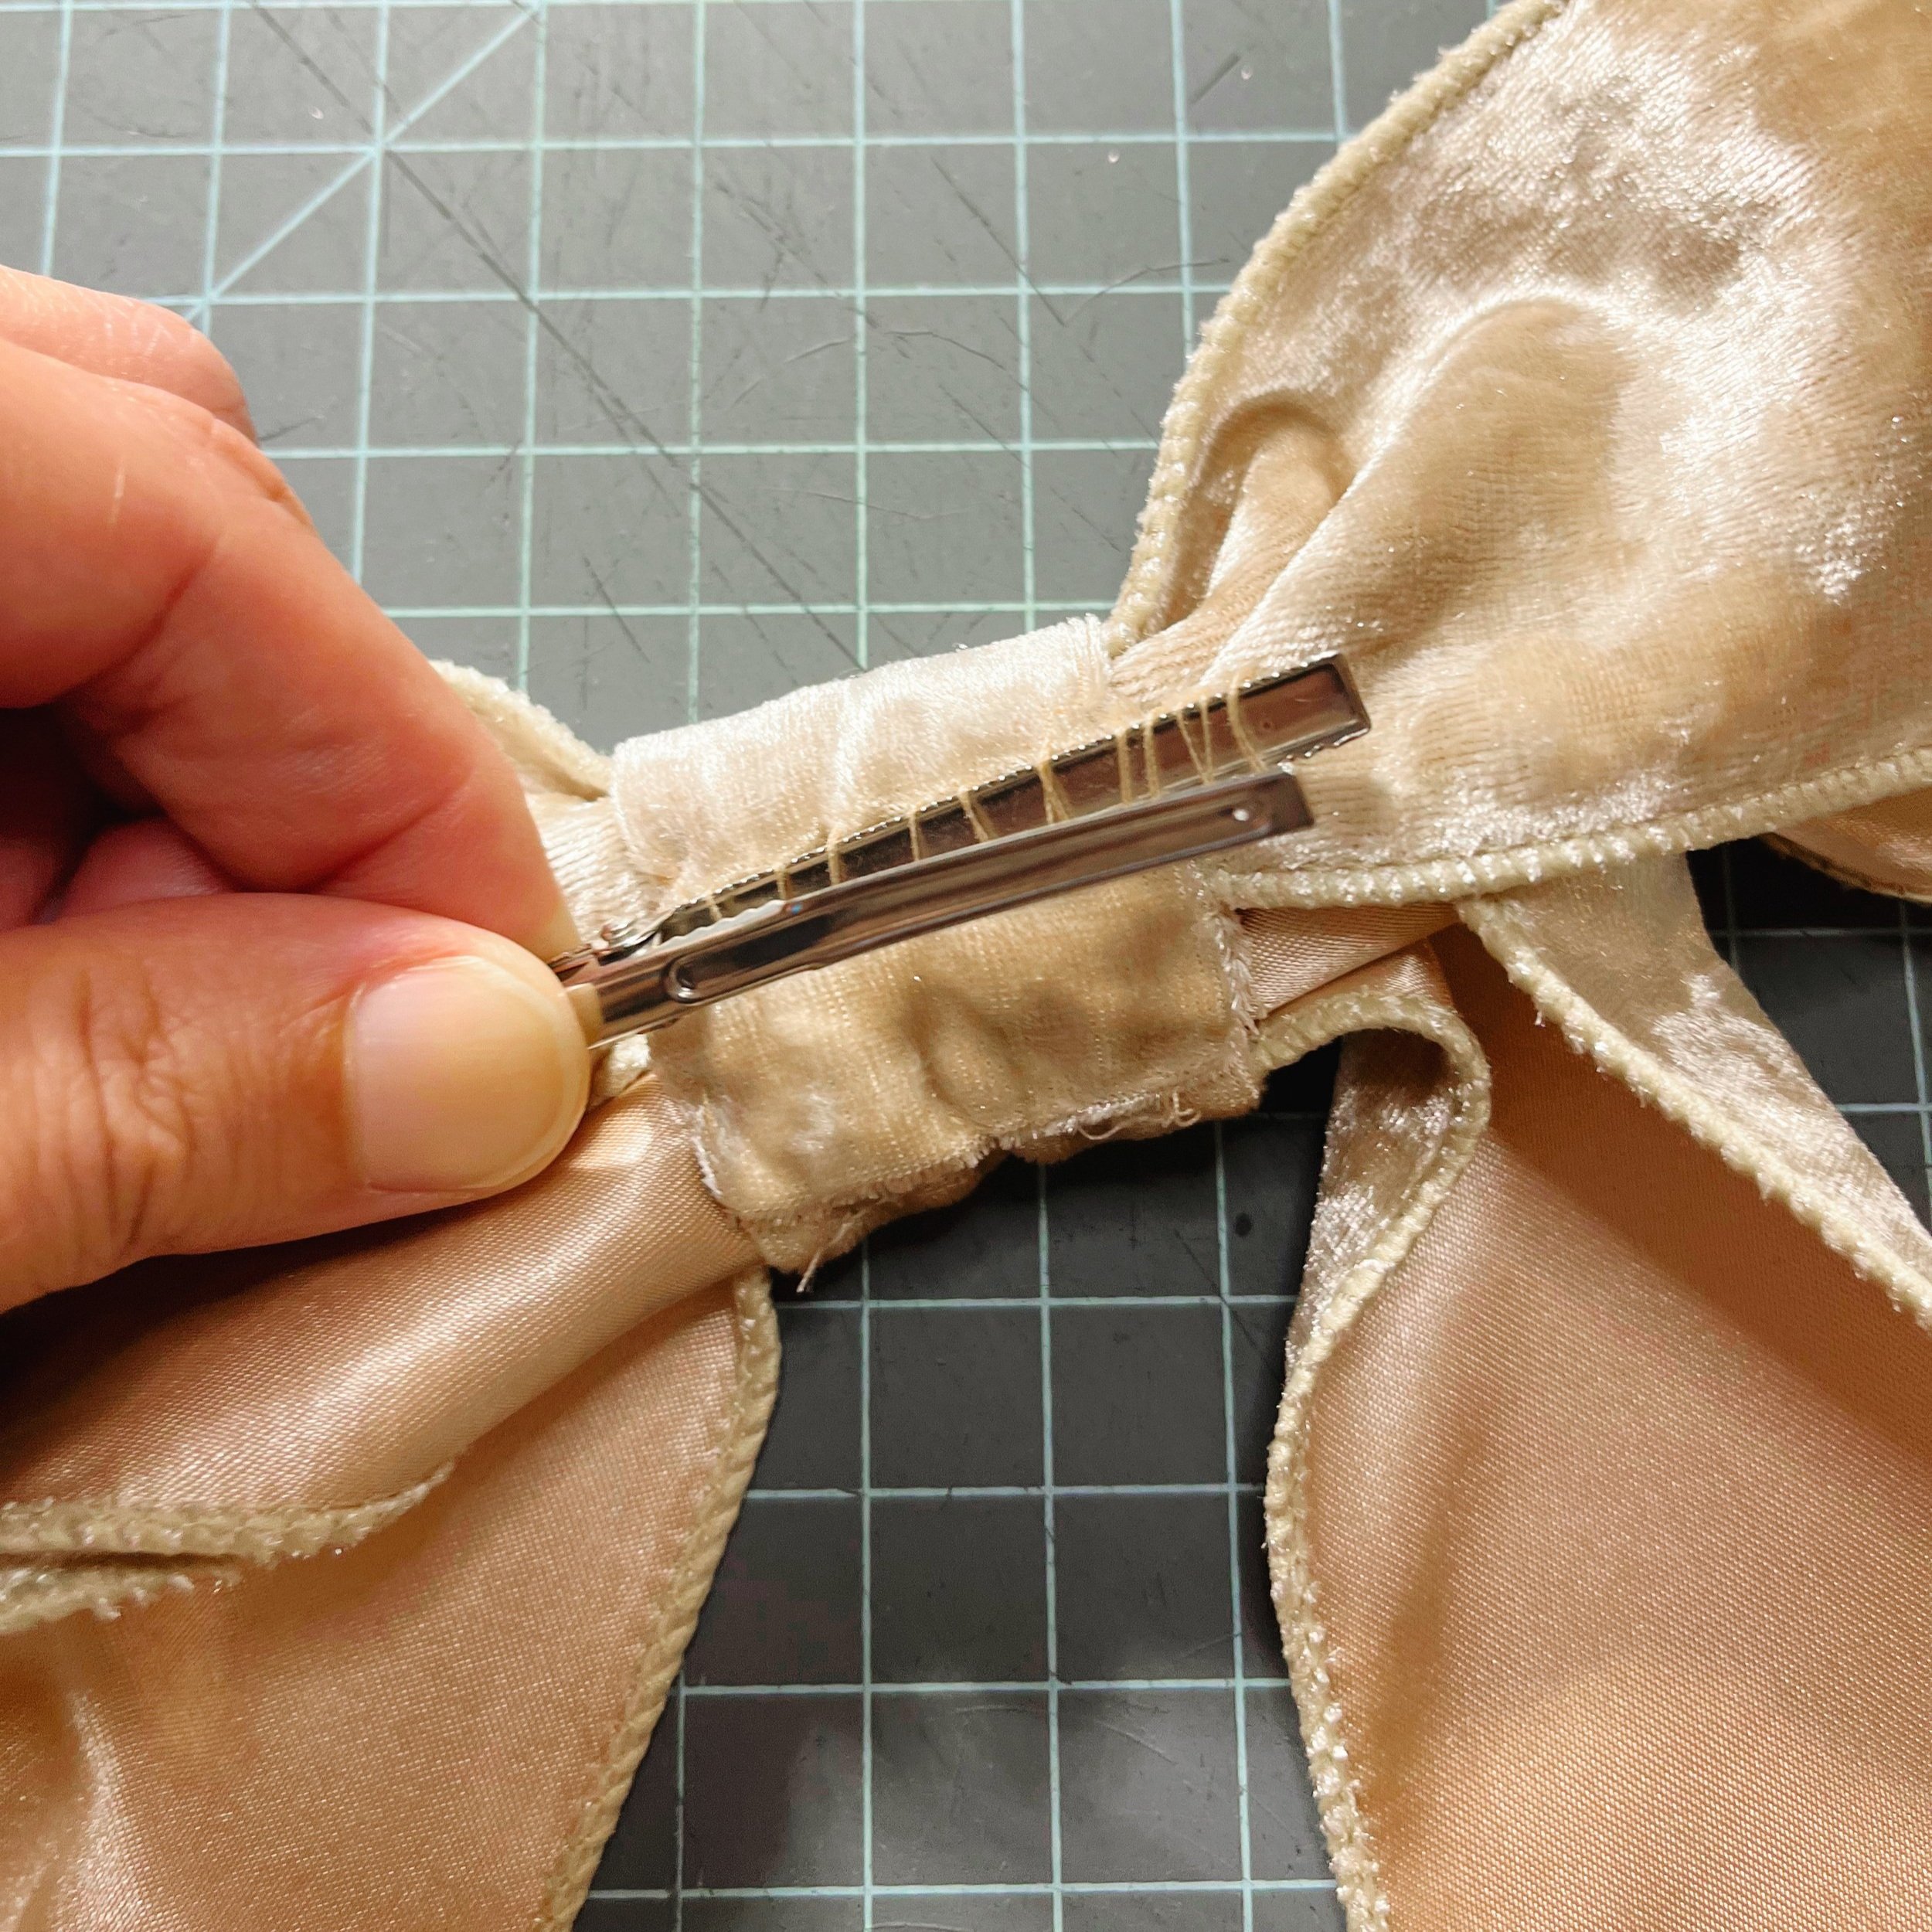
The next step is to attach the clip. Position the clip where you want it and using the same needle and thread, simply attach it by going around the bottom post from one end to the other. If you choose to glue it on instead, you’ll need to cut a small circle of felt to attach to the bow over the base of the clip in order for it to stay. You can see what I mean in this Peeps hair clips tutorial.
Lastly, trim the ends at an angle so that they’re even and apply Fray Check to the satin side of the ribbon so that they don’t fray. Apply it in a thin line all the way across
That’s all! Isn’t it so pretty? My daughter loves these and it only took a few minutes to make each one. I still have enough supplies for one more of each color too, so I think these would make great, inexpensive gifts to make for teen girls! Or little girls too, I think they’d really love these bows.
Let me know if you make some, I’d love to see!
Cheers,
Nikki