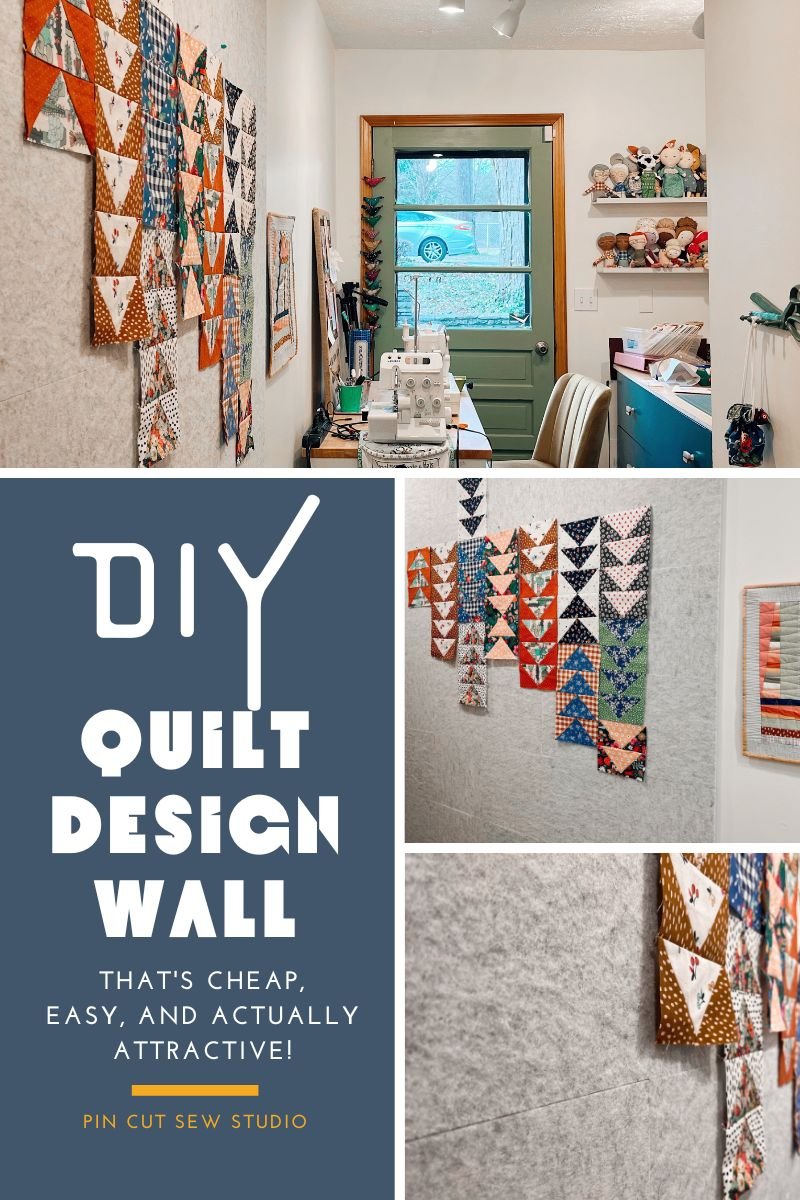
My DIY Quilt Design Wall
I recently got a bug in my bonnet telling me that I could really use a design wall for my scrappy quilt projects that I love to sort of let come together as I go. In past homes, with large sewing rooms, I just did this kind of thing on the floor, but in my current very small sewing room, I don’t have that kind of space on the floor, but I DO have a perfect empty wall!
So I went searching for design wall inspiration and came up with a novel solution that was inexpensive, easy to install, AND it’s attractive! I’m going to share with you what I did, but first, in case you don’t already know …
What is a design wall and why would you need one?
A design wall is used by quilters and is pretty much exactly what it sounds like — a wall, covered in a clingy fabric, that allows you to slap work-in-progress quilt blocks and fabrics to it, in order to arrange and design the quilt as you’re sewing it together.
You may need one if you, like me, find yourself wishing you had a place to figure out where to put which quilt blocks, without taking over your living room floor or your king size bed, or having to risk the dog napping on your project while you’re figuring it all out.
DIY design wall options
Of course, you can purchase a premade design wall on a nice frame and save yourself some work! But I wanted to make my own to lower the cost, so I looked at all the options and gathered inspiration from what others had done. In the end, I went my own way (you’ll see what I did in just a minute!) but there are several ways you can do this, so I’ll include all the options here.
Usually, the design wall is made of fabrics like flannel, felt, or cotton quilt batting, and there are several ways of fashioning one. The cheapest and easiest is to simply tack a sheet of batting, or a few yards of wide felt, or simply a flannel sheet to the wall.
While that may be the cheapest, easiest, and most moveable option, it is certainly not the most attractive way to create a design wall! I knew I wanted a permanent fixture, not one that would flap around with breezes and definitely something that looked nice, or it would drive me crazy.
Most people seem to fashion their design walls using foam board, particle board, or other material, then wrap it in their chosen fabric and attach it to the wall. These design walls work great and that’s what I almost did, until …

How I made a quilt design wall out of felt sound proofing panels!
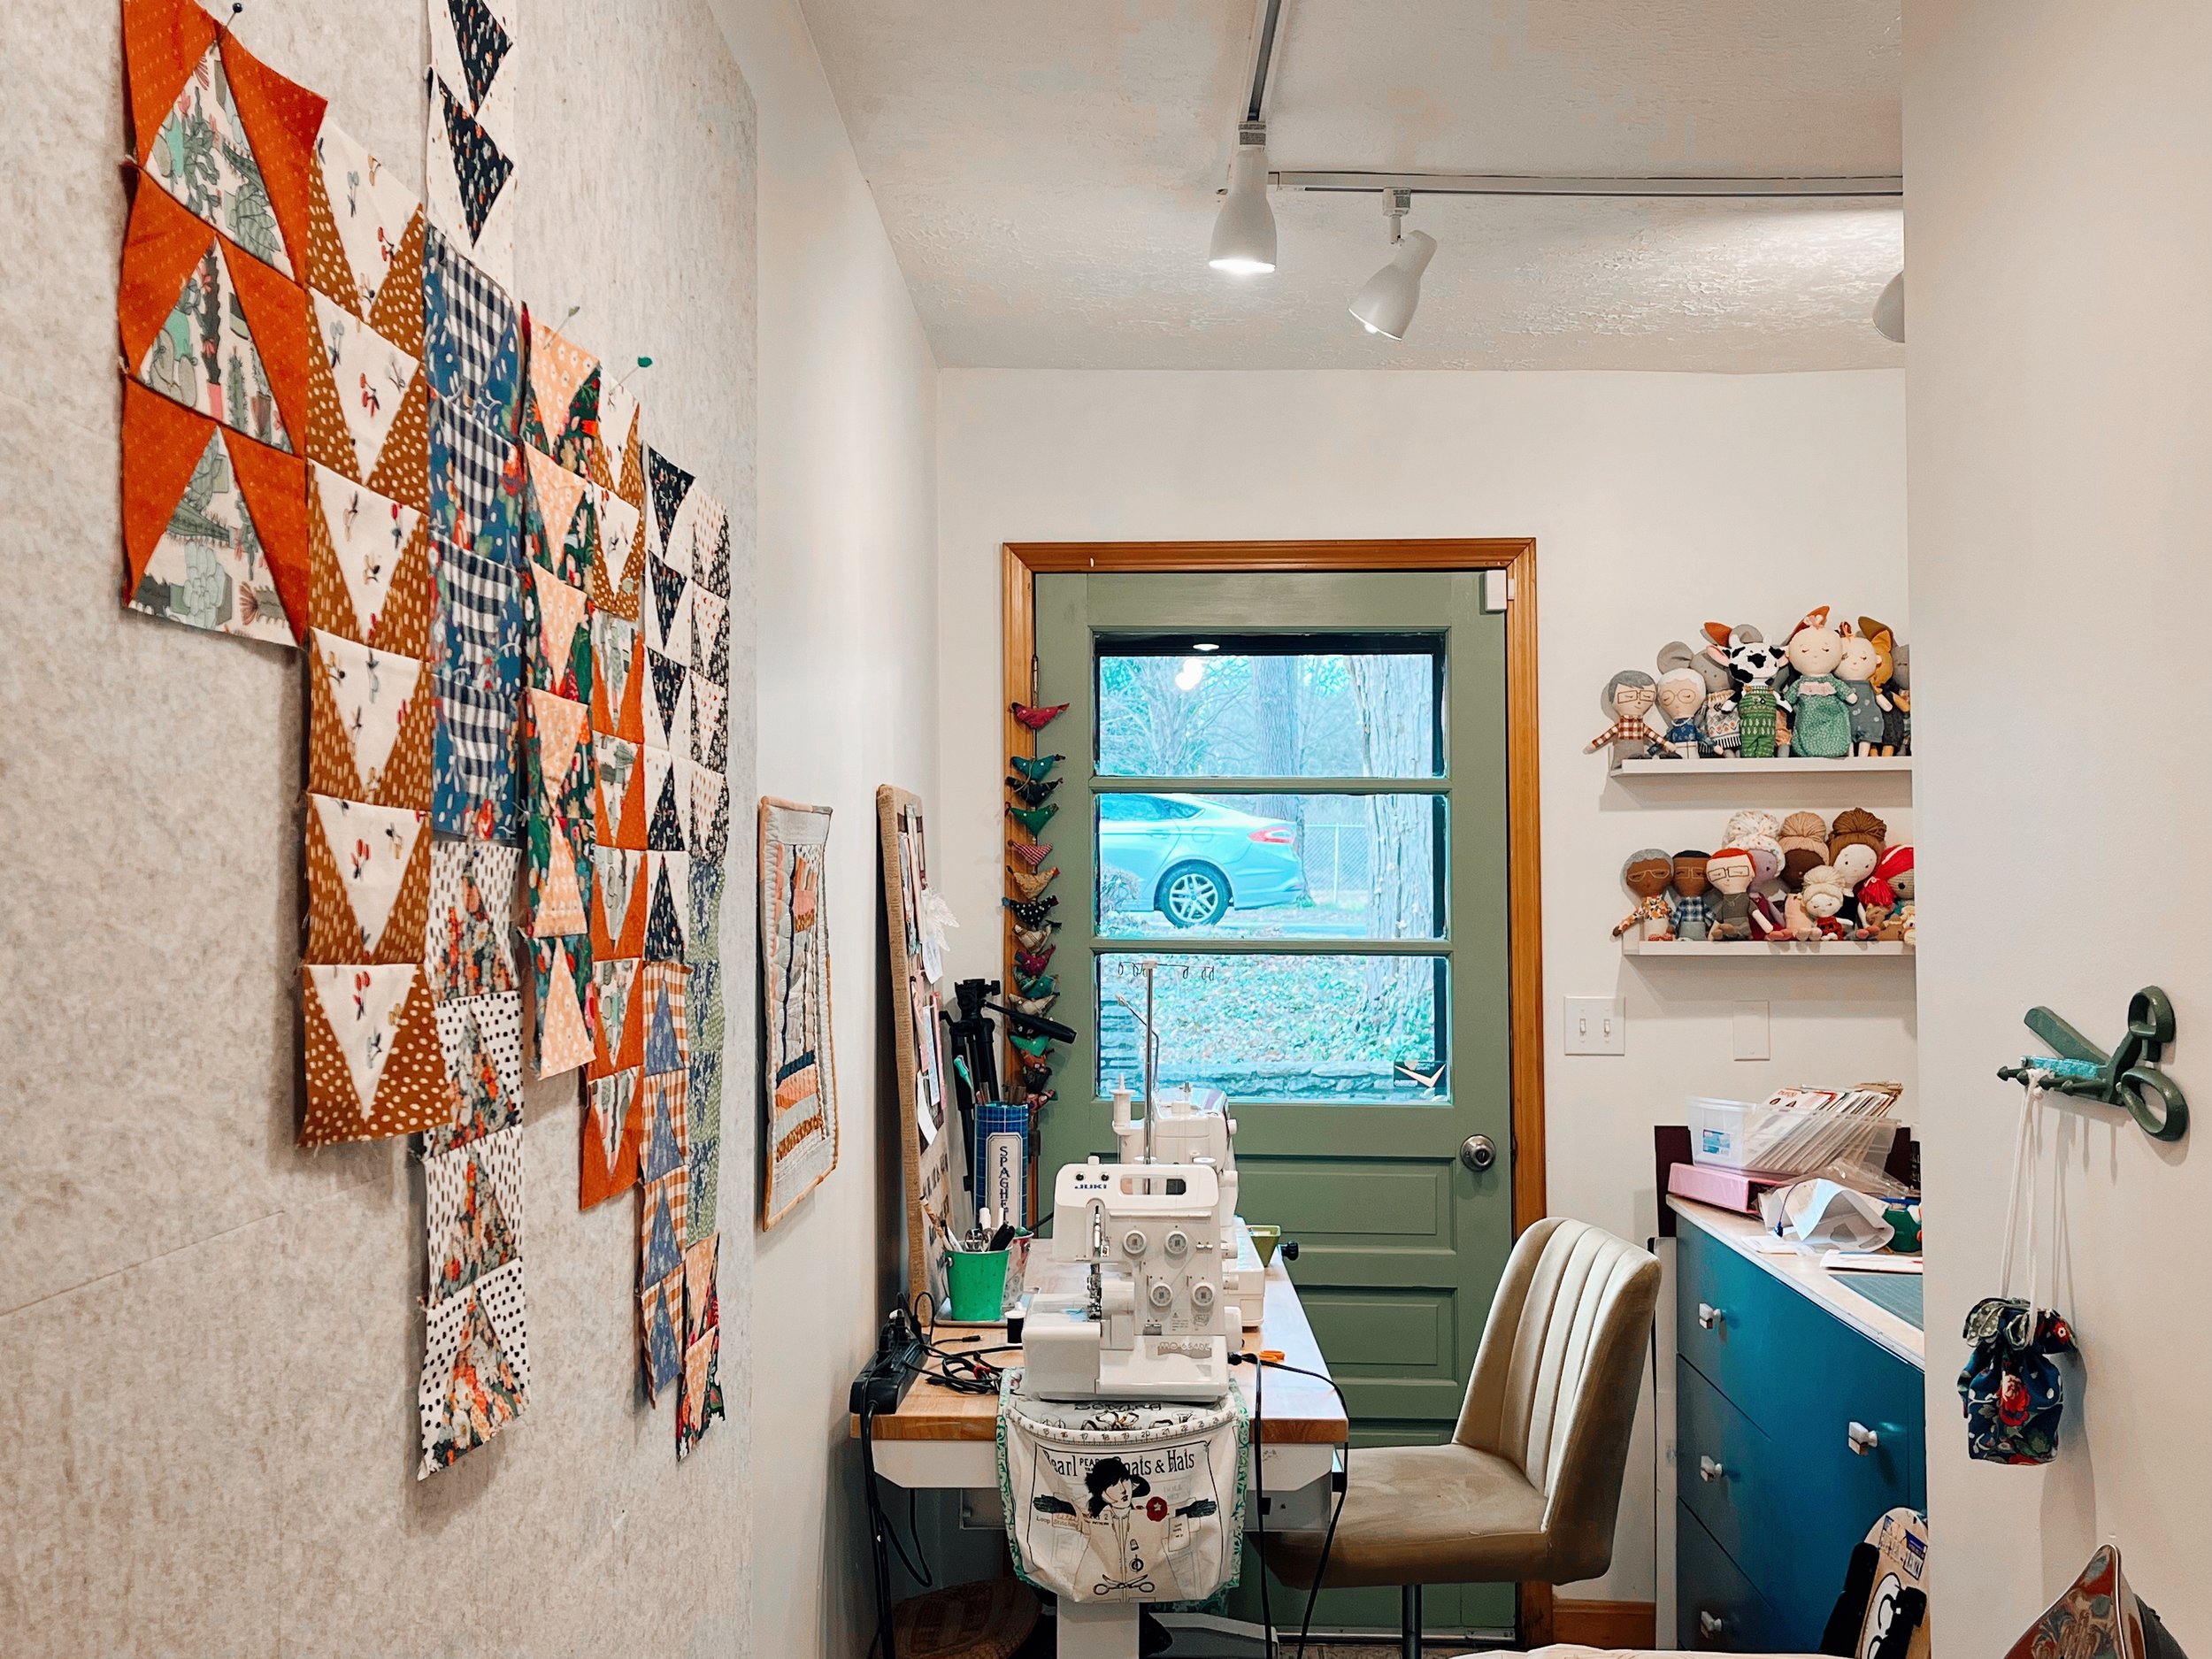
I discovered I could get 12” x 12” felt sound proofing panels on Amazon in packs of 20. I ordered 2 packages and they were on sale, so I got 40 of those, plus the 3M adhesive squares I needed to mount them, for less than $60. My husband got really into this project and helped me out with it. Here’s what we did:
The felt panels came with a softer side and a more coated side. The felt needed roughed up a bit in order to cling properly to my quilt blocks, so working with the softer side of the panels, we simply used a sanding block to make them fuzzier. This worked like a champ and only took us about 20 minutes.
We initially thought it would be best to assemble the squares on the floor, duct taping them together and then attaching it to the wall, but this didn’t work out. We did it, placed the 3M sticky squares on the duct tape, then put it on the wall, but the next morning it had fallen off because the duct tape didn’t adhere to the back of the panels like we thought it would! So we redid it and simply attached 4 sticky squares to to each panel in the corners and stuck them directly to the wall. This has been holding strong ever since and we shouldn’t have overcomplicated in the first place!
We used a level and started with the bottom row, making sure it was good and straight. It’s important to measure out your wall and figure out what size grid you can make, avoiding outlets and things. My grid is 5 squares across and 6 squares down, making my design wall 60” x 72”, a great size for designing quilts!

More things to know if you try it …
I am SO happy with my design wall! For me, it was super important that it look attractive and not messy, it’s just a personal sensory issue I have, and these panels look downright sharp! I love how my sewing room looks as I walk past it. I also think it will last and look nice for much longer than other DIY options.
There are a couple more things to note if you decide to try using soundproofing panels for your design wall, though, which I’m going to list out so you can have all the info before making your decision.
Sound proofing panels also come in other materials, mainly a foamy material. I haven’t tried these, but I assume they won’t stick as well to quilt blocks, so make sure you get felt ones.
The panels also come with sticky backing! I almost got these instead, but didn’t want the headache of using a hair dryer to remove it down the road. The 3M squares will still remove the paint when I take them off, but to a much lesser extent.
While my felt, after sanding it, does hold my quilt blocks, they don’t stick as well as they would to quilt batting. That said, I knew using quilt batting would attract every thread and fuzz in my sewing room and that would drive me crazy.
The panels double as a pin board! This is one of the best parts! Many people say that their quilt blocks go flying off their design walls with breezes of any kind, but since I can stick a pin in the top of each block, I won’t have that problem. I also love having a pin board in my sewing room, for inspiration, swatches, and cute things that me smile. If you use foam core as a base, you can stick pins in that too, of course, but you’ll end up with tons of holes in it over time and it my wear down more quickly.
The panels come in other colors and shapes. I love the soft dove gray of mine, but you can also get black, white, or dark gray. They also come in hexagons, which could be cool, but I wanted the nice and neat looking grid.
In the end, I’m so happy with how this turned out. It was an out-of-the-box way to get a design wall on a budget that actually looks nice in my space. It’s a win!
I recorded my design wall process, so if you want to see more of what we did and how it looks, along with some family antics, watch the video below, but keep in mind, this was before the design wall fell down and we reattached it the easy way!