
How to Sew with Faux Sherpa Fabric
This item of clothing has been on my to-sew list for a few months and while my to-sew list can be long and I don’t always actually sew all the things on my to-sew list, for some reason I was determined to make this one happen! I’ve seen a ton of these kinds of vest styled on Pinterest and just knew it would be a versatile layering piece for me this Winter.
Fortuitously, Hobby Lobby has faux sherpa in their Fall garment fabrics line this year! I used a coupon and bought a yard and a half, which turn out to be way too much. It’s super wide so I ended up with quite a bit left over.
Before I tell you what I learned from this project about sewing sherpa (and faux leather trim!) let me just show you how awesome my vest turned out!
This post may contain affiliate links, which means that while I am not paid to promote certain items, I will earn a small commission should you purchase items through these links. For more info, see my disclosure policy.
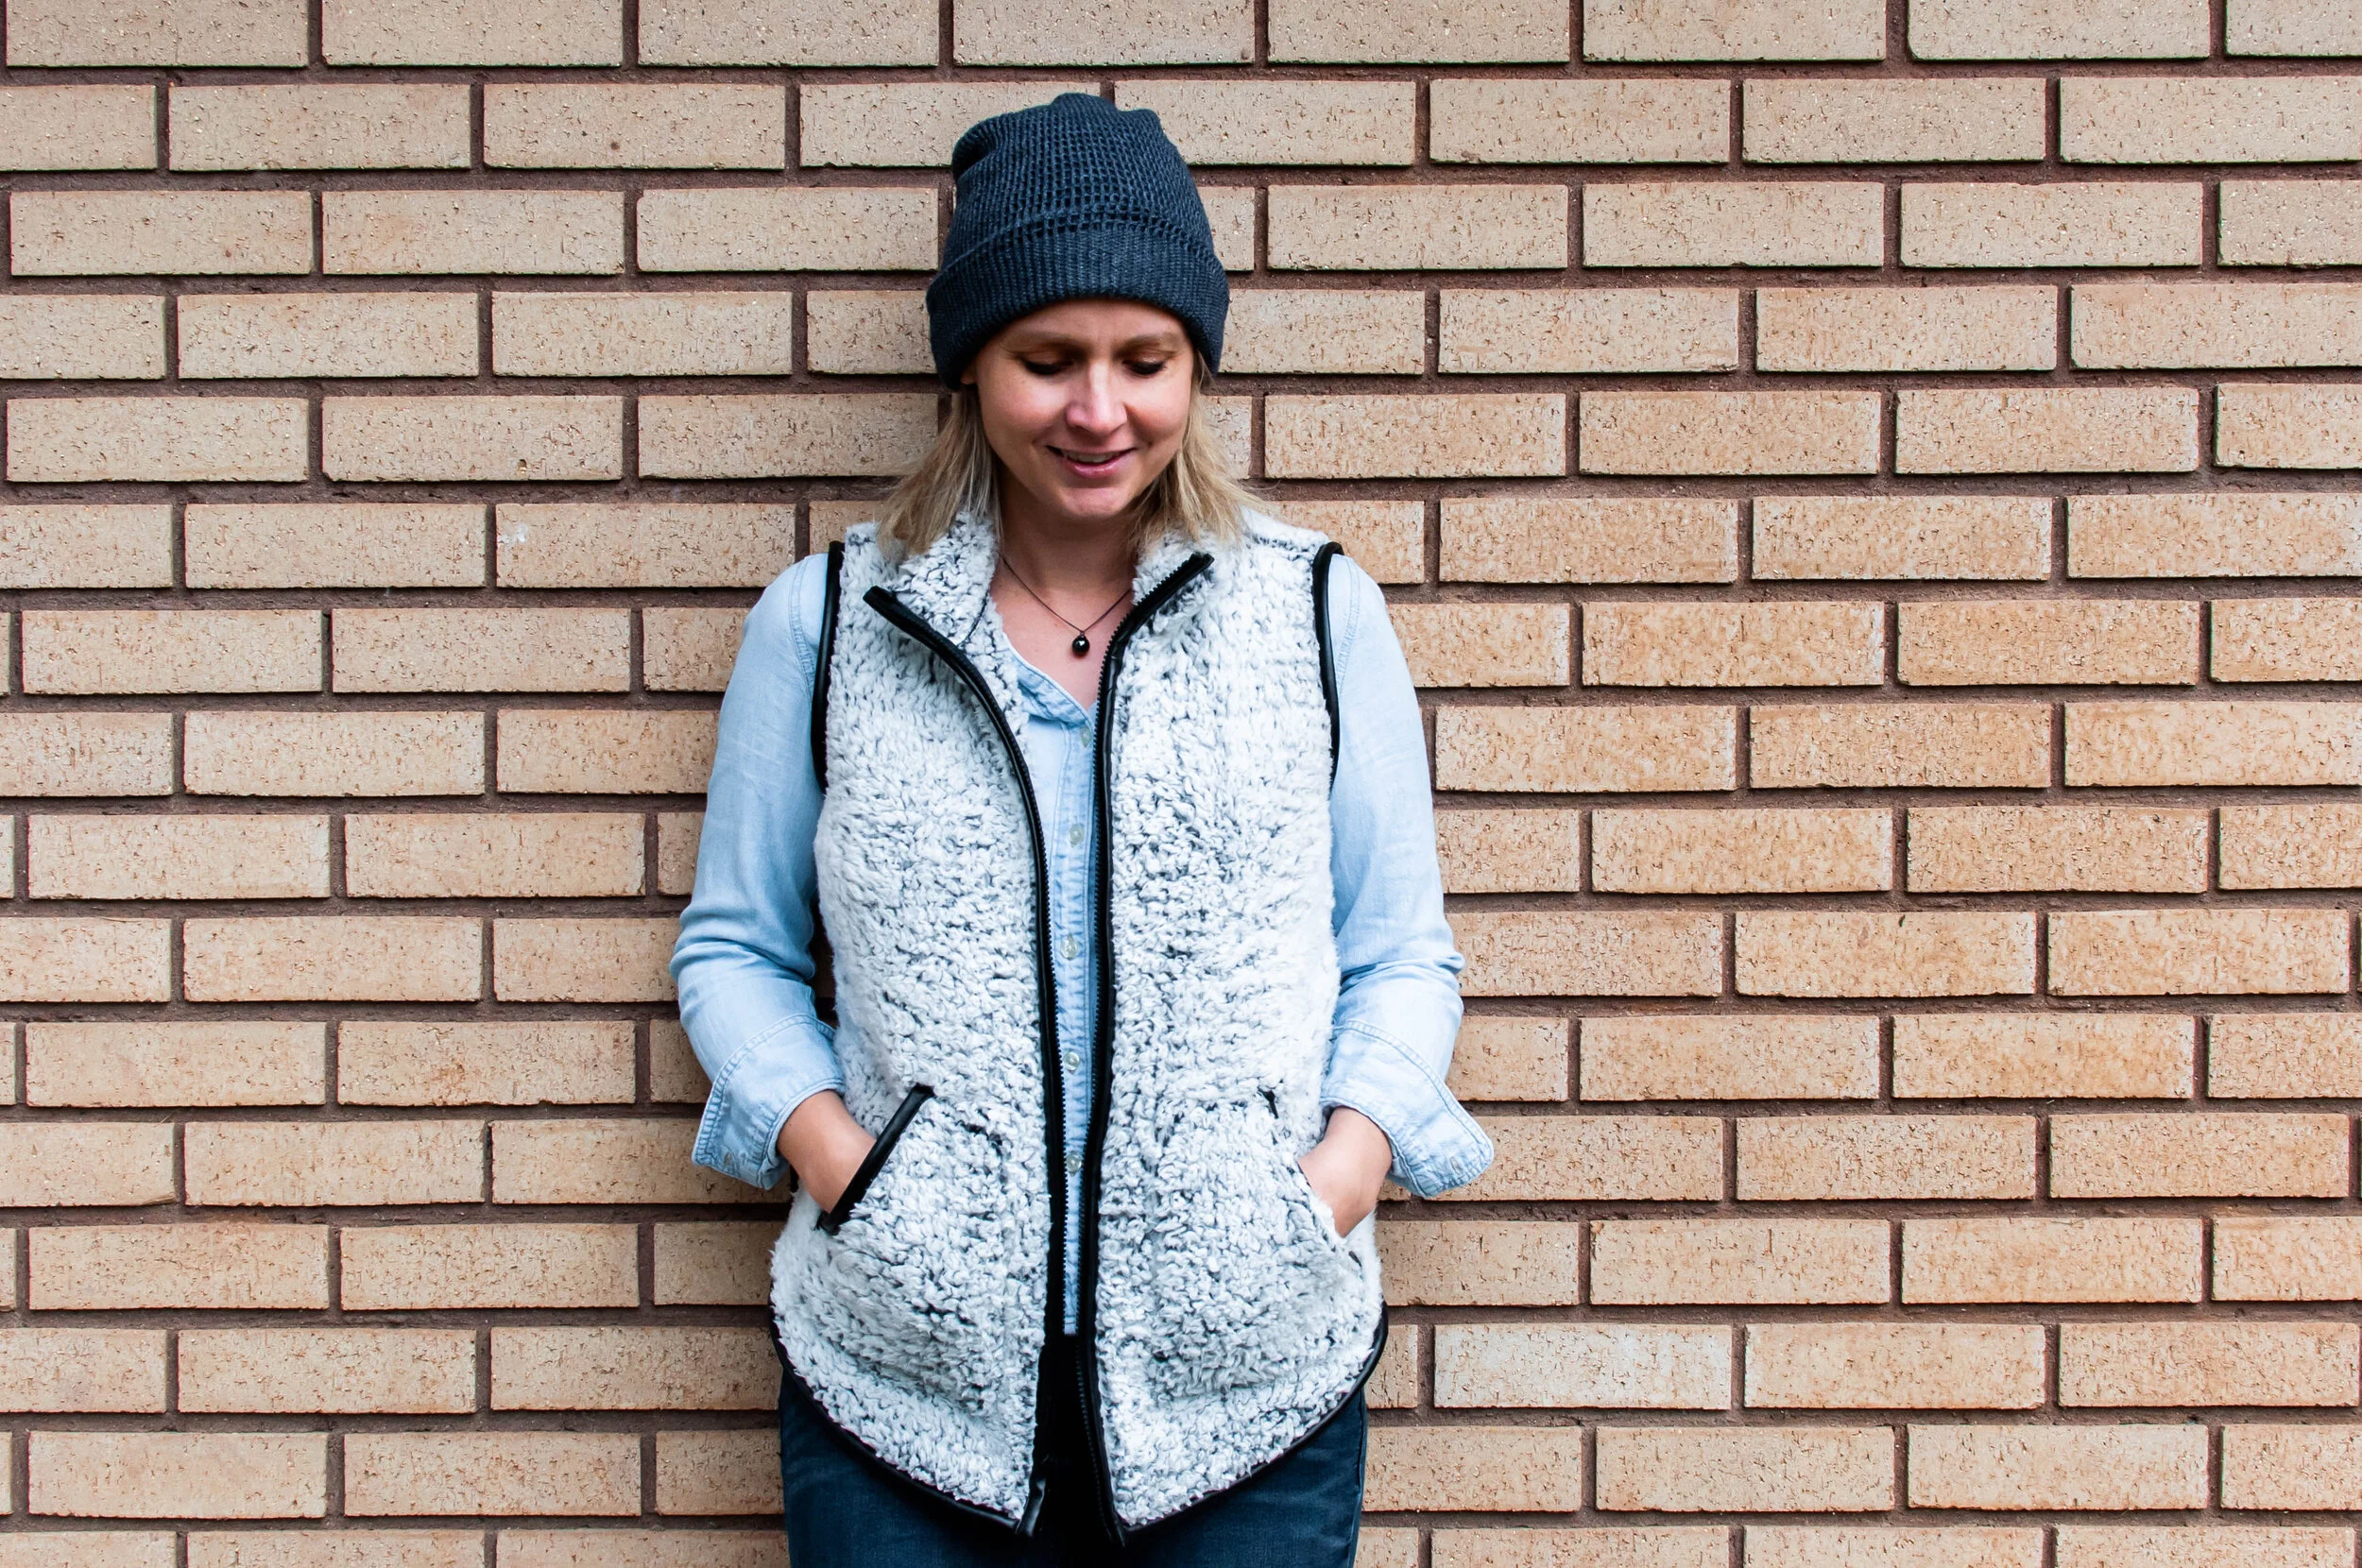
I originally thought I would use a Big 4 pattern I had seen with this style of vest, but it turned out to be out of print. Luckily, I spotted Heidi Handmade Frenzy on Instagram wearing a vest in the style I wanted using the Love Notions Oakley Vest pattern. I went to purchase it a few days ago and it happened to be on sale!! It’s still on sale as of this writing, so go get yourself some patterns. I love it when projects come together this easily, haha.
Before moving onto sewing with these tricky fabrics, let me just give this pattern a five star rating! The biggest reason I love it is because it includes a separate front piece for those who need a full bust adjustment!! Saved me time and energy for sure. Besides that, it’s well drafted, a modern design and has good instructions. Only make sure you read which pages to print before you just print the entire thing like I did. After realizing my printer had spit out about 100 pages, I noticed the instructions tell you which pages to print for each view. It’s only like 10. Whoops!
Let’s move on and talk about these fabrics!
PIN ME FOR LATER!
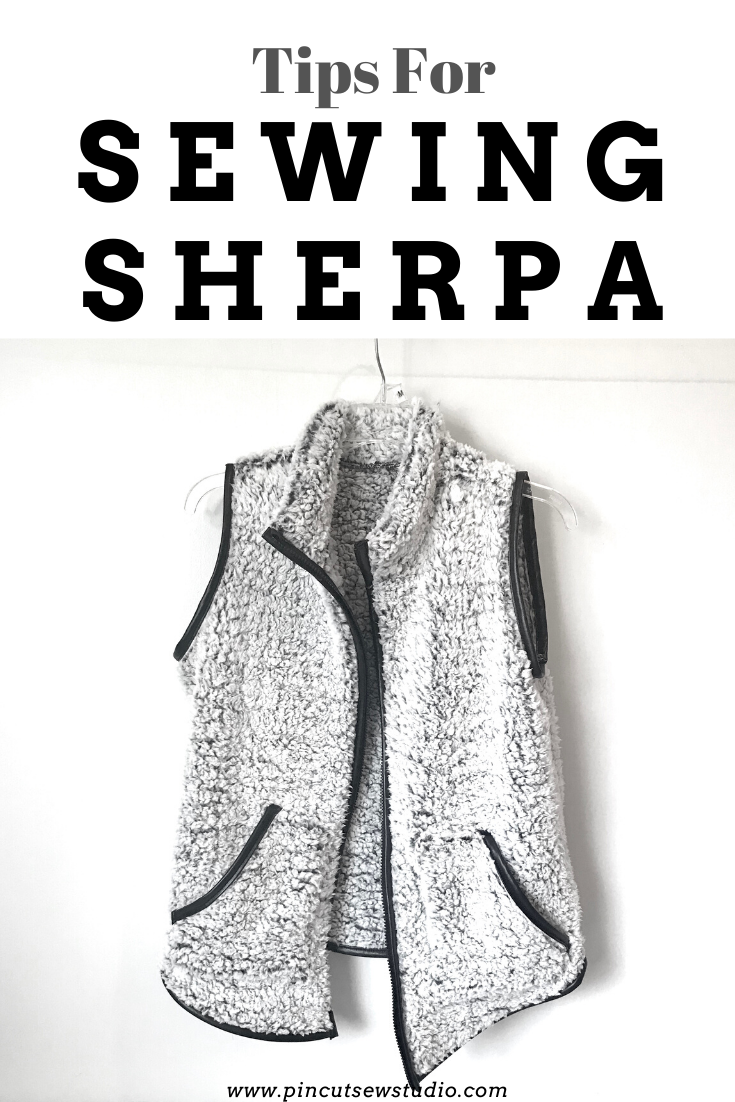
Tips for Sewing with Sherpa
Use a walking foot.
My old semi industrial Pfaff has a built in walking foot, but if your machine doesn’t, you’ll for sure want to attach one! You can buy them pretty inexpensively any machine and it’s a must-have sewing tool. Basically, it keeps your layers moving forward at the same rate, so it’s extra helpful for thick fabrics like these, or sticky fabrics like the vinyl pleather I used for the trim, which I’ll talk more about in a minute.
Use clips, not pins.
If you don’t already have some wonder clips, now is the time to get some. I promise you’ll use them all the time in your sewing room! Pins didn’t work at all on this project, because they just get buried in the sherpa and they’d leave permanent holes in the vinyl, so I used the clips on the entire project.

Finish those raw edges.
Before starting, I tested the sherpa in my serger and it actually worked great. If you don’t have a serger, you’ll want to finish the seams somehow to avoid having the fuzz come off all over town when you’re wearing it! Use a zig zag stitch or bind the seams with bias tape.
Take your time.
Removing stitches from this sherpa would be next to impossible. Go slowly so you don’t have to use the seam ripper! The stitches get buried in the fuzz and are impossible to see, which is a good thing for hiding mistakes of other kinds, but not great if you have to unsew.
Other than that, the sherpa wasn’t as scary to sew with as I thought it would be. I assumed it would be very thick, but it’s actually not at all when going under the presser foot. I also thought it would create a ton of lint to be cleaned out of my machine, but it didn’t.
The vinyl trim I used turned out to be the trickier fabric of the two. I got it by the yard, also at Hobby Lobby, and I was super excited because I wanted something that looked ready-to-wear and wasn’t sure what I would find for the trim. The pattern calls for bias tape, so I cut bias strips from the pleather 2” thick. I couldn’t press it, but that wasn’t really an issue, I just clipped it into place with my wonder clips and I didn’t have any issues.
It did make the project very thick, though, which made me glad I have a heavy duty sewing machine! If you don’t, though, proceed with caution, use a size 90 needle and turn your hand wheel toward to you to help the motor out through the thickest part.

I’m proud of myself for conquering some new-for-me fabrics!! I have large chunks of both the sherpa and the vinyl left, so do you have any suggestions on what to make with the leftovers!
I was going to link you to the Hobby Lobby sherpa that I used, but it’s sold out online. So I looked on Amazon and there are lots of options there! Here are a few:


10 Great Gifts to Sew for Mother’s Day