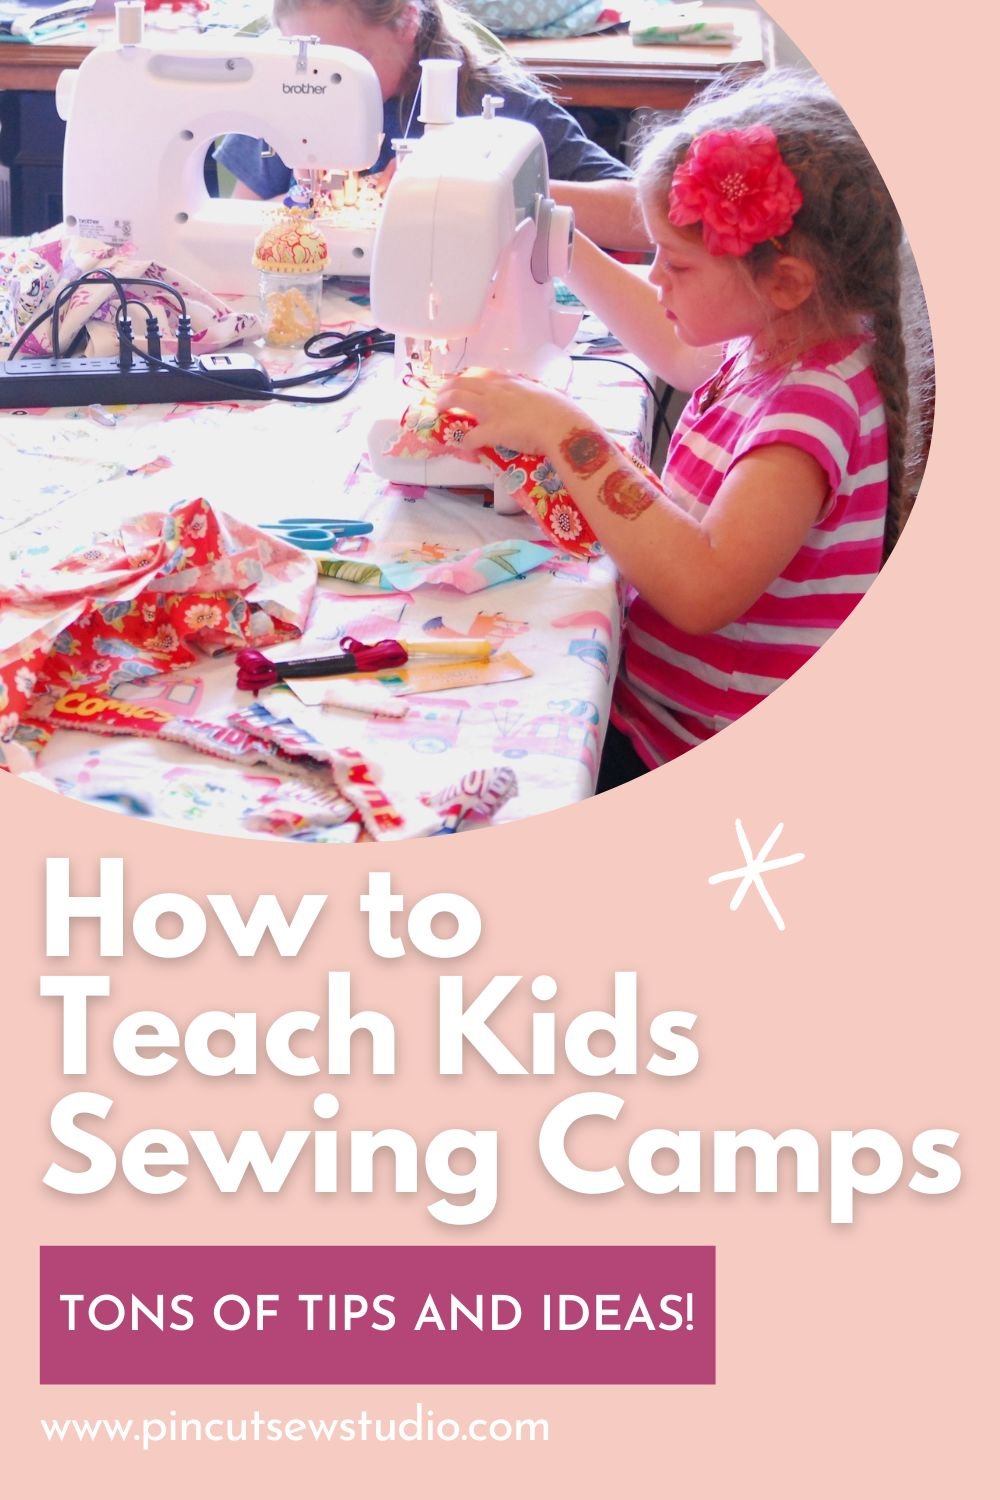
How to Teach Kids Sewing Camps & Classes || Tons of Tips and Ideas!
If you’ve been reading Pin Cut Sew for a long time, you may remember that this blog began because I started teaching sewing camps for kids several Summers ago when we lived in Hawaii. I needed a way to earn money that summer and teaching kids to sew quickly emerged as a FUN way to earn quite a bit of extra income in just a few weeks of sewing camps.
I learned a lot during those four weeks of sewing camps and was able to perfect my system in order to continue teaching camps and classes over the next few years, even when I moved to another state. I’ve made an income with sewing in multiple ways over the years, but teaching kids classes is by far the one that made the most money in the least amount of time, AND it was actually fun and rewarding for me, as opposed to sewing yards and yards of curtains or making 50 of the same product, hoping they’d sell at a craft fair, which I did not find enjoyable at all.
Today I’m gathering my best tips and tricks for getting started teaching kids to sew while earning some good income at the same time! Read on to learn how I set up my first kids sewing camps.
Tips for Teaching Kids Sewing Camps and Classes
I’m sure if you’re considering getting started teaching kids to sew, you’re feeling a little bit daunted by the details. What supplies do I need? Do I have space for this? How much should I charge? How do I find students and then what do I teach them to make? I’ll do my best to answer those questions for you here!
Gather Your Supplies
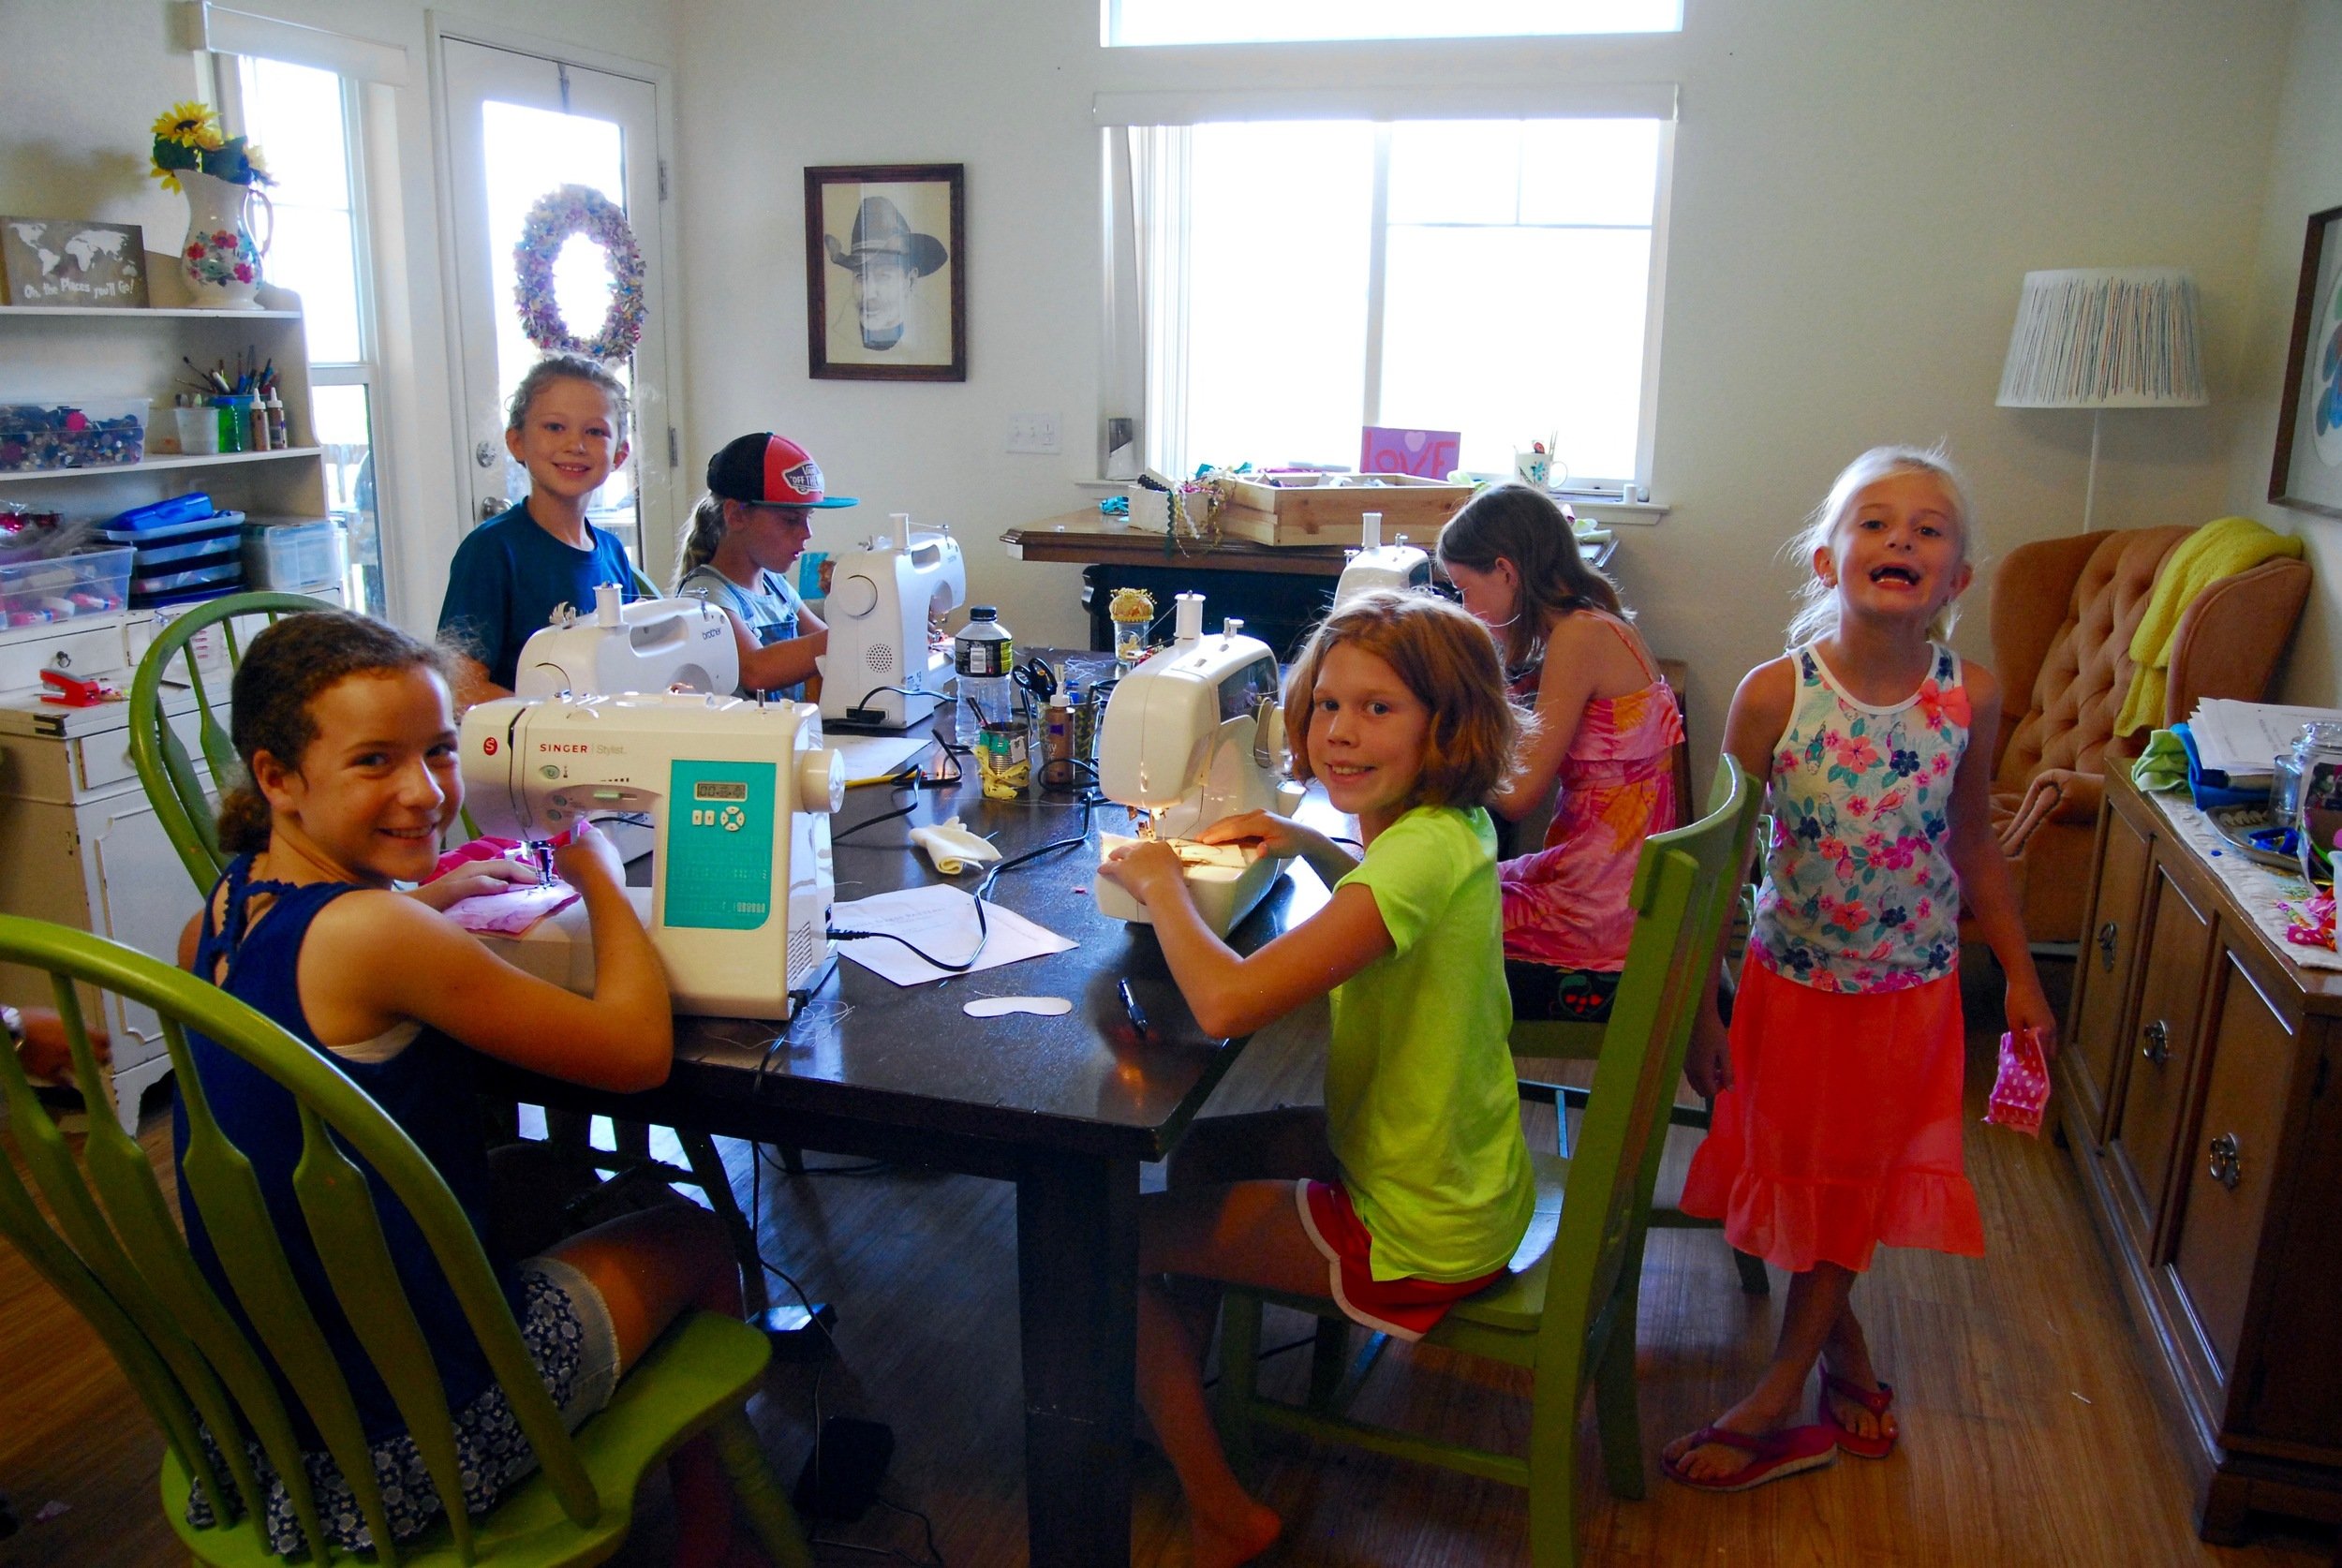
You don’t need as much as you might think! I purchased three inexpensive Brother sewing machines and had my six students share those machines. It worked out very well, and later, when I had six machines for my classes, I realized that it was actually better to share, since the students could observe and help each other while they waited for a machine. Also, I was able to help everyone more easily when not every student was on a machine at the same time. So if you have just a few machines, that’s okay! You can also ask students to bring their own machines; however, part of the appeal for the parents when I advertised my camps was that I provided everything they needed, so that’s something to consider.
You will need several pairs of scissors and other basic sewing tools like pins, seam rippers and marking tools. These can be purchased inexpensively. I like the basic Fiskars scissors and I even had a pair or two of their scissors for small hands. You might also keep a left handed pair on hand.
Ironing is obviously a big part of sewing and I had two of these Shark irons for classes. Both are still going strong, even years later, so I highly recommend them!
As for fabrics and materials, you probably have a ton in your stash that you can use, but I did make sure I had all the needed fabrics on hand, like the fleece we needed for doll sleeping bags, and aloha fabrics for our Hawaiian doll dresses. I obtained all these fabrics at good prices by shopping around, looking in remnant bins and using what I had on hand. You can also probably find people who are willing to donate materials, or recycle clothes from your giveaway bin like I did when we made doll t-shirts.
I will note that it’s important that you have fabrics that kids will actually like — so maybe don’t use so-and-so’s grandma’s fabric stash that was so generously donated to you. Kids will have a hard time getting excited about the projects if the only fabric choices are musty and out of date.
For certain projects, I did ask parents to bring a yard or two of fabrics that the students picked out themselves and brought to camp. For projects like pajama shorts, they’d rather choose their own fabrics, and parents have fun helping them pick them out at the store.

Set Up your Space
If the thing holding you back is that you don’t have enough space, I will politely beg to differ. I started my camps in my kitchen and dining area (and it wasn’t a large house — it was military housing!) I had a large island and an extra side table for cutting, we set up the machines on our dining table, and I had a fold out table we set up for an ironing station.
I cleaned up camp to a degree at the end of each day so that my family could live and eat, but otherwise, my family was very accommodating and we dealt with it, knowing it was just for four days at a time.
Later, when I taught in our next home, I had a dedicated space for teaching sewing, but I still maintain that you can make this work with any space! You may have to limit the number of students in order to fit the space you have, but with some creativity, you can teach camps in your home. You may even be able to borrow some space, from a library, a friend’s basement, or your church. Get creative!
Find your Students
Finding students is easy once the word gets out. I’m sure you know some moms and kids in person that you can tell about sewing camp, and they’re very likely to tell their friends. I made simple printable invitations using the free version of Canva with all the basic info on it: camp dates, the themes, the location and the price.
I then went to the Facebook groups I was a part of for moms in my area and homeschoolers. Join some Facebook groups where moms hang out and see if you’re allowed to post your sewing camp invitation there. This is how I found most of my students and those students came back for many classes afterward! I never had to try very hard to fill up my camps and classes.
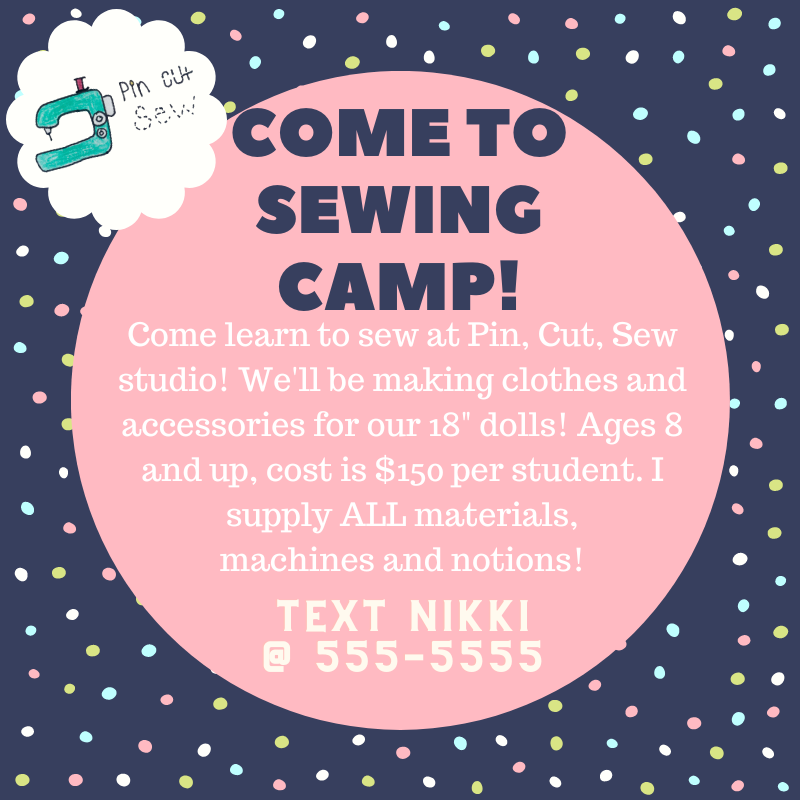
I kept my age limit to children ages 8 and up. I of course had a few moms ask if their 7-year-olds could attend and I said yes to them, but they did need more help, so I made sure I had some older students to help them. There’s something about their dexterity with the scissors and sewing machine that seems makes age 8 be ideal to start.
What to Charge
This may depend on where you live and what you’re providing. I urge you not to undervalue your time and expertise! My camps were $150 per student and ran for four days, three hours per day. No one had an issue with this price and it was on par with what other kids camps and activities were costing at the time. That was several years ago, though, so I would probably charge a bit more now!
Find out what other summer activities in your area are costing and price yourself similarly. Another option is to charge a bit less, but have the parents bring certain materials or sewing machines, or have classes for shorter amounts of time. This will take some trial and error, but the main thing to beware of is undercharging! Don’t do it! These camps take a lot of time and energy and charging too little will wear you out and make it feel as though it’s not worth so much effort.
What’s Your Teaching Style?
Now for the fun part! If being a homeschool mom has taught me anything, it’s that everyone teaches differently! We often emphasize students’ learning styles, but I try to encourage moms to also realize their own teaching/learning styles and taking that into account when planning their curriculum.
The same goes for teaching sewing. I’ll tell you how I set up my own camps, but you may prefer a more organized method, which is totally fine. You may prefer fewer students, with everyone on their own machine, beginning with threading and moving forward from there.
I loves the organized-chaotic creative atmosphere and that worked well for me. I loved the crazy mess we got to clean up at the end of class and I like how the students forged friendships along the way.

Sewing Camp Theme Ideas
That first summer, I offered two different themed camps for two different sessions. The first was a sleepover themed camp and the second was sewing for 18” dolls. It was good to have one camp option that would appeal to boys too, since the doll camp filled up quickly with girls. I had a few boy students who really enjoyed my camps and classes, so it’s good to make sure you’re planning projects accordingly.
Sleepover Sewing Camp
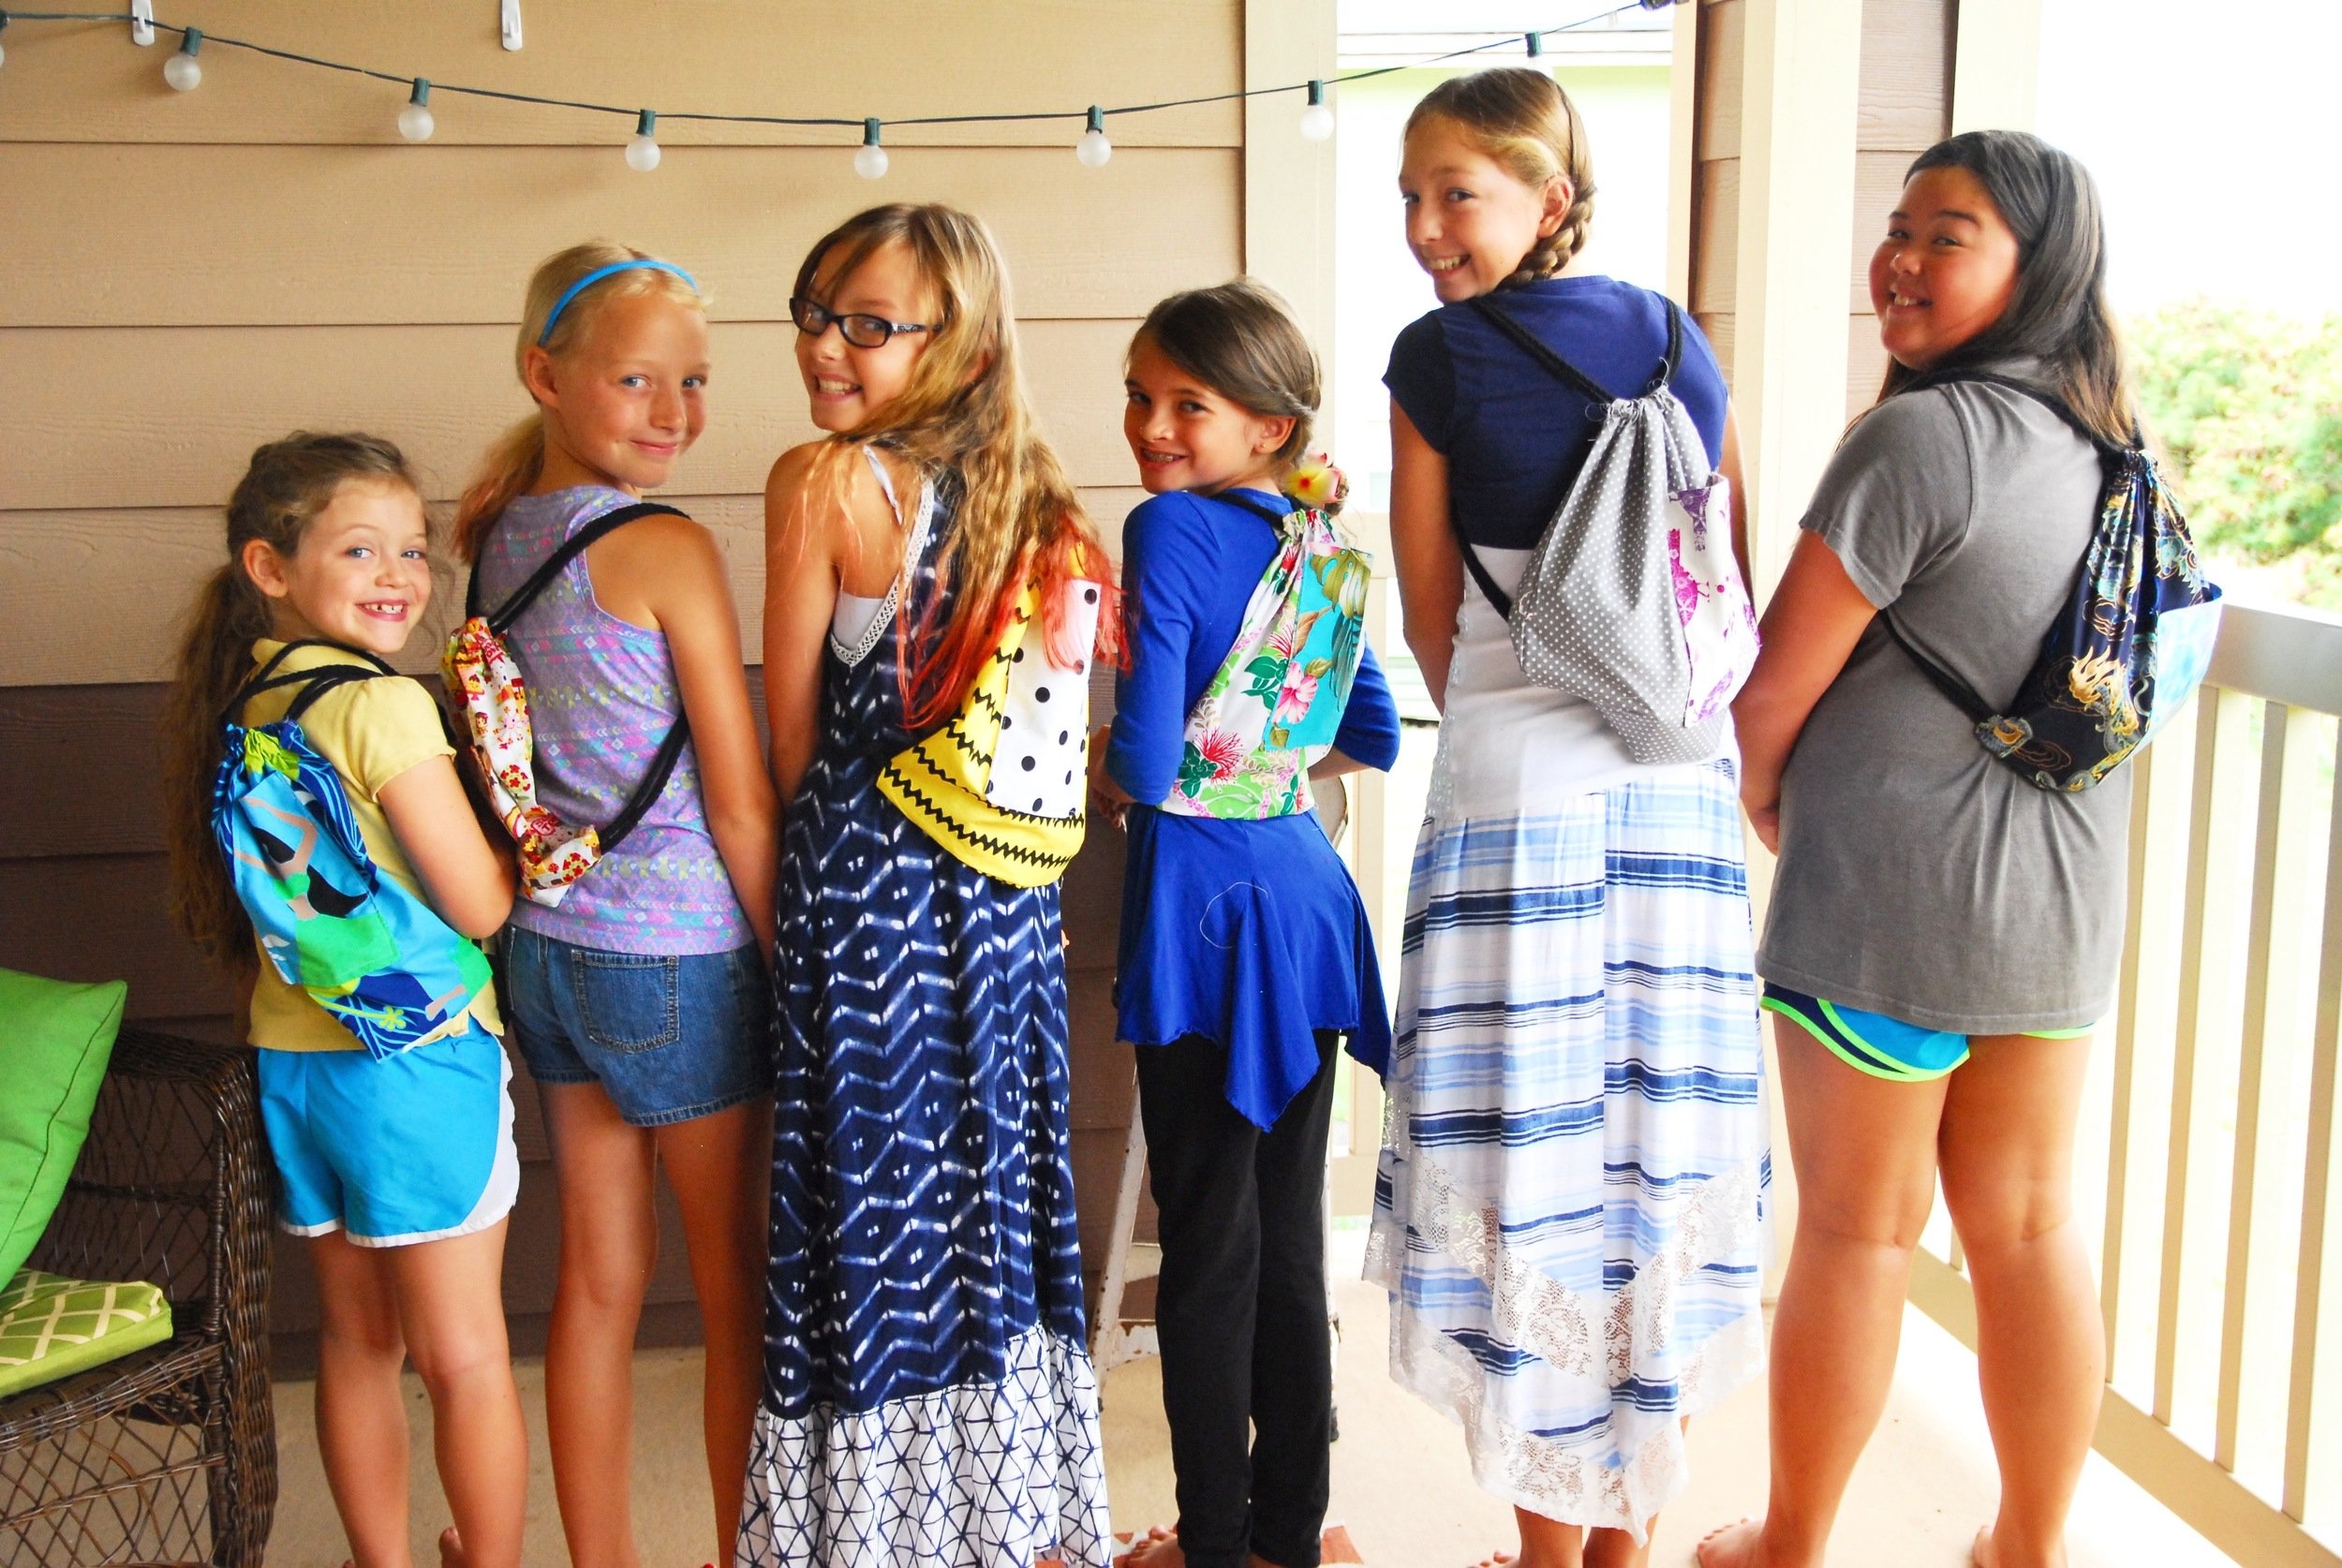
For sleepover sewing camp, our projects included pillow cases (watch my tutorial here), drawstring backpacks, sleep masks and pajama shorts. All these projects were a huge hit! I made sure to have the patterns created beforehand so each student or pair of students had one. I didn’t bother writing or copying instructions; I simply gave the students their next steps as they were ready for them. They enjoyed this method because they could just get to the sewing part and not get bogged down in trying to understand written directions. I also realized this helped them learn how certain kinds of projects go together and then they were able to make little projects themselves while they were waiting for a machine or if they had extra time — it just encouraged exploration.
I often let the students take the patterns home if possible and if they wanted them. I was easy for me to make new ones with the large roll of paper I used, so I didn’t mind letting them have the patterns.
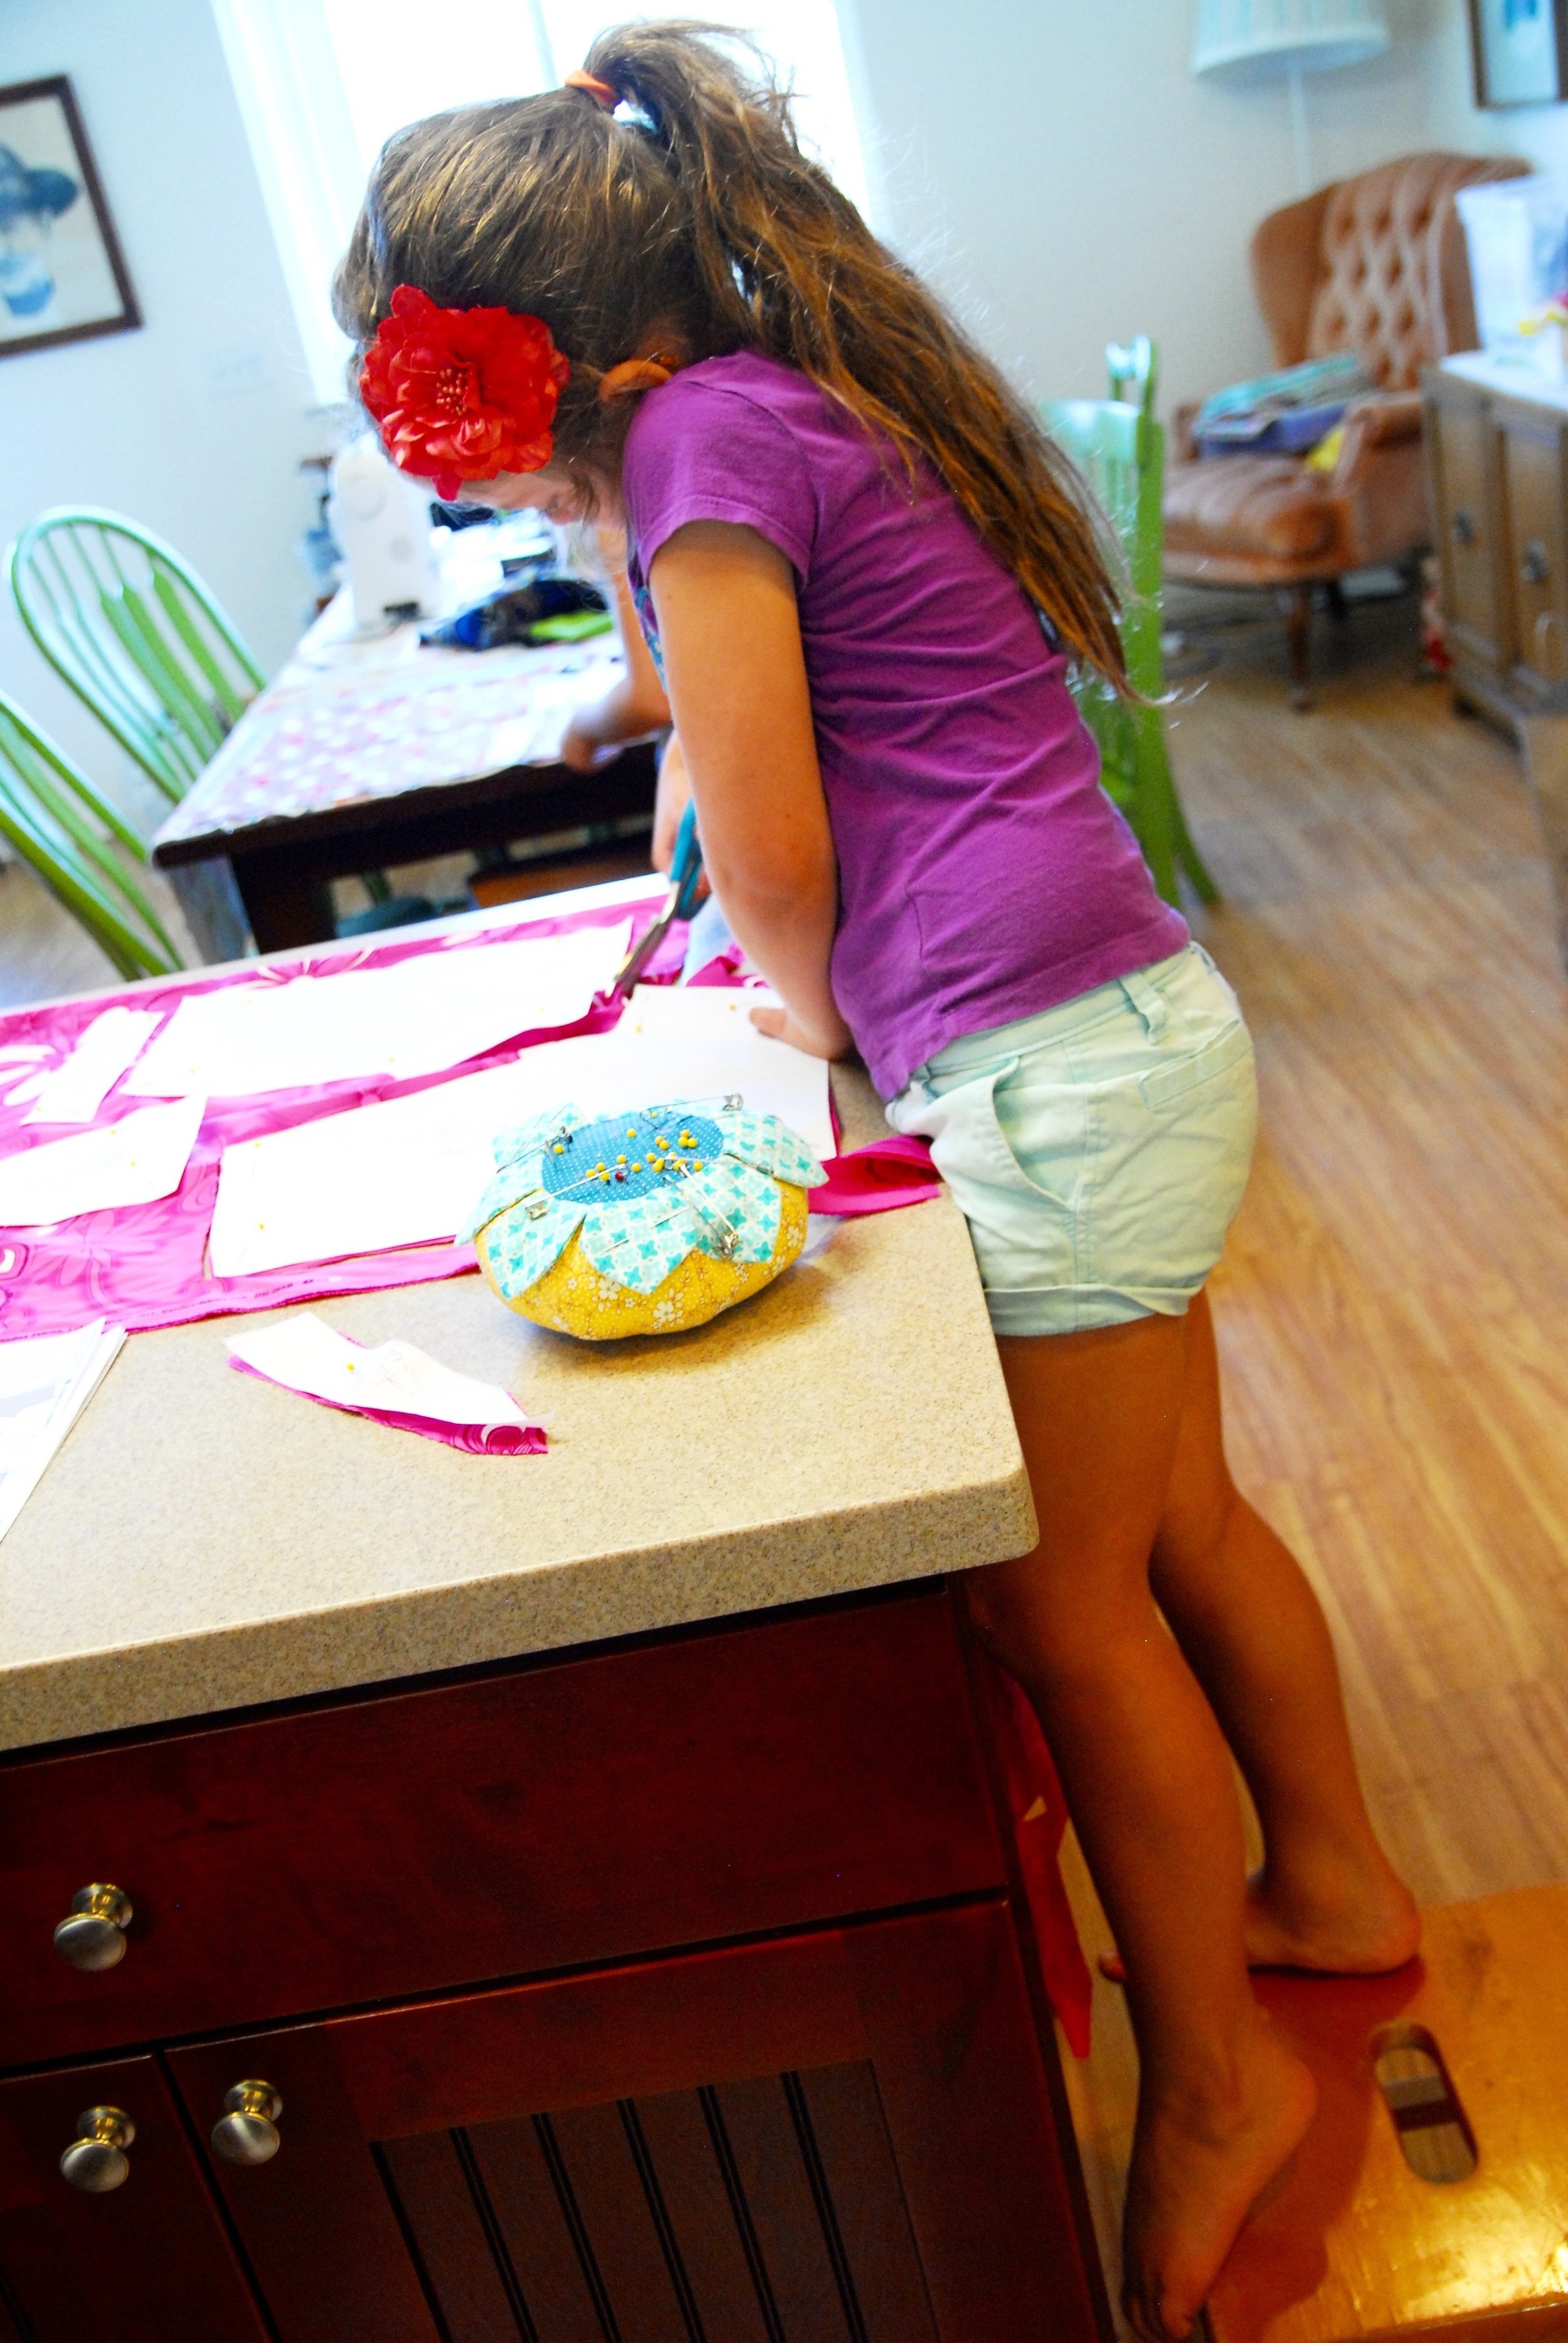
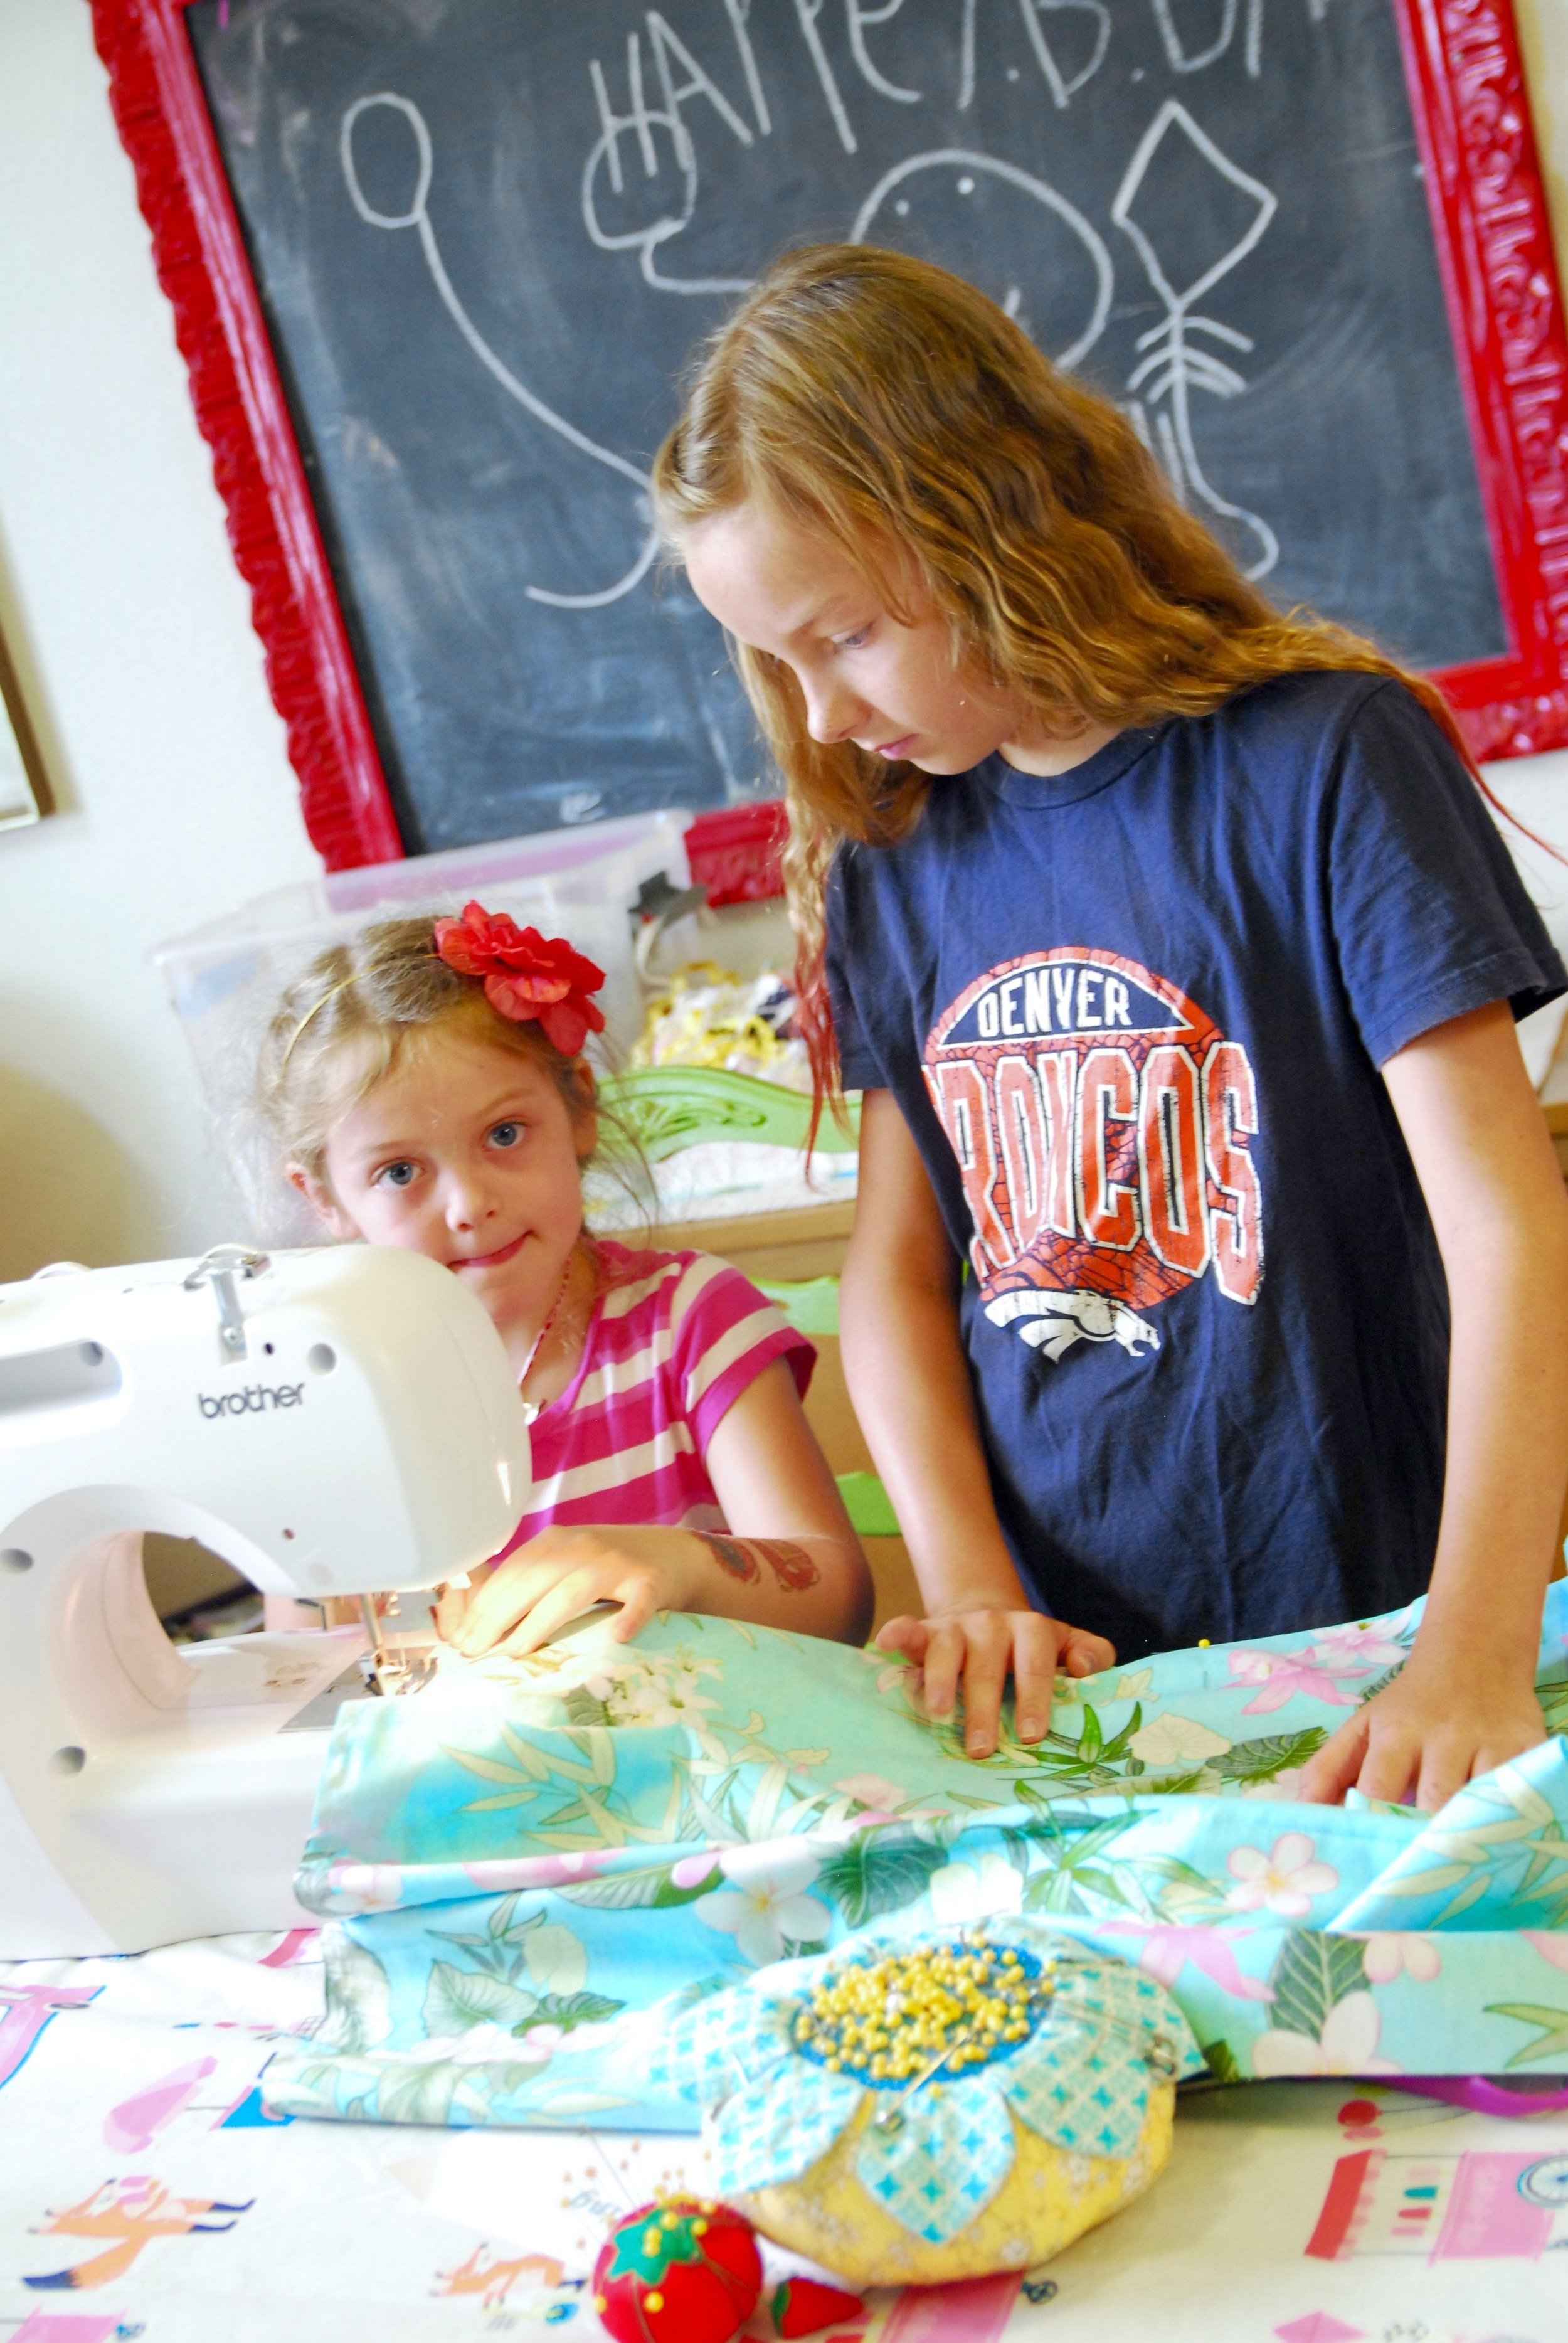
Doll Sewing Camp
Doll sewing camp projects were so fun! The girls were encouraged to bring their 18” dolls and we made them dresses, pants and shirts (we recycled old t-shirts!), sleeping bags, doll sized sleep masks, and other doll crafts like visors and sandals with craft foam. On the last day, we set up a runway and had a doll fashion show! The girls chose music and narrated the show, it was SO FUN.

For more project ideas, you can refer to my tutorials page and my YouTube channel tutorials. I have tons of projects there that would be perfect for kids to make. I keep my tutorials beginner friendly!
More Sewing Camp Theme Ideas:
Holiday themed camps (I often help 2-day mini camps during school breaks for various holidays).
Back to School
Summer
Gifts
Clothes Camp (We upcycled jeans, appliqued on t-shirts — that kind of thing).
Sew for your room camp
Teaching Kids to Use the Sewing Machine
We started out by hopping on the sewing machines right away! I printed these free printable sewing mazes and taught the students to start and stop, lift the presser foot and turn corners. Then we practiced sewing around the paper with an even “seam allowance”. I did not teach them to thread the machines right away, but any time we needed to rethread, I had them do it and they learned very quickly to thread them and wind bobbins.

I could write a book with so many more tips and ideas, but this is about as big as I can make a blog post! I am actually working on an ebook with ALL the info and ideas for teaching kids sewing camps, and I will update this post with that link as soon as it is ready! In the meantime, you can read a lot more about teaching kids to sew in this other giant post!
I hope you’re encouraged to give teaching sewing camps a try and that my method of doing things sparked some ideas for you! There are many ways to earn money with your sewing, but I find teaching is a great way to use your skills to earn an income in an out-of-the-box way. If you have other questions for me about how I made my sewing camps and classes work, I’d be so happy to chat with you about it, so don’t hesitate to reach out!
Cheers and Happy Sewing! :)
Nikki