DIY Fast & Easy Fabric Gift Tags (Sewing Optional!)
I made something so fun and I’m excited to share it with you! I had bought some very cool gift tag fabric from JoAnn last year and knew I’d eventually turn it into some DIY Christmas gift tags of some kind, but I just didn’t get around to it and I wasn’t sure how to make it a very simple, fast project.
But, inspiration struck this year and I had a great idea for how to turn this fabric into tags, AND how to turn any fun Christmas fabric into pretty and personal gift tags this Christmas. These tags are easy and fast, plus they can be a no-sew project if you so choose. You can even reuse them from year to year, or put them on your Christmas tree as ornaments!

This post may contain affiliate links, which means that while I am not paid to promote certain items, I will earn a small commission should you purchase items through these links. For more info, see my disclosure policy.
Fast and Easy Fabric Gift Tags
I created a video tutorial for these gift tags, which I’ll post right after the supply list, but I also documented the process so I could write written instructions to walk you through it too, in case video isn’t your thing.
Supplies
Here’s what you need:
Scraps of Christmas fabrics. My gift tag fabric is an Alexander Henry print called “Just for You” that can be found here.
Fusible Web. This is the product that basically turns your fabric into a sticker that irons on to your paper gift tag. You can find this at your fabric store, either on the bolt with the interfacings, or in a package in the notions section.
Card Stock
Hole Punch and Eyelet Setter, and eyelets (optional). I have this set of spring loaded punches that both punch a hole and set the eyelet. One of my most useful tools that I’ve had for years!
String or Ribbon
Here’s the video tutorial! You can see how that spring loaded hole punch and eyelet tool works, how to use the fusible web, and ideas for the optional decorative stitching in this walkthrough.
Gift Tag Instructions
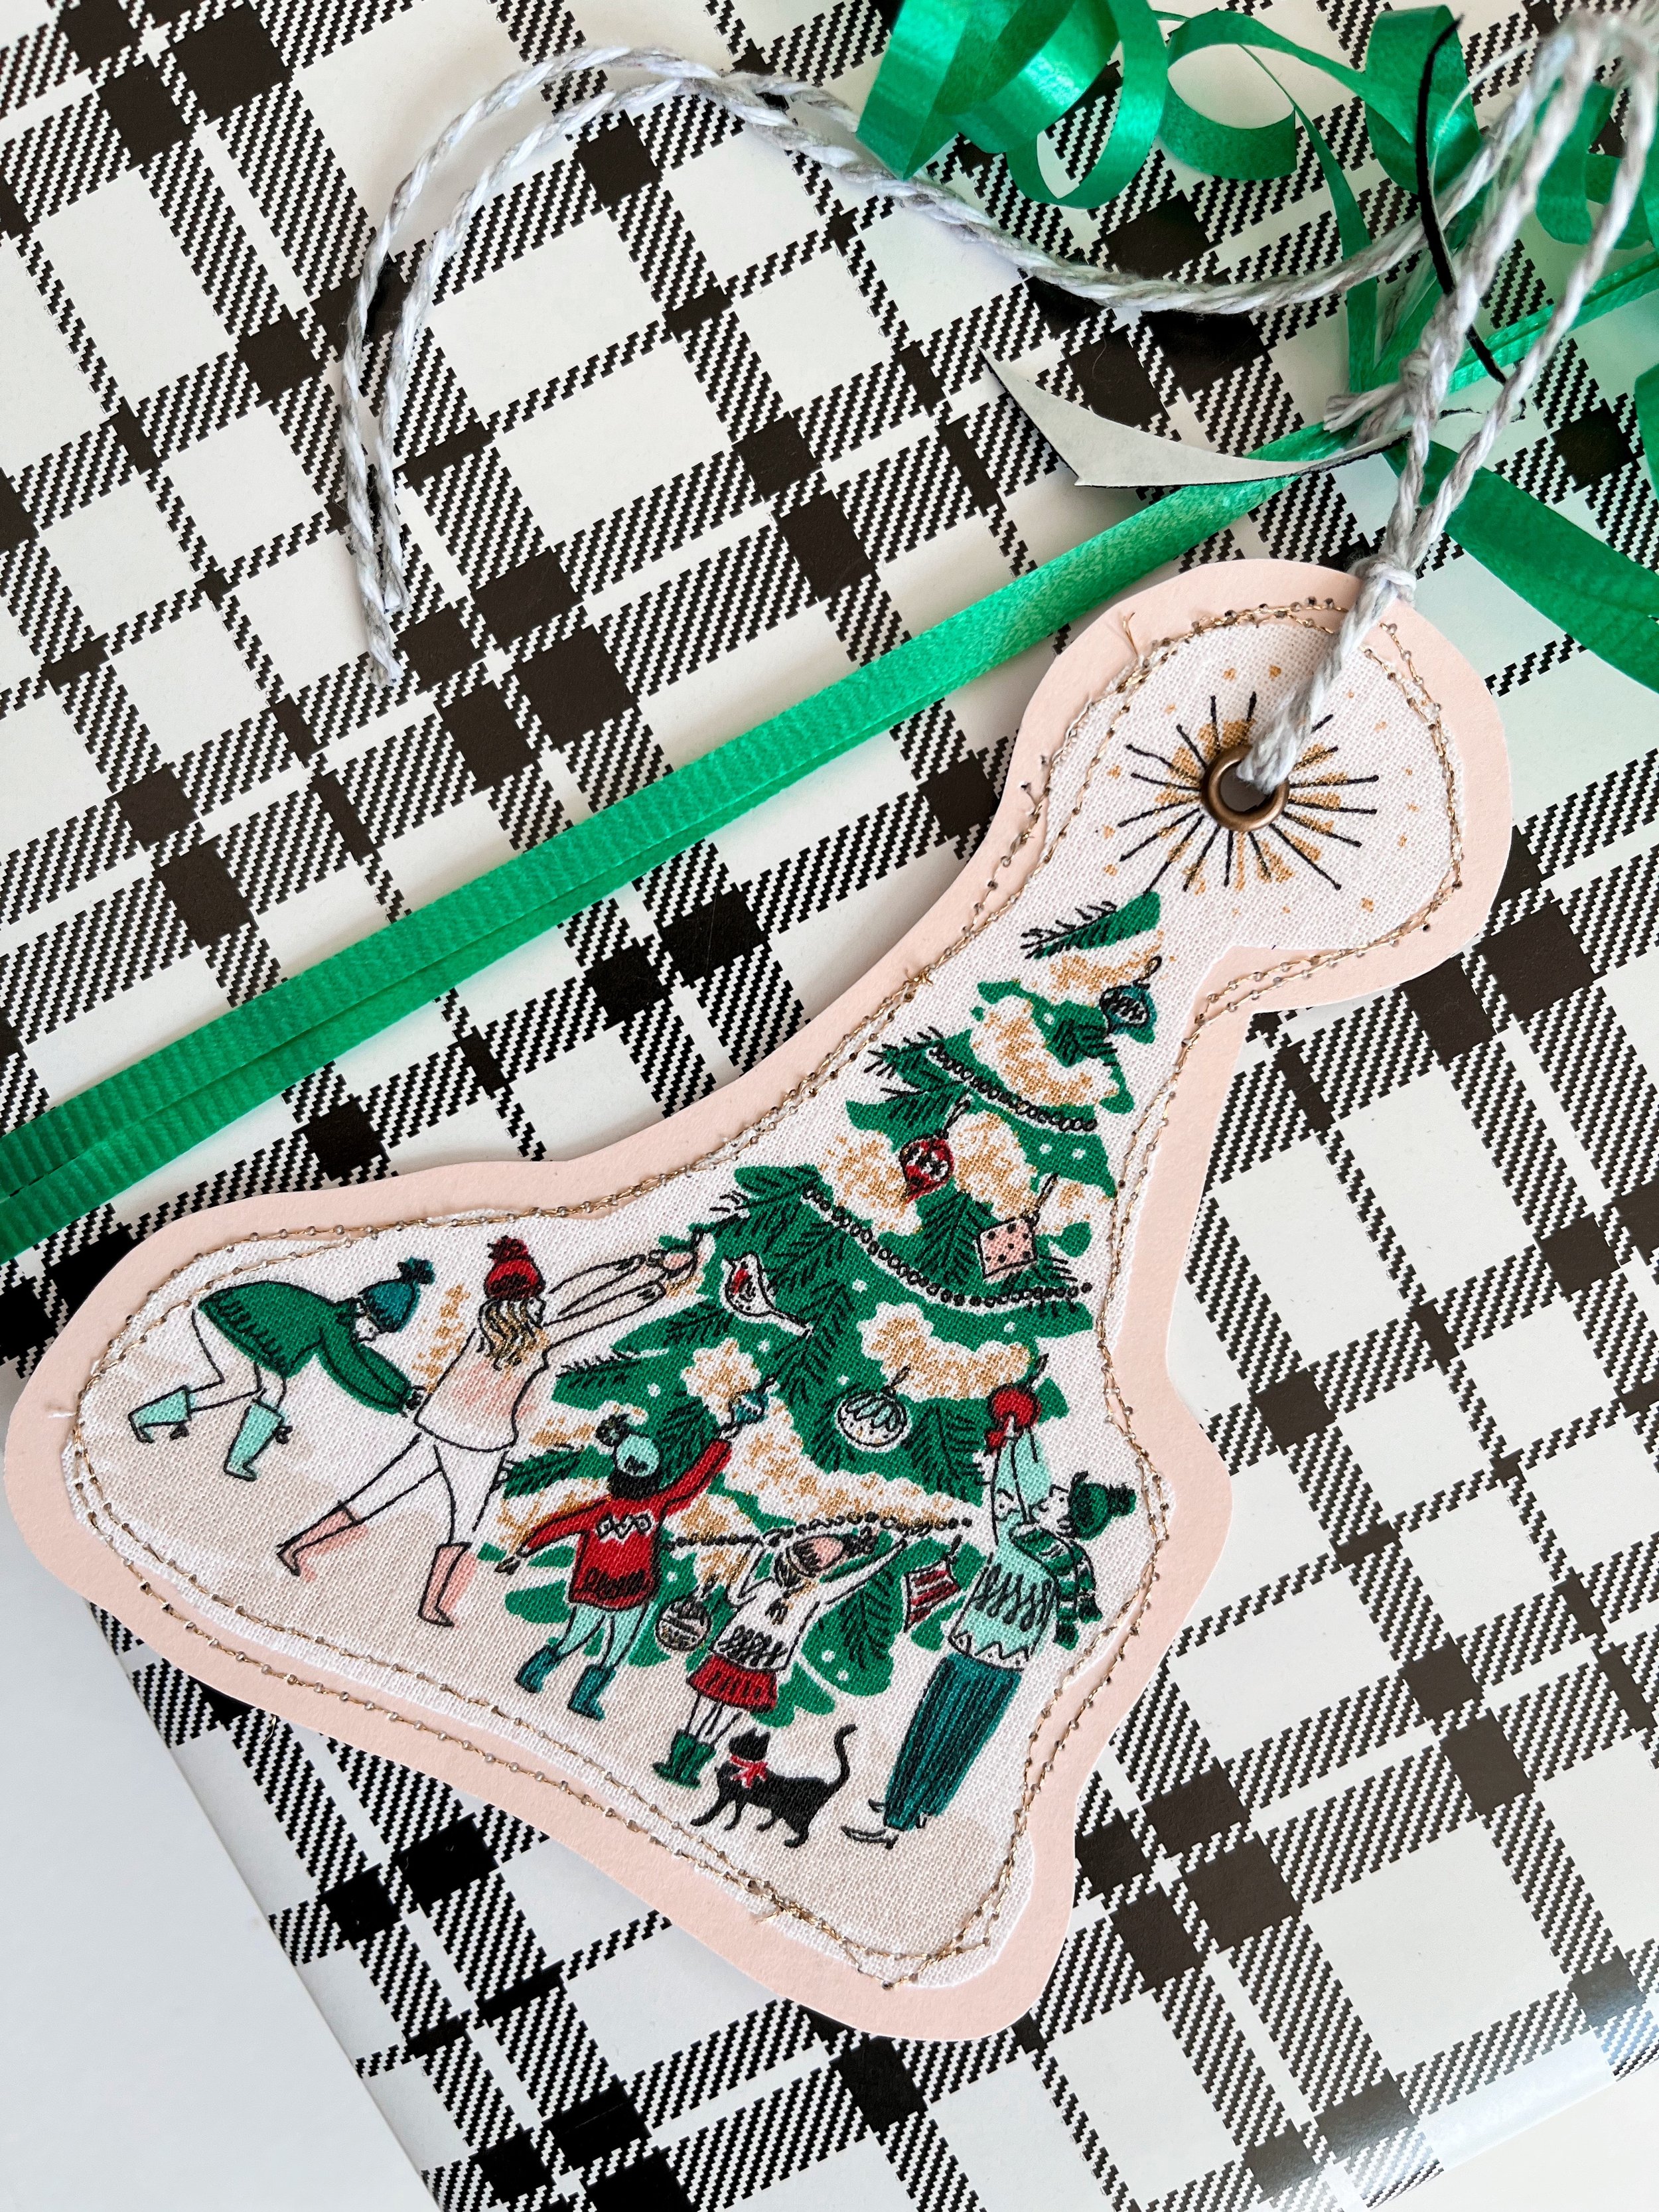
The first thing to note is that you don’t have to have gift tag shaped fabric to make this project! I made some tags out of all kinds of Christmas prints, including this pretty little Christmas tree scene. The instructions are the same, not matter which fabric you’re using!
Here’s the basics!
First, fuse a piece of your fusible web to the back of the fabric motif you want on your gift tag. The fusible web should more the cover the picture you’re going to cut out, don’t cut it to size beforehand.
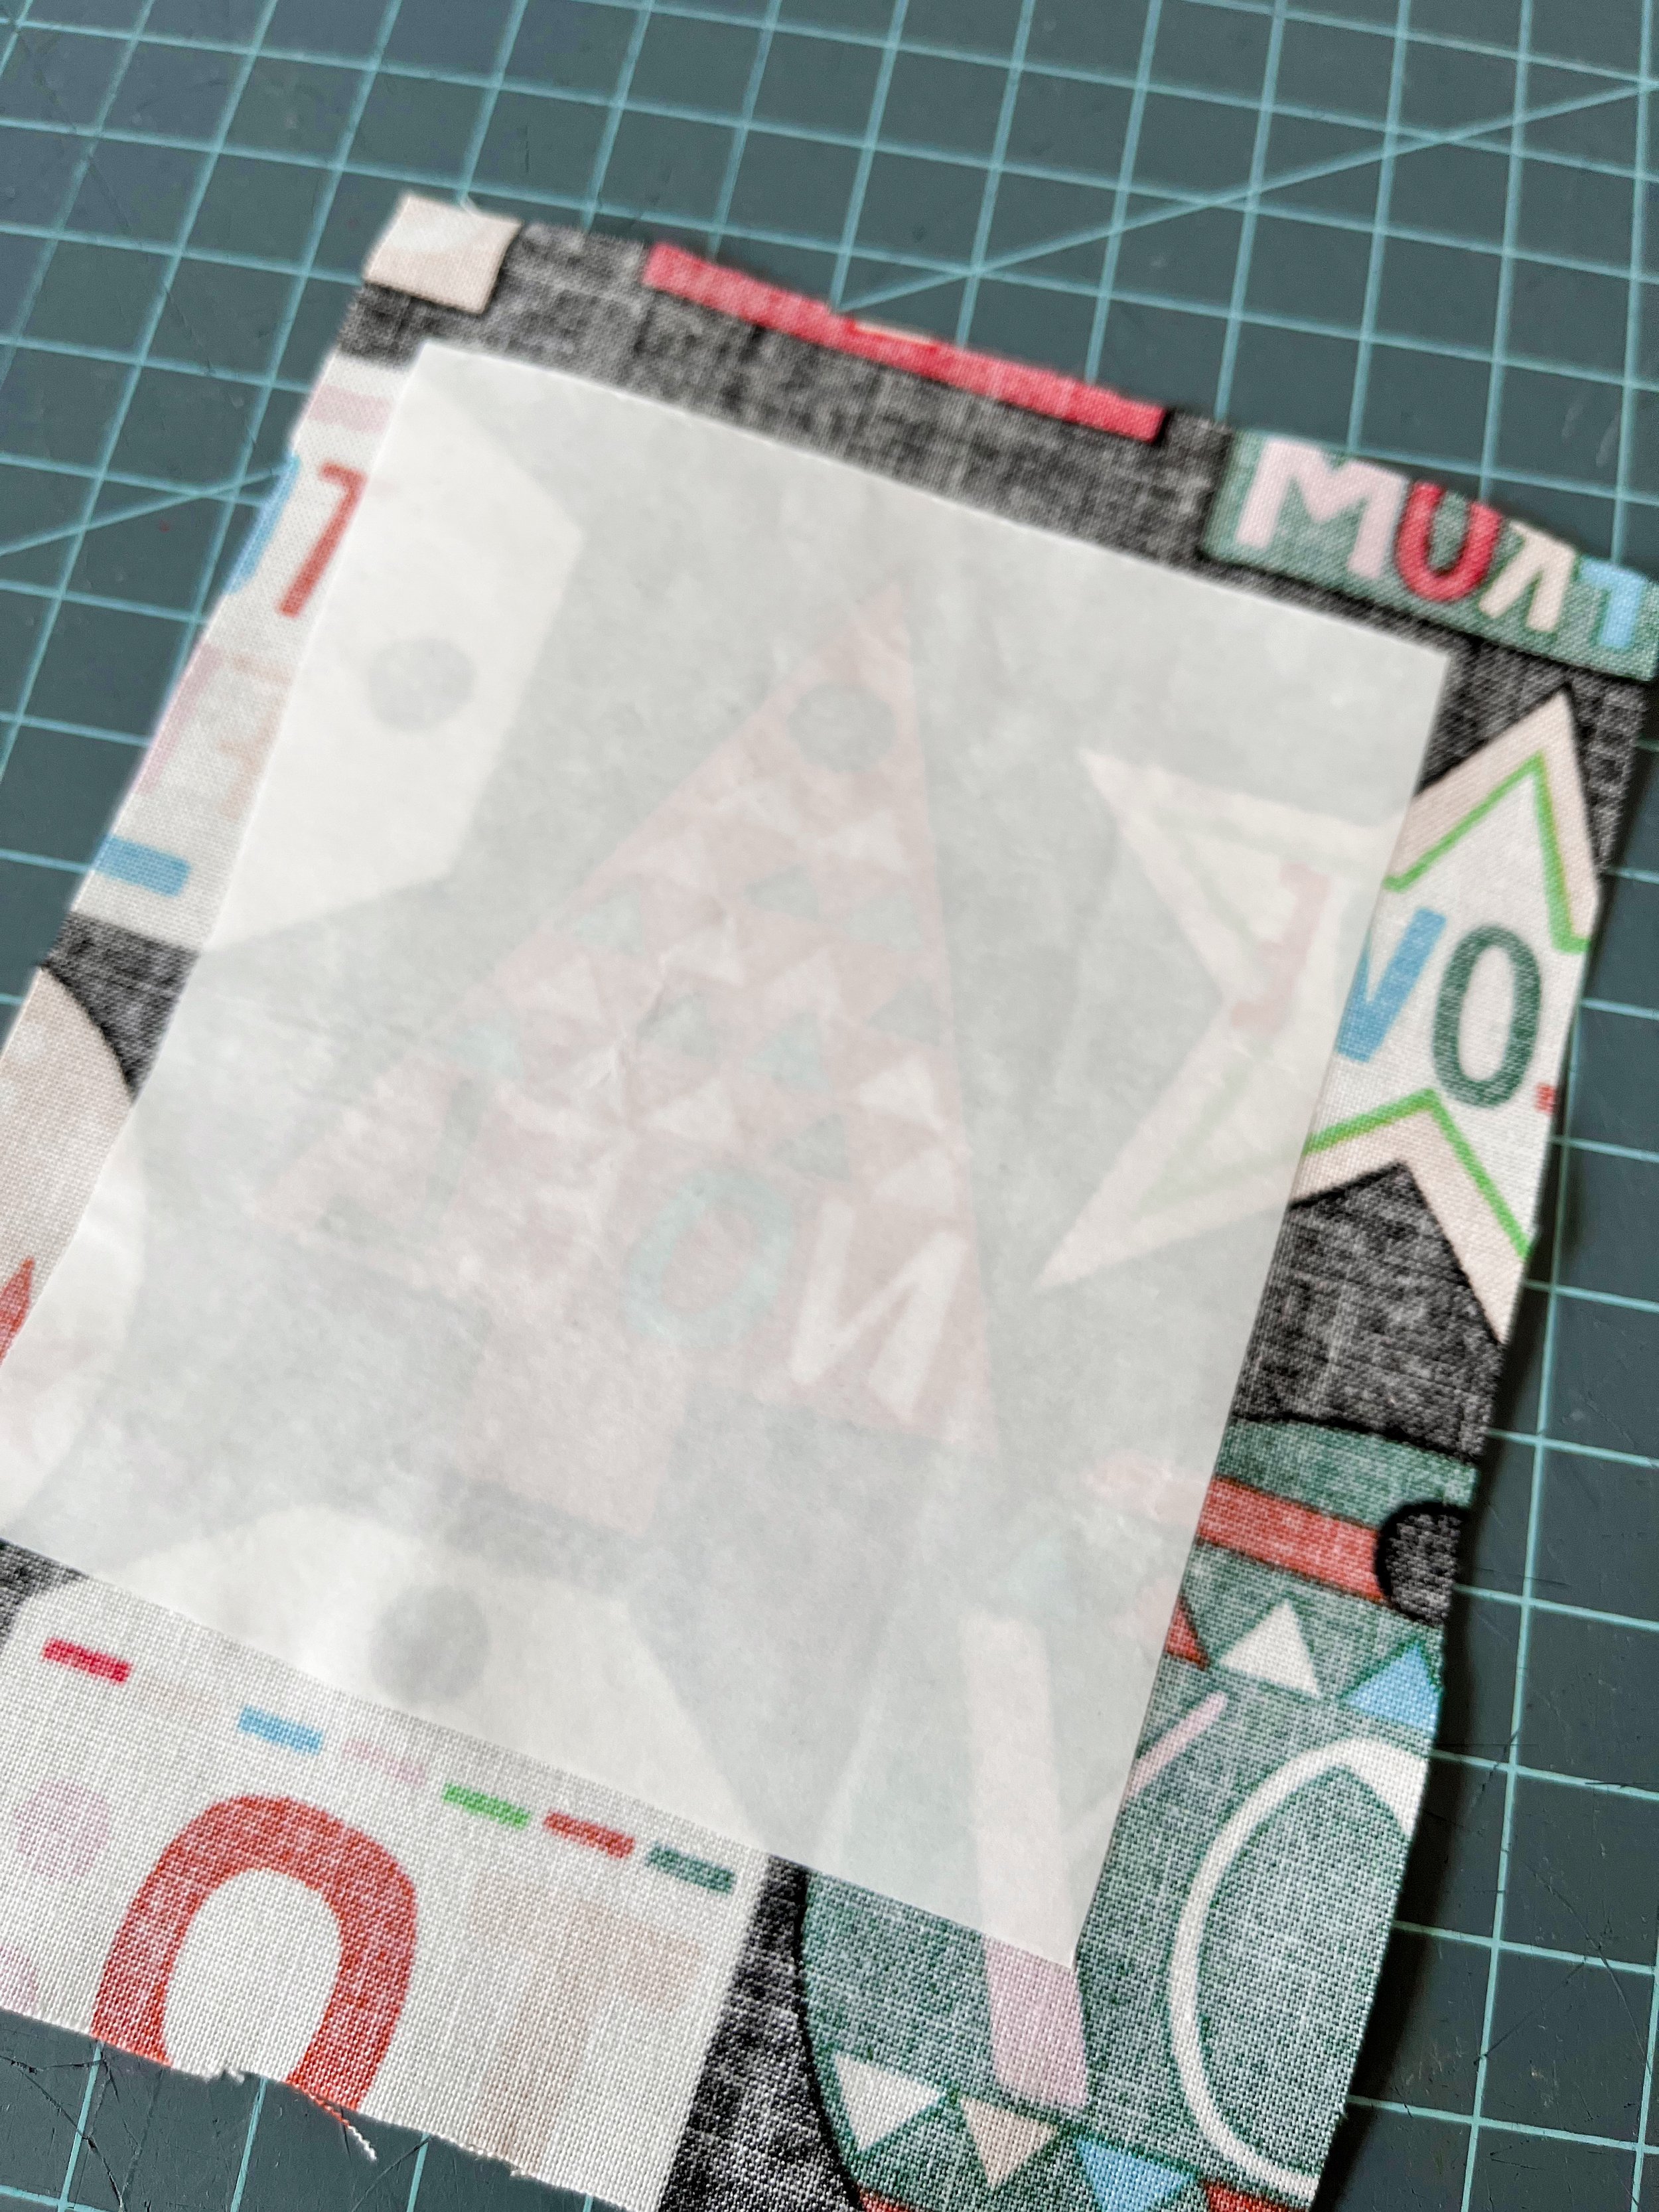
Now it’s time to cut the shape out. I cut my shapes out by leaving about 1/4” of a border around the motif. Once it’s cut, remove the paper backing and iron the cut out piece onto a piece of card stock. You can iron on paper, it won’t hurt a thing!

Cut out the card stock, leaving about a 1/4” border around your fabric picture.
You can leave it like this, punch your hole and be done, or you can add some dimension by stitching around the picture. Yes, you can sew on the card stock! I used a fun gold metallic thread and it really looks cool! On some of my gift tags, I sewed twice around the motif, trying not to be too precise so that the lines looked doodly. On others, I sewed a zig zag around the edge and I really love how that looks too.
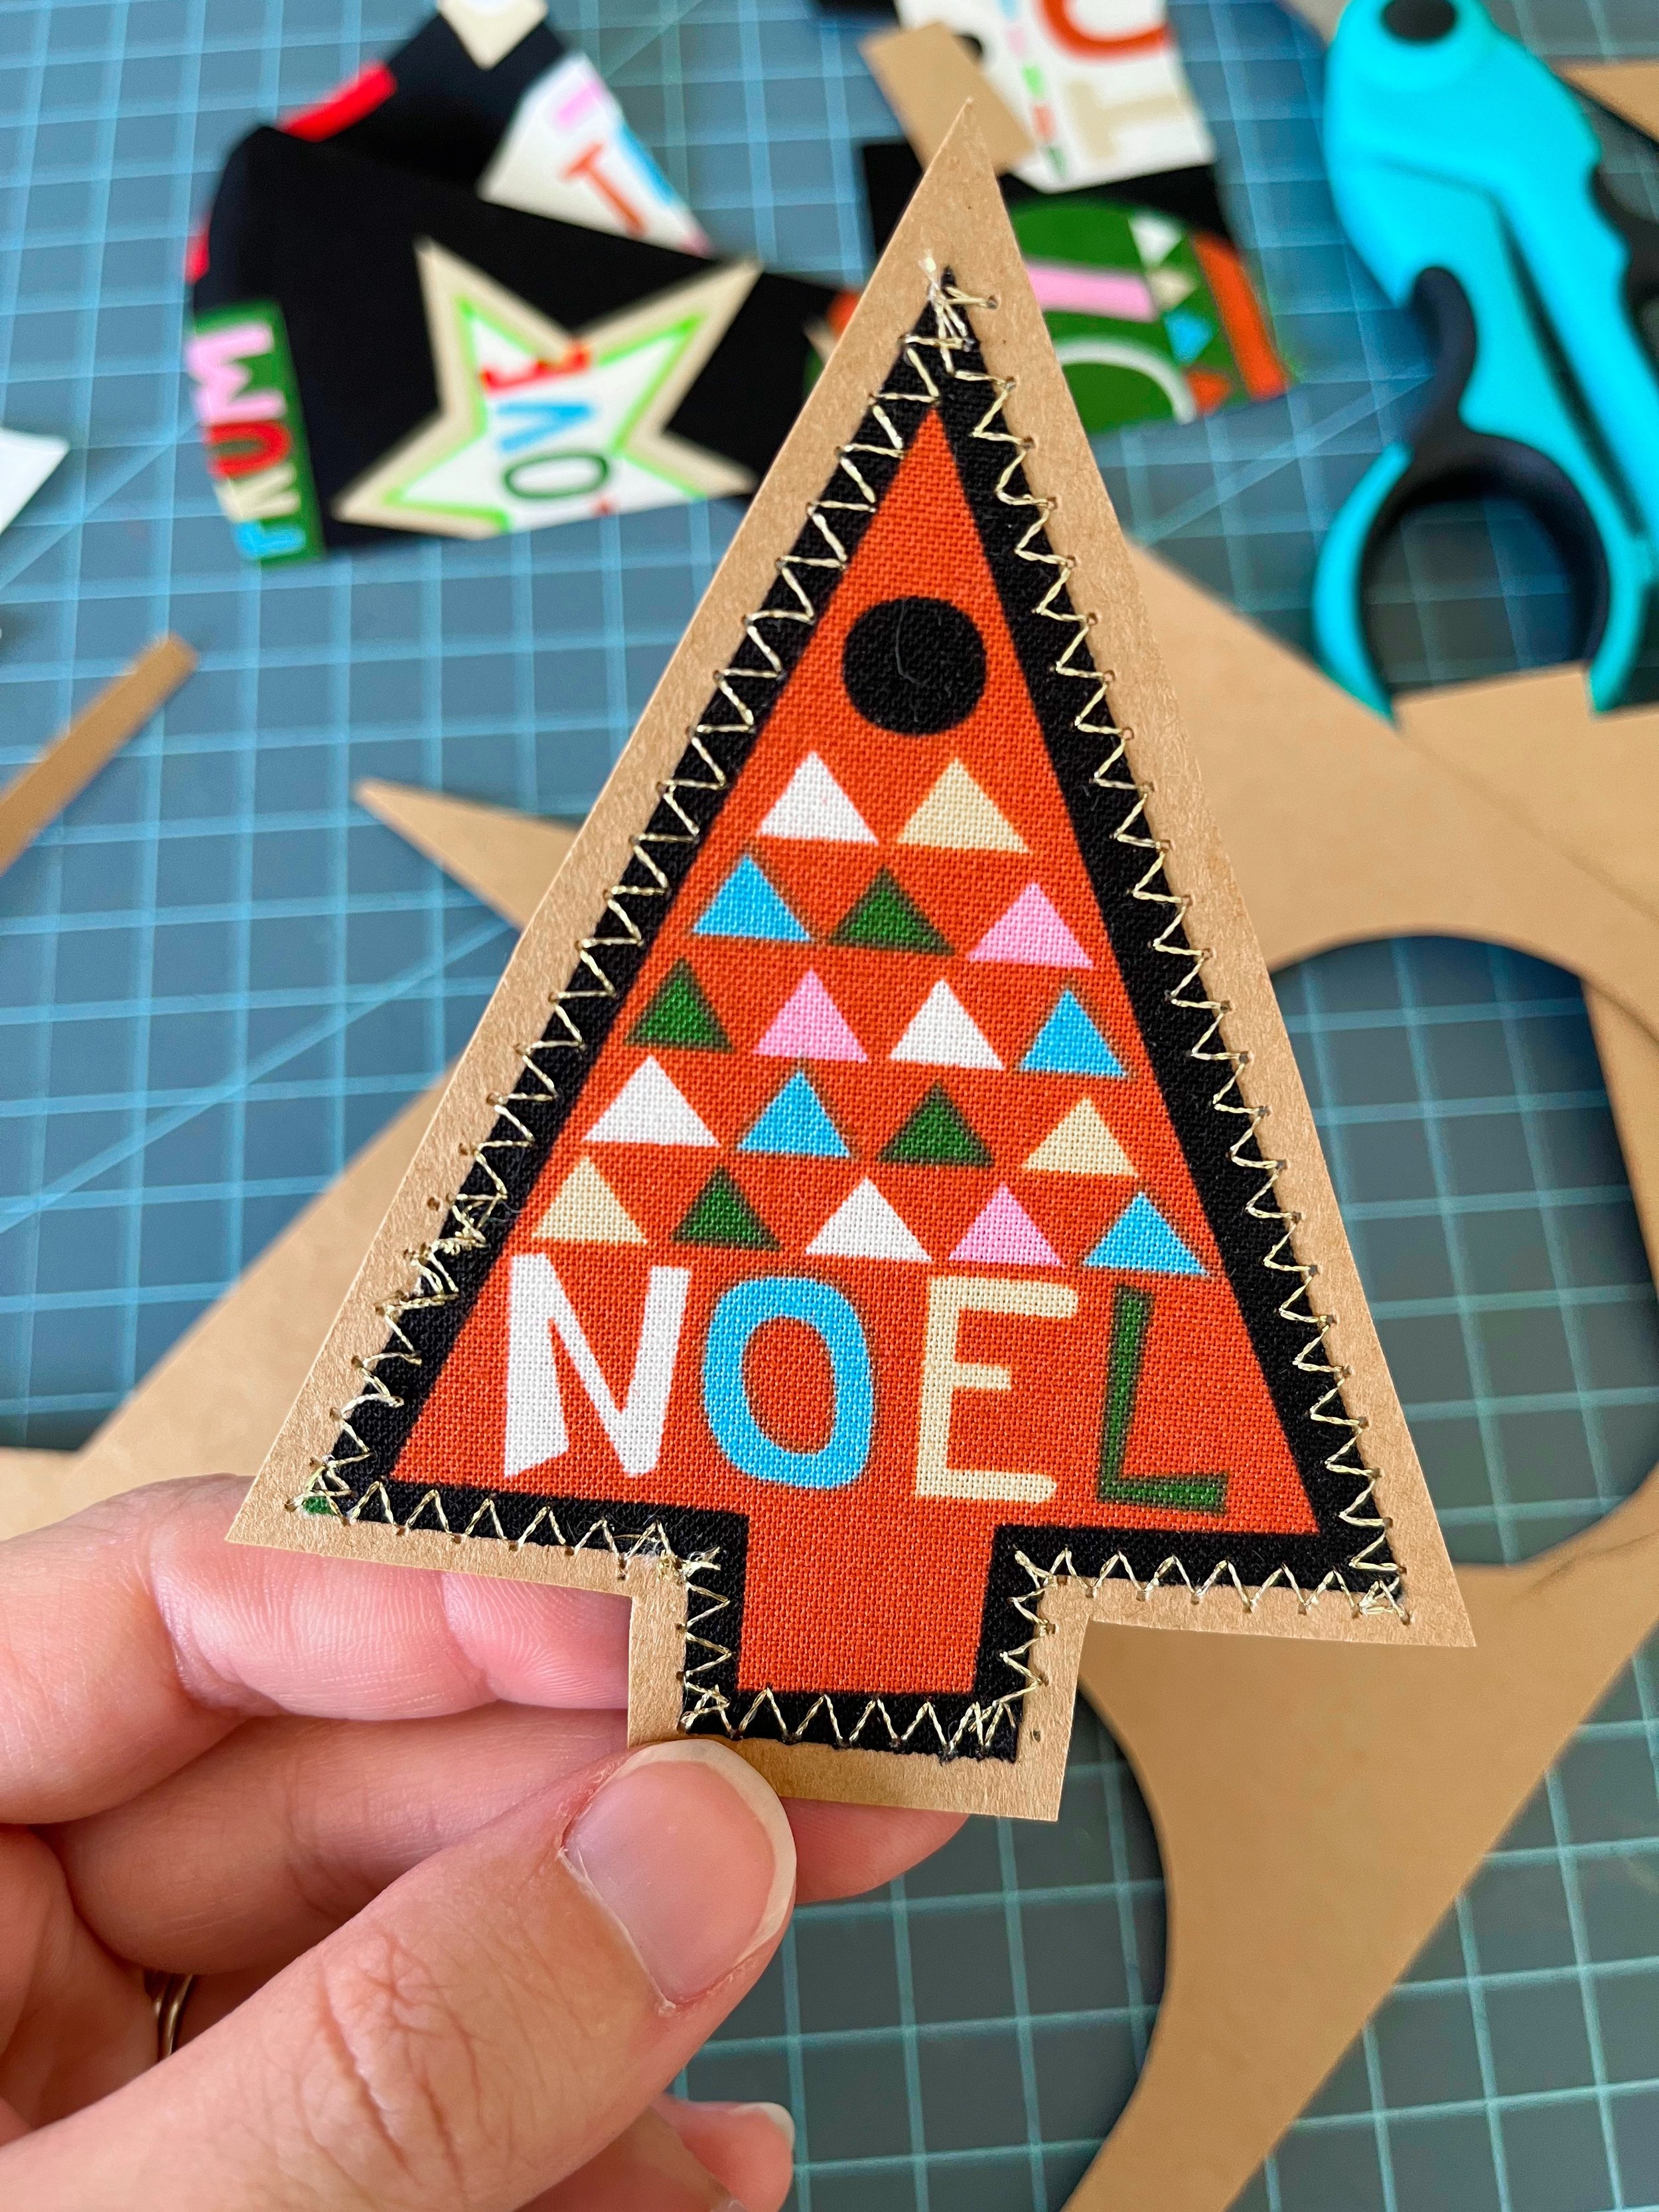
Lastly, punch a hole in the top of the tag, install an eyelet if you want, and thread your ribbon or string through it.
My hole punch/eyelet setter is very handy here! It’s actually a scrapbooking tool that I got many moons ago, but I use it in my sewing room so often. I’ve even punched extra holes in belts with it! Super handy and useful.
I also bought a white jelly roll pen that shows up on darker papers to write names on the backs of some of the tags. For the lighter papers, I just use a Sharpie pen, of course.
I hope this project looks fun to you!! I made a bunch in a very short period of time and had a ton of fun doing it. I can’t wait to start wrapping gifts and tying these on :)
Cheers!
Nikki