
How to Read a Sewing Pattern Part 4: Reading the Instructions
This post my contain affiliate links, which means that while I am not paid to promote certain items, I will earn a small commission should you purchase items through these links. For more info, see my disclosure policy.
I'm back with part 4 of a series on how to read sewing patterns and today we're going to learn to decipher the instructions! If you haven't read the rest of the series yet, here are some links:
Part 1: Choosing your pattern and reading the envelope

Did you ever take those quizzes in school, where the first instructions was to read all the instructions and the last instruction was to ignore every instruction after the first one? So you looked like a total idiot if you skipped reading the instructions? Yeah, well, when reading sewing patterns, I'm going to tell you NOT to read all the instructions before you start. If you're a beginner at using patterns, reading all that stuff with all those drawings is just going to overwhelm you. Thus, today's Pro Tip: Just take it one step at a time!
We talked about the first page of instructions already when we learned to use the cutting diagrams in part 3, but there's some more important information on that sheet. In time, you won't need to refer to this page at all, but for starting out, if you're having a hard time knowing what the instructions mean by certain terms, go back to your "General Instructions" and chances are you'll find your answer. See below the glossary of terms on a pattern I cut out to make today.
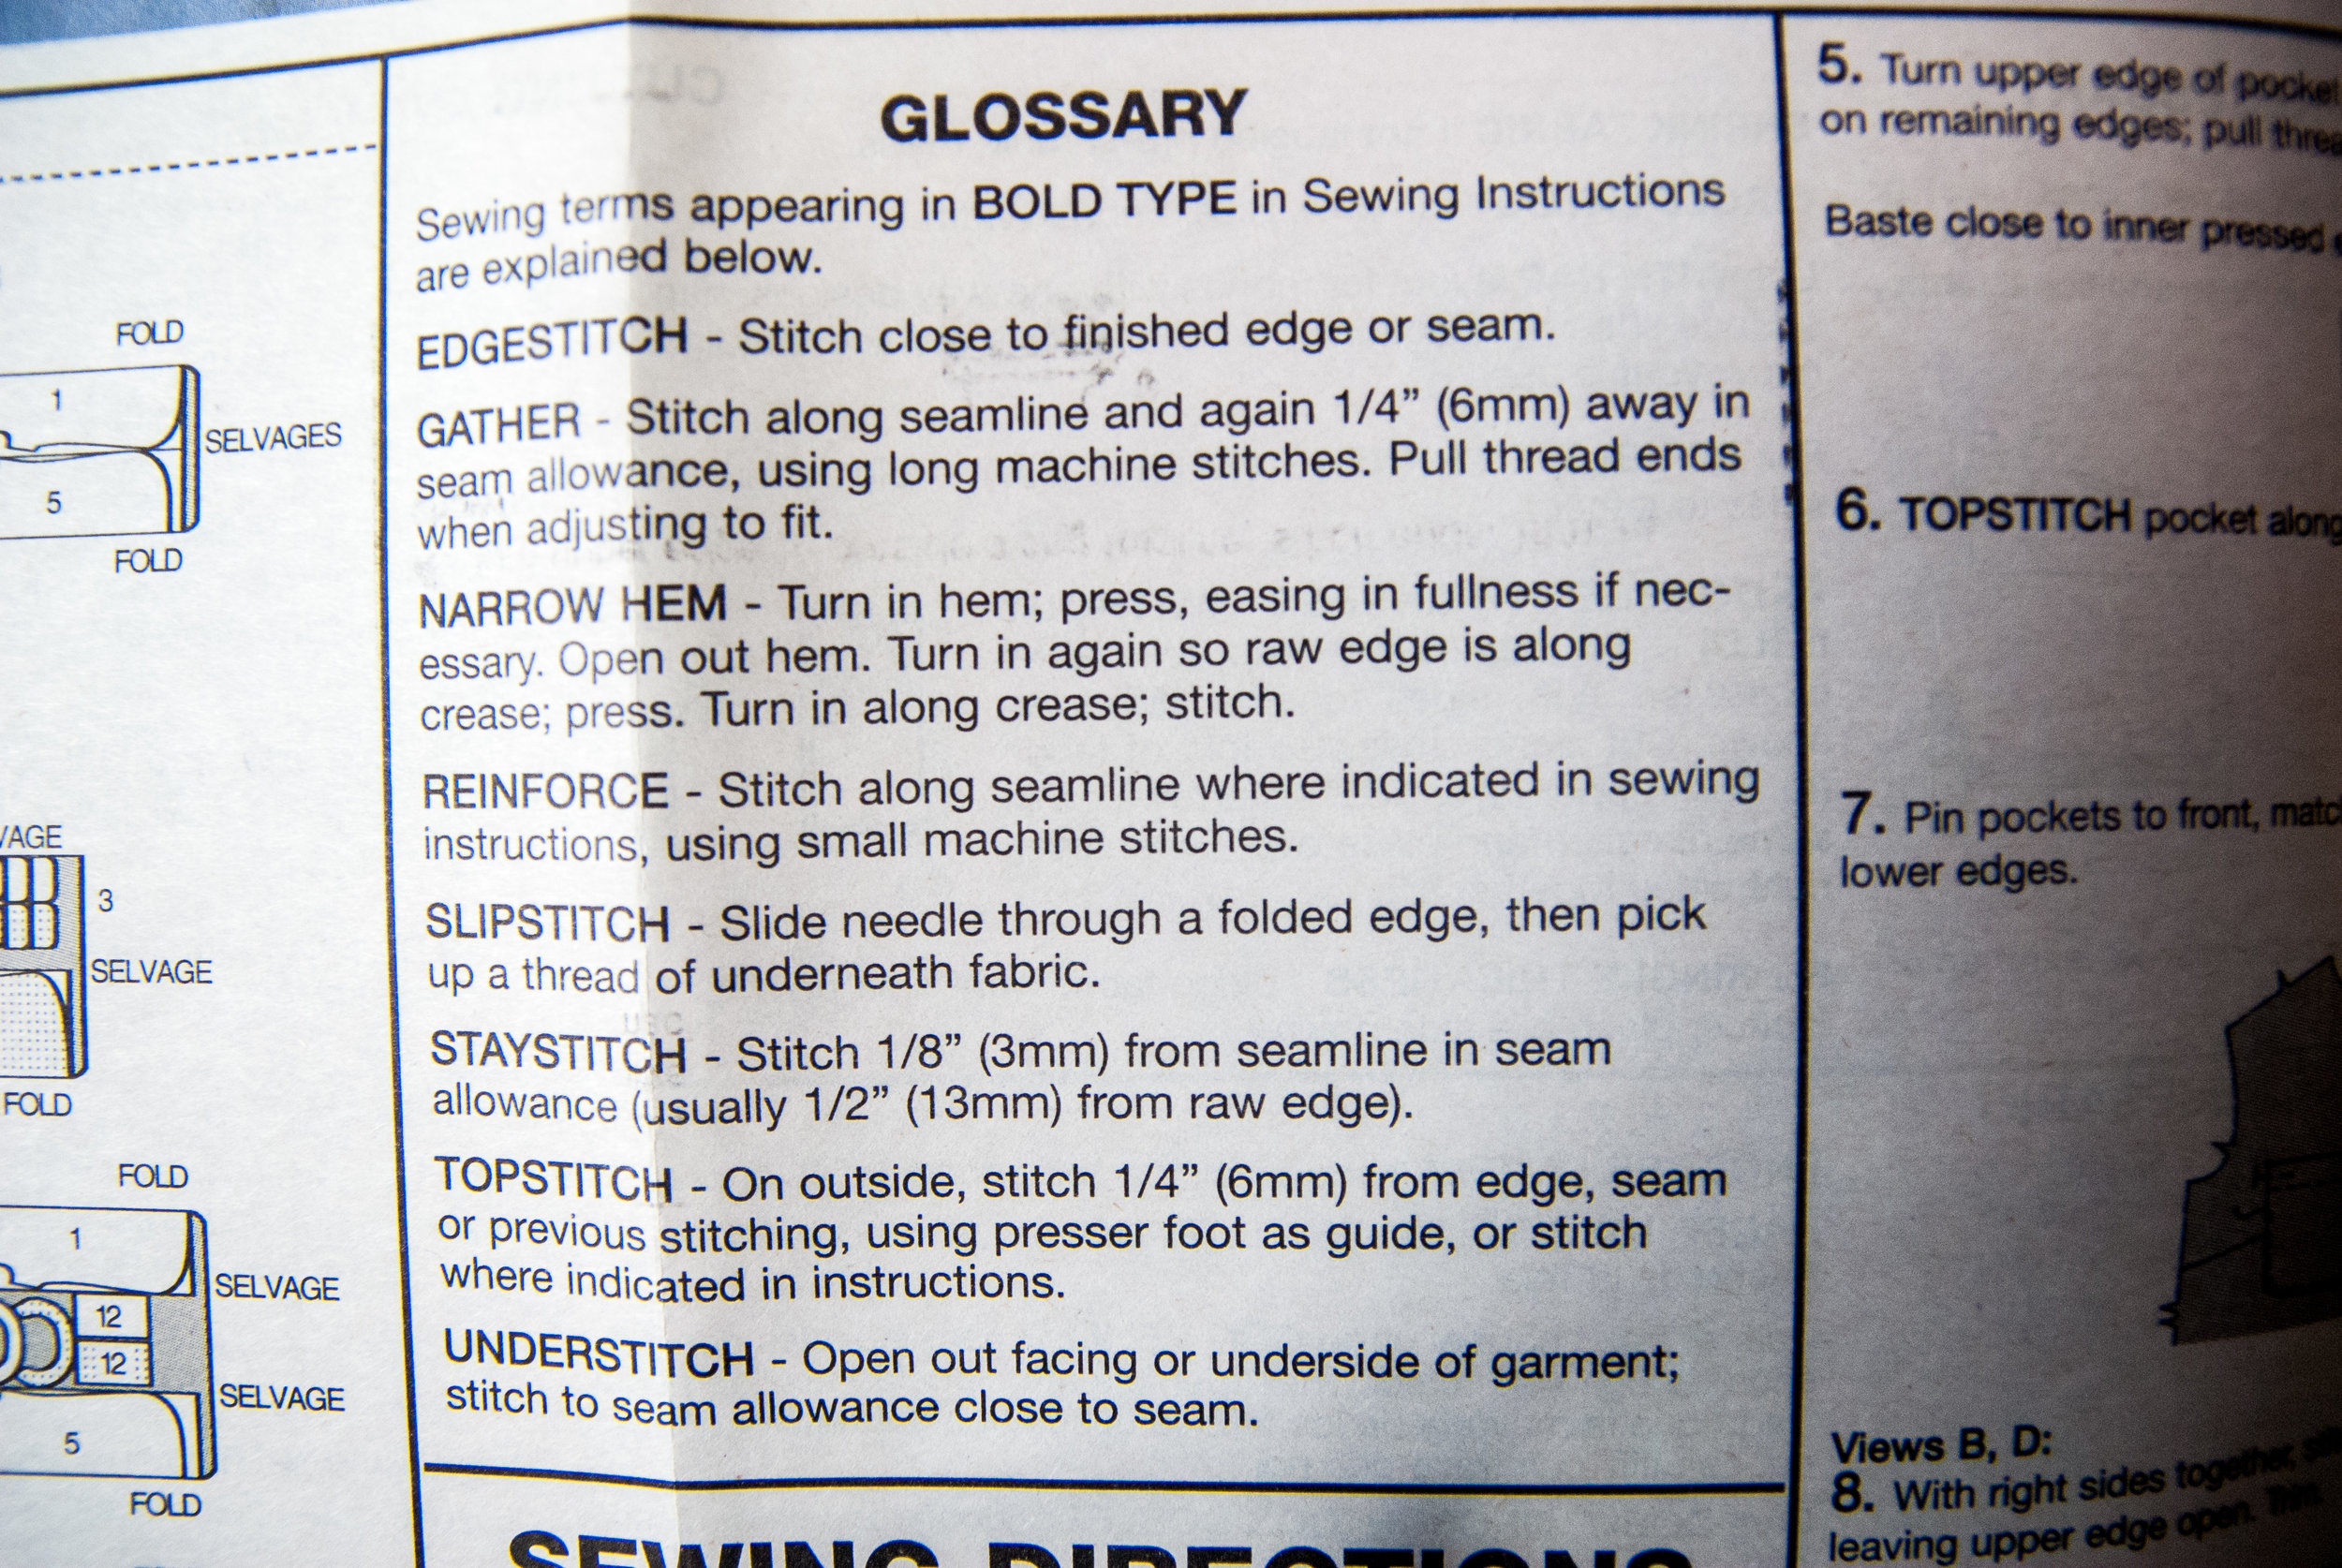
I know, those are very short descriptions, but it's okay because we have the Internet, ha! I promise you'll find plenty of videos or more thorough explanations of any of these terms with a quick google search.
Also on this page, you'll find your "seam allowance", which is how far from the raw edges you're going to be sewing unless otherwise instructed on certain steps. For garment sewing, seam allowances are almost always 5/8" (in the U.S., at least). If you have trouble knowing where that is on your machine, use your gauge to measure from the needle and stick a piece of washi tape there as a guide. I do this for my sewing students quite a bit to help them stay on their seam allowance!

You can also see in the above photo, along with the seam allowance, there's a fabric key. In the drawings throughout the instructions, you'll come across these textures to help you see which parts in the drawings are the right or wrong side of the fabric, for example.
The last bit of good info on this sheet is about pattern markings. You may have noticed when you cut out your pieces, there are notches, circles, squares and/or triangles all over them. These markings are important! You'll find your own favorite methods of marking, but I'll share some of what I do after this next photo.

Most of your markings will be notches and these help you line up your pieces correctly when sewing them together. I cut a small snip (not too big, maybe 1/4" so it's well inside my seam allowance). For the circles, squares and triangles, different people have different preferred methods. A collection of marking pens and tailors chalk is a good thing to have on hand. I don't like marking with these things, so I almost always just mark with pins by picking up a couple threads with a pin in just the right spot. This works for me, but experiment with the tools available to you and decide what you like best. Megan Nielsen has written an excellent article on five ways to make your pattern markings. To make these markings, simply stick a pin through the circle on the pattern piece and then mark each fabric layer right on the pin.

See that pin in my dart circle?
You're officially ready to start sewing! And remember, just take it one step at a time!
Trying to write a post covering every new thing you'll encounter as you sew various patterns would be impossible, but here are my three pieces of advice as you work through the instructions:
- Trust the process. Some steps may not make sense at first, but they're in there for a reason, so don't skip them.
- Us the Internet! One of the best things about people who sew is that they love to help others learn to sew too and there is so much content online to help you with those steps you don't understand.
- Press as you go. You can always tell when a handmade garment has not been properly pressed! Make friends with your iron, because it is an essential tool in sewing. When the instructions say press, you'd better press! I use Shark irons in my studio and I love them. And remember, pressing is different that ironing!
I hope this series has helped you feel prepared to tackle sewing with patterns! Part 5 will be about fitting garments as you go, so stay tuned for that next week. Cheers!