How to Install and Sew with a Walking Foot
I recently highlighted some sewing tools I’m a huge fan of, one of them being a walking foot attachment for my sewing machine. Since this is such an essential tool for me, I was so surprised at how many comments I received from people who either had one and had no idea what it was for up until that point, or people who had never even heard of one!
So I got to work making a video on exactly what a walking foot is, why you need one in your sewing life, and also how to install it properly on your sewing machine. I’ll include that video at the end of the post, or you can watch it here, but if you prefer reading over watching, I’m going to put all that info in this blog post too. So keep reading to learn all about the walking foot!

What is a walking foot and why do you need one?
A walking foot, sometimes called an even feed foot, is an attachment for your sewing machine that helps multi-layered, bulky, slippery, stretchy, or even sticky fabrics move through the machine without bunching, shifting, or puckering. It has feed dogs that move the top layers along at the same rate as your machine’s feed dogs are moving the bottom fabric along from the bottom.
For quilting, the walking foot is absolutely an essential tool! Quilting lines without a walking foot can result in drag lines, bunched up layers, and even distorted finished shapes. The walking foot will eliminate all those issues. Use your walking foot for the top stitching on your quilts, and also for the binding. Small quilt projects, or just generally bulky projects like pouches and bags, or anything with thick interfacing — the walking foot is great for those too.
A walking foot is for more than just quilting, though! It can also be used when sewing silky or slippery fabrics together, which tend to shift when stitching. Fabrics like vinyl that tend to stick and not move smoothly through the machine can sometimes be sewn more easily with a walking foot too.
Sewing knits is probably my second most common use for my walking foot. Stretch knits can be tricky to sew, but with the right needle (ball point!) and a walking foot, you can avoid the puckering, stretching, distorting, and skipped stitches that can happen when sewing knits.
Where to get a walking foot
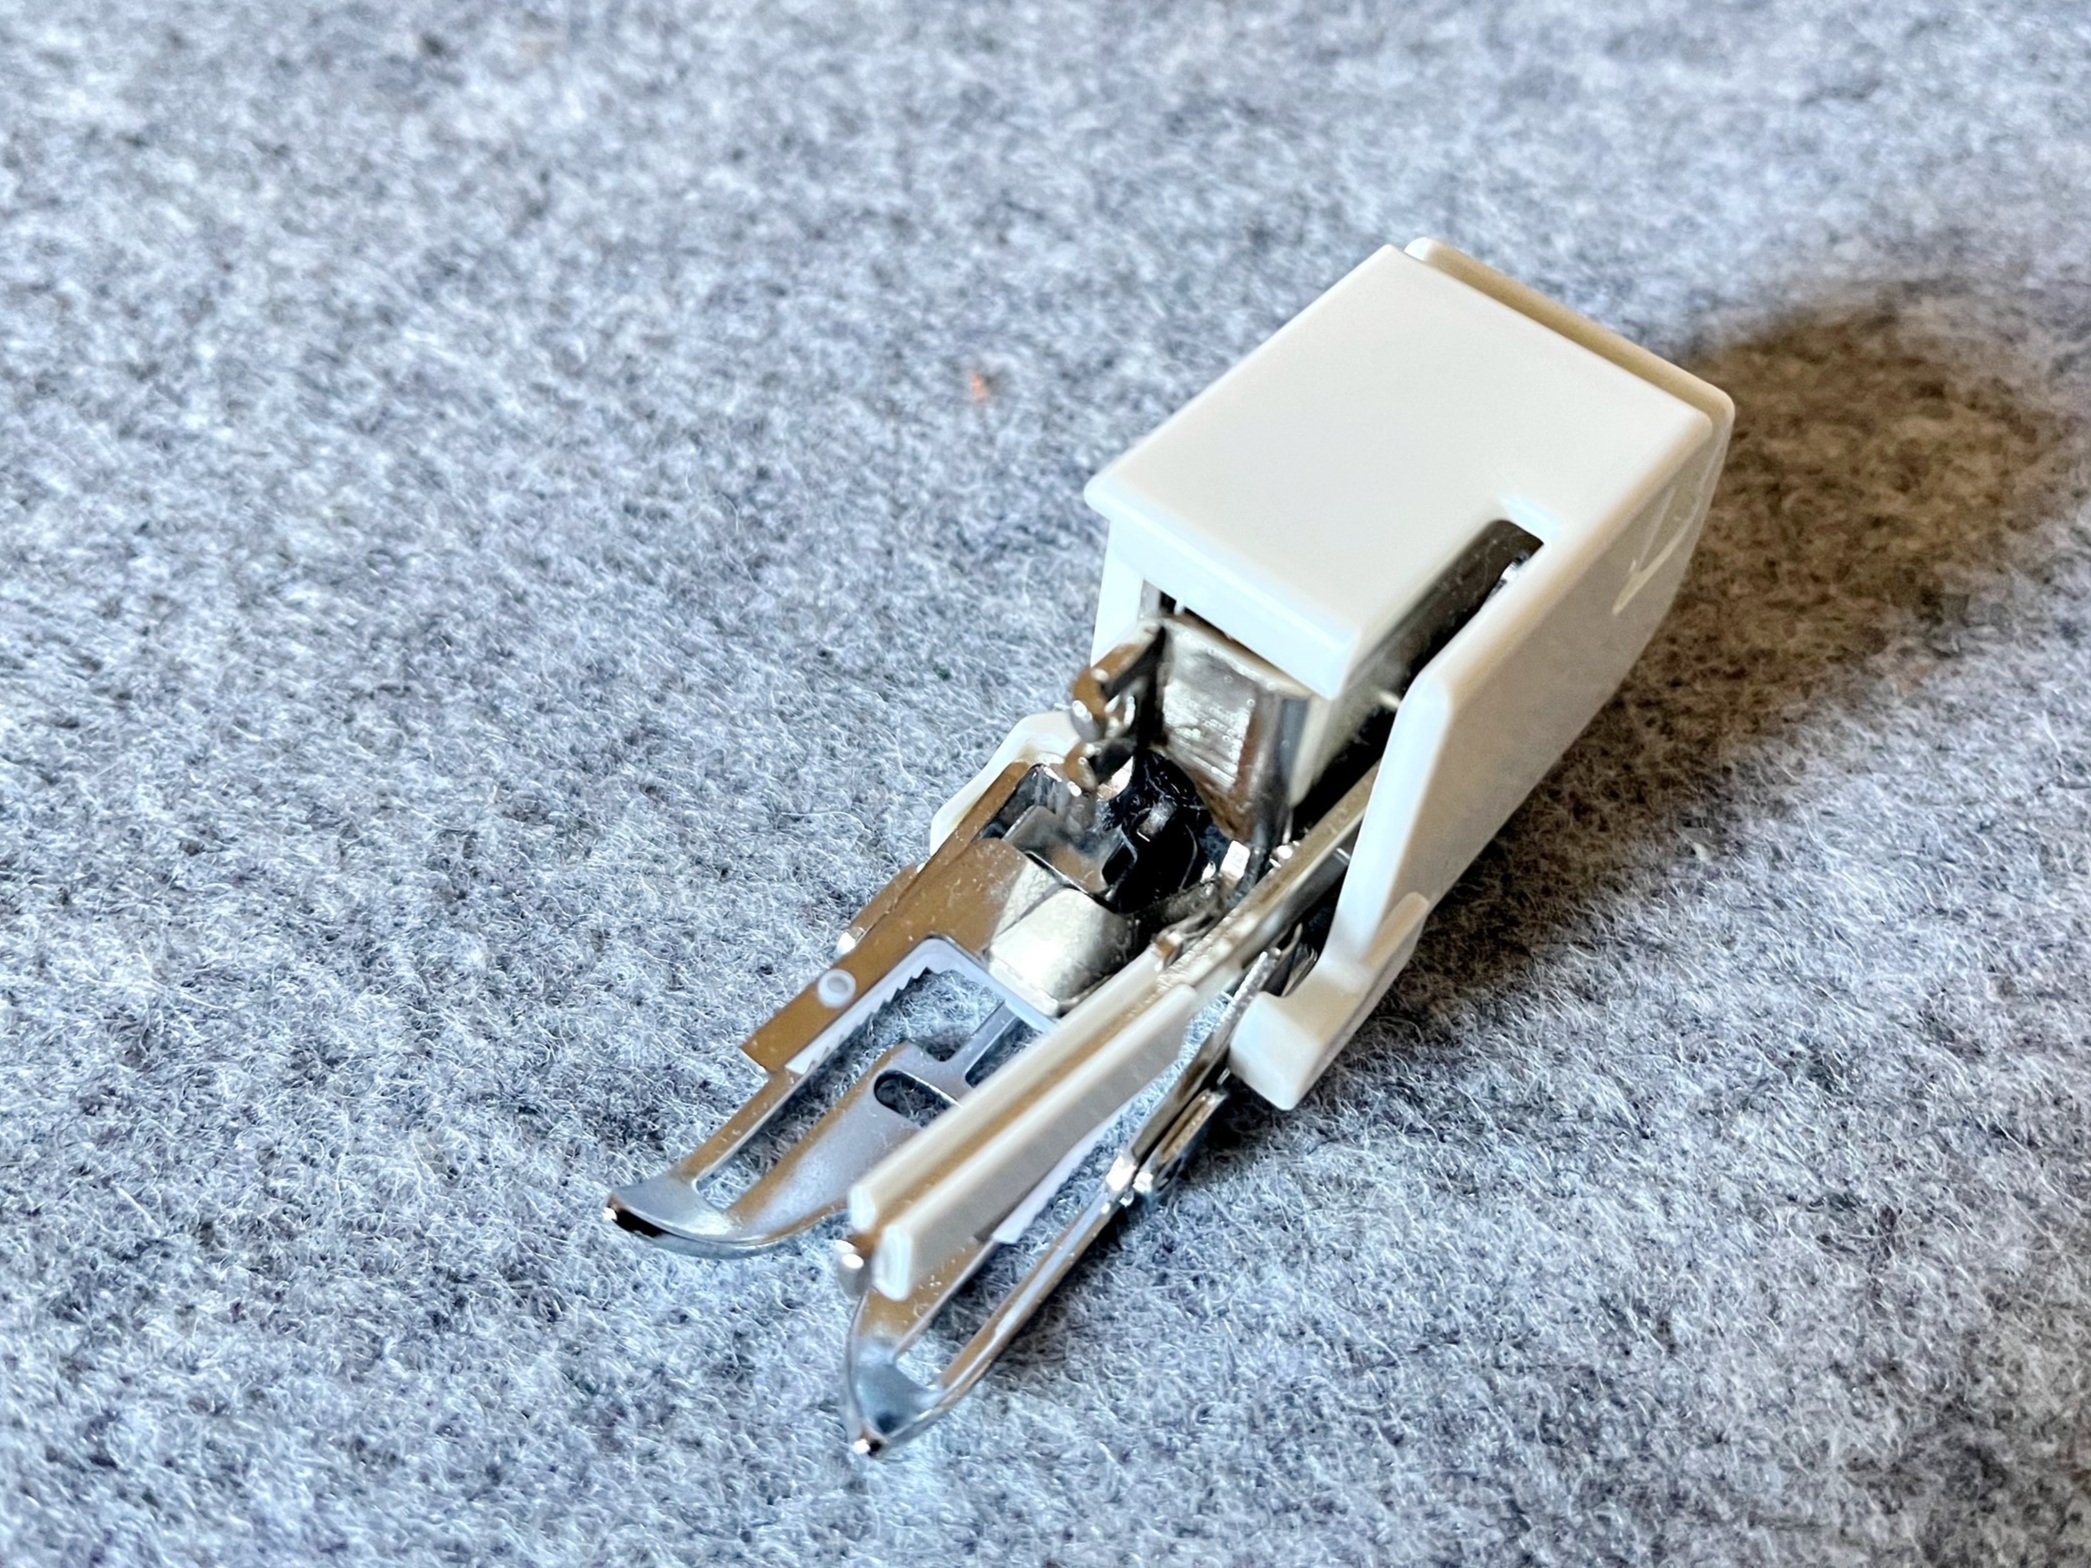
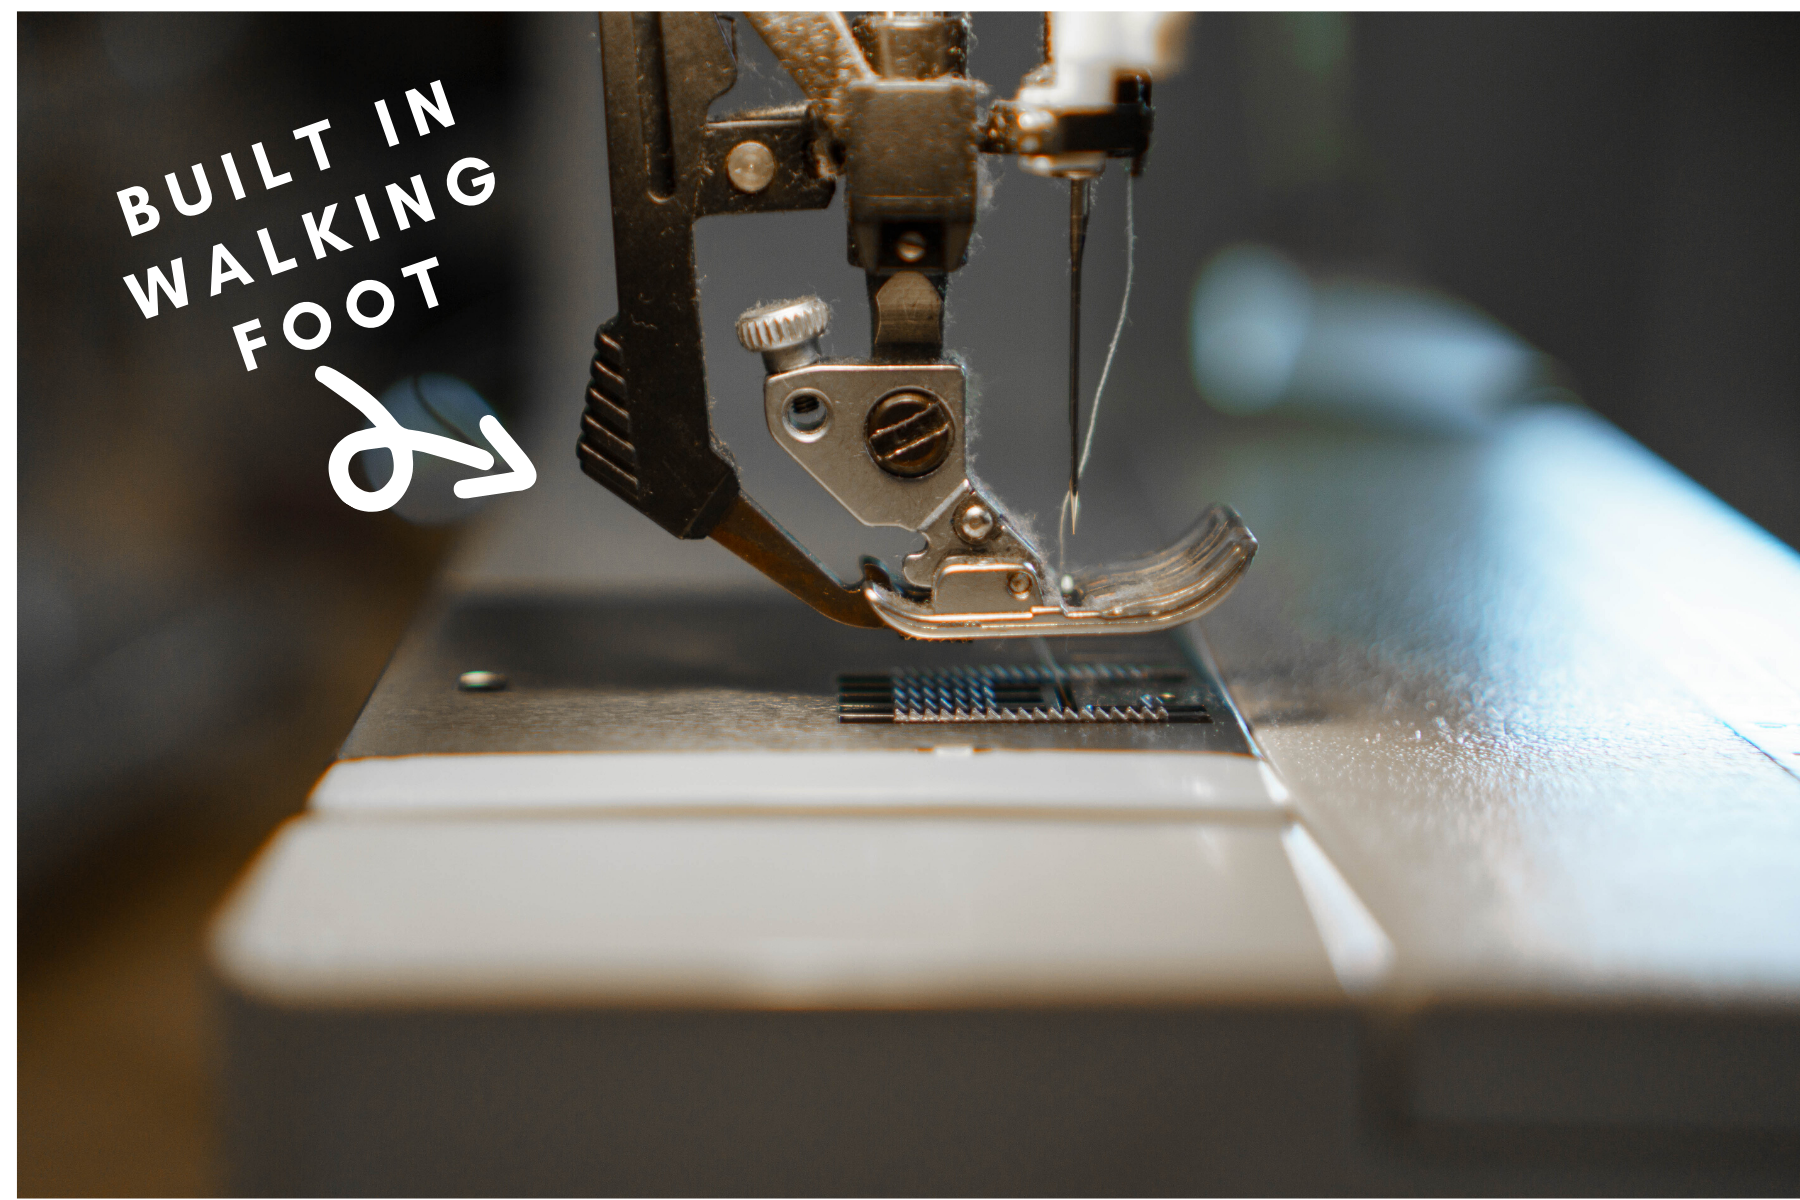
Note that some machines come with a walking foot already built in. Pfaffs have them and some Berninas and Janomes do too. It will look like a shoe shaped lever tucked up behind the presser foot that you can pull down into place.
My Janome did not come with one, so I ordered the one specifically made for my machine. The machine was a big purchase for me, so I wanted to get the proper walking foot, even though it was pricey. A good resource for machine-specific parts is Sewing Parts Online.
If you don’t want to spend much, you can get a very inexpensive walking foot on Amazon that will fit most machines! I used these universal walking feet on my student level Brother machines when I taught kids sewing classes and they worked great. I’ve made entire quilts using that walking foot and it worked like a champ.
You will need to know whether or not your machine has a high or low shank before you order a walking foot. If you’re not sure, a quick Google search of your machine model will be able to tell you. Most modern machines, unless they’re semi industrial like mine, are low shank. You can see in the video that the presser foot holder contraption I remove from my machine is taller that most. If yours is the shorter piece, yours is low shank.
Now let’s learn how to attach the walking foot to your machine!

How to install your walking foot
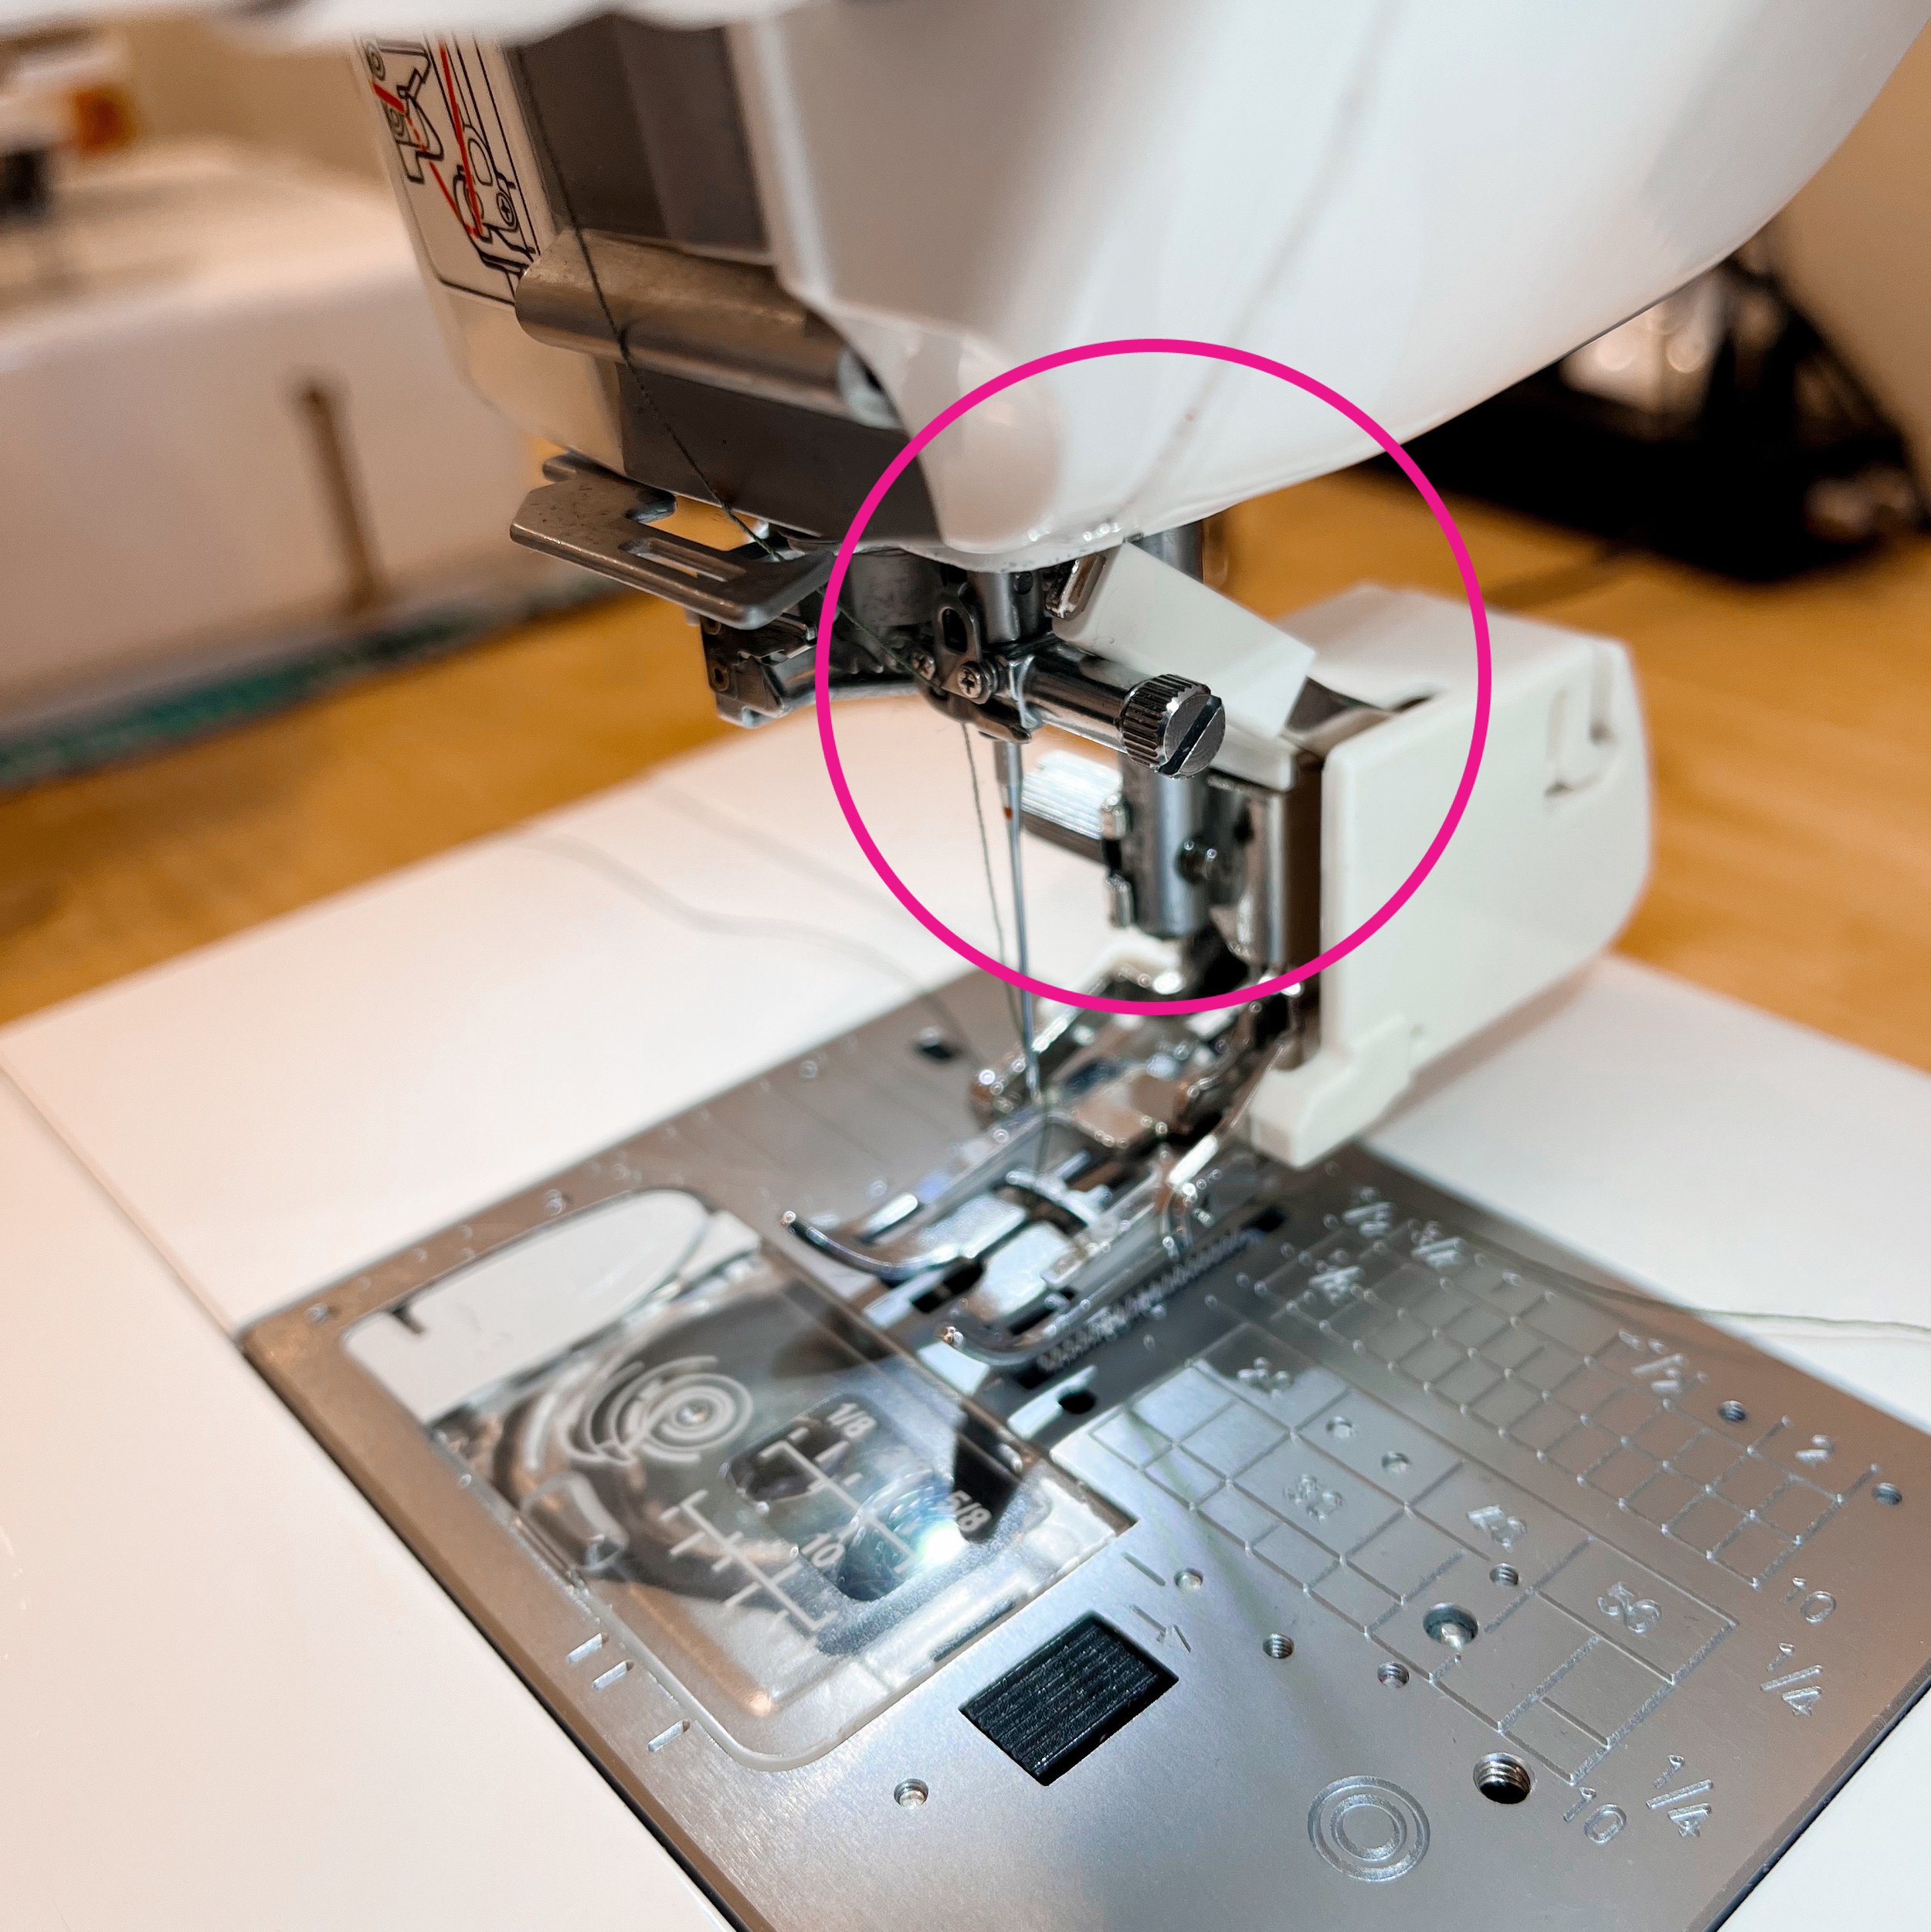
I had some comments from people saying that they had tried to install and use their walking foot and they just couldn’t get it to work right. There is on essential element to be aware of when putting the foot onto the machine and it has to do with the moveable lever on the right hand side of it!
So, to install the walking foot attachment, first you need to remove the presser foot holder from the shank of your machine. Not just the snap on foot, but the entire foot holder that’s held on by a screw. Unscrew that and remove it.
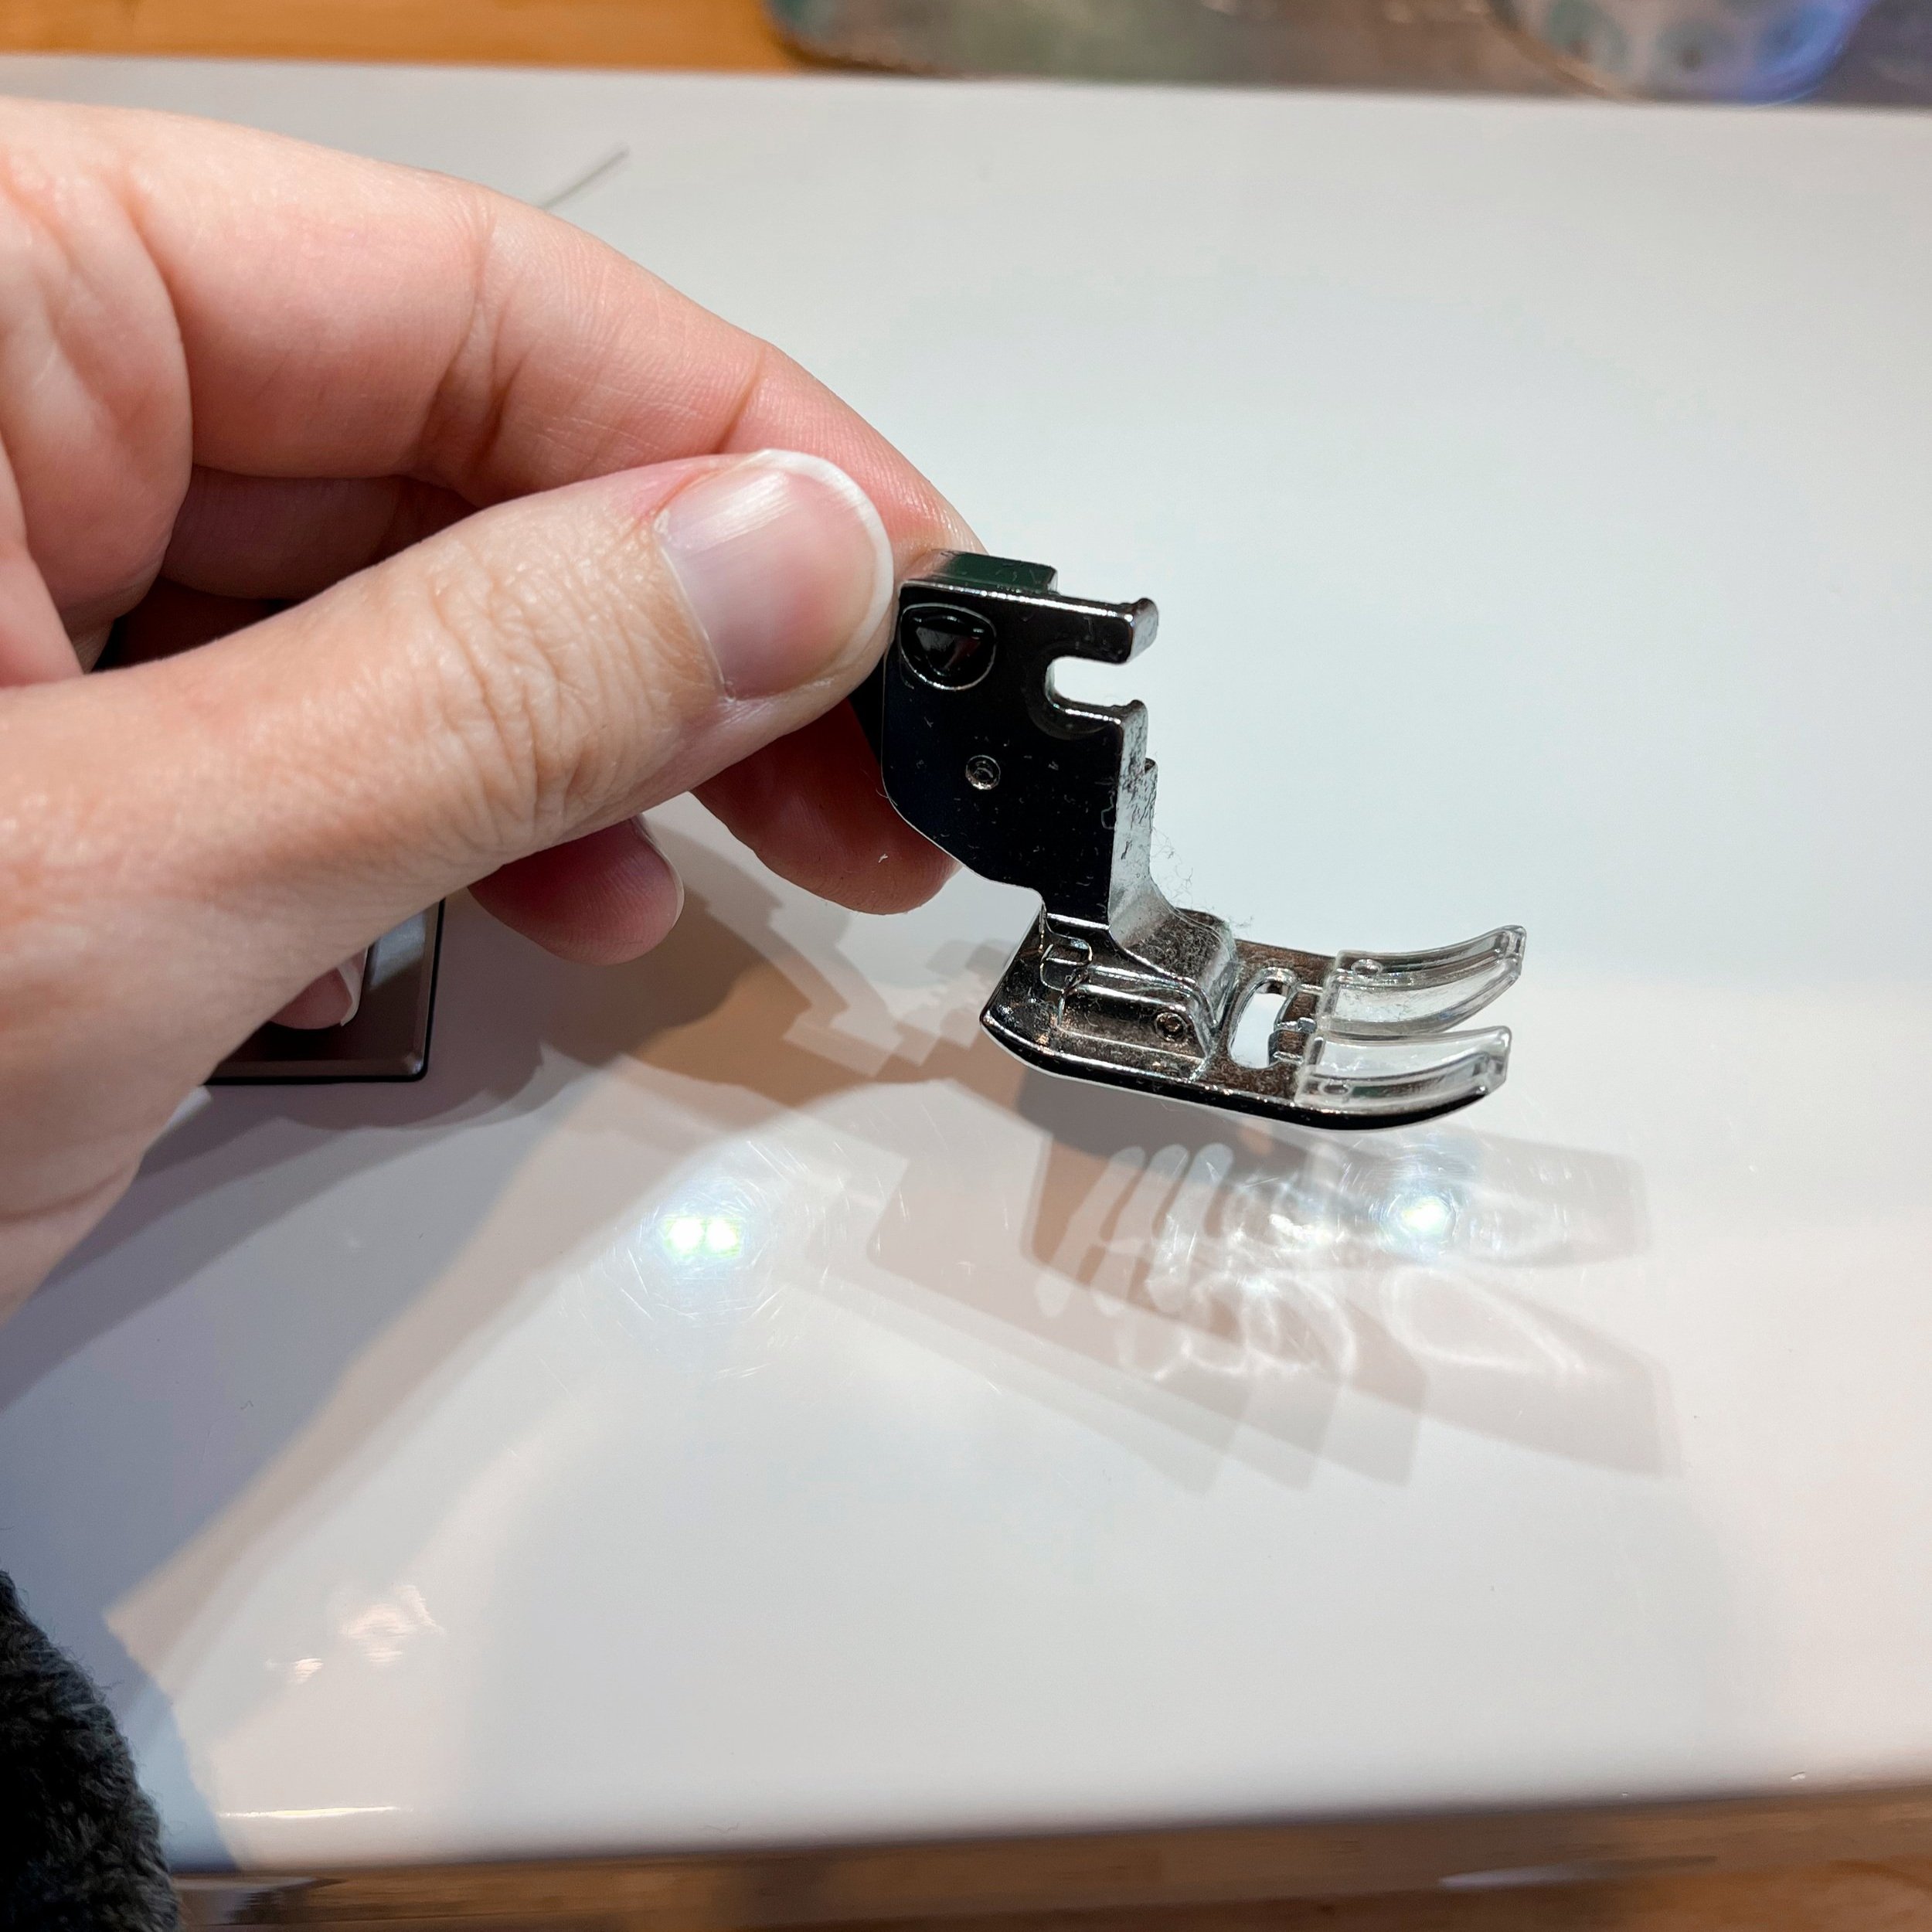
Now place the walking foot attachment onto the shank instead, but make sure that the little moveable lever on the right rests on top of the screw that holds your needle in place! This is an essential step and without it, your walking foot won’t work properly and could even break. On some walking feet, that moveable arm has a C-shaped prong at the end that fits around the screw. Either way, the moveable lever must be moved up and down as you sew by the screw that holds the needle in place.
Once it’s installed and screwed in properly, you can sew as normal! And yes, you can backstitch with a walking foot attached, no problem. Most walking feet come with a clip-in seam guide, which is very handy when sewing straight lines onto a quilt project. You can position the guide at the desired distance from the needle and use it to make evenly spaced lines, no marking necessary.
This is more easily demonstrated in video form, so here is the video version of all this info! Enjoy :)
I hope this has been helpful and that you now feel equipped and excited to use that walking foot on your sewing projects!
Cheers :)
Nikki