
Why I started making a muslin every single time
This post may contain affiliate links, which means that while I am not paid to promote certain items, I will earn a small commission should you purchase items through these links. For more info, see my disclosure policy.
Before we start, if you don’t know what a “muslin” is in garment sewing, it’s basically a mock up of the pattern in an inexpensive fabric called muslin. I didn’t used to bother with muslins at all. When I got really into garment sewing about 10 years ago, I lived in a place where nice fabric was readily available to me at a good cost. That is no longer the case. The industry has changed quite a bit, I no longer live somewhere conveniently located to good fabric stores other than JoAnn (don’t get me started), and sewing definitely isn’t a cheap hobby these days!
Several months ago, I got really tired of making things that didn’t turn out and having to toss out my nice fabrics and decided to muslin my next project. I had such good results that I have made a muslin of every single garment since then and have only had one wadder due to poor fabric choice (rookie mistake.)
Whether you’re just starting out with garment sewing or are an old pro, I thought I’d give you some tips for making muslins here today.
1.Your muslin doesn’t have to be muslin
You can of course buy muslin fabric by the yard or by the bolt for just this purpose, and if you’re the kind who really needs your practice clothes to be uniform in color, this may be the way to go. However, you can use anything to make a muslin. When your well-meaning neighbor gives you a box of ugly fabric, keep the biggest pieces to use as muslins rather than throwing them out. I’ve taken to buying sheets at the thrift store to use as muslins and it’s been working awesome for me! Be strategic, though. Sheets come in all kinds of fabrics these days. I use the microfiber kind to sub for my drapier fabrics, 100% cotton sheets to use as heavier fabrics and jersey sheets to mock up patterns for knits. Sheets at my thrift store are around $4 each and I can get three or more garments out of one.
2. Cut only the necessary pattern pieces for your muslin
You don’t need to construct the entire garment. You’re making a muslin to check and perfect the fit, so only cut the pieces you need to do so. Omit collars, facings, pockets, and often even sleeves or skirt portions of dresses. No need to insert the zipper either.
3. Use a basting stitch
Use a long stitch length and go ahead and sew your pieces together. I so still back stitch at the beginning and ends of seams so that when I try them on they don’t just come apart. Assume you’ll need to take some of those stitches out as you adjust. A basting stitch will make this much easier.
4. Nip and Tuck
Try on your muslin, pin up any openings or what have you, then see what adjustments needs made. You can get a lot of information about fit by pinching out excess or slicing open spots that pull. Is your top too small in the bust? Do you need a full bust adjustment? Do the edges not quite meet where the zipper will go? Try taking smaller side seams. I the back of the neckline gaping? Take some darts out of it. While I can’t go into a whole fitting series here, you’ll have no trouble finding tutorials for every issue only and below are some fitting books that could be very helpful for you.
5. Transfer your changes
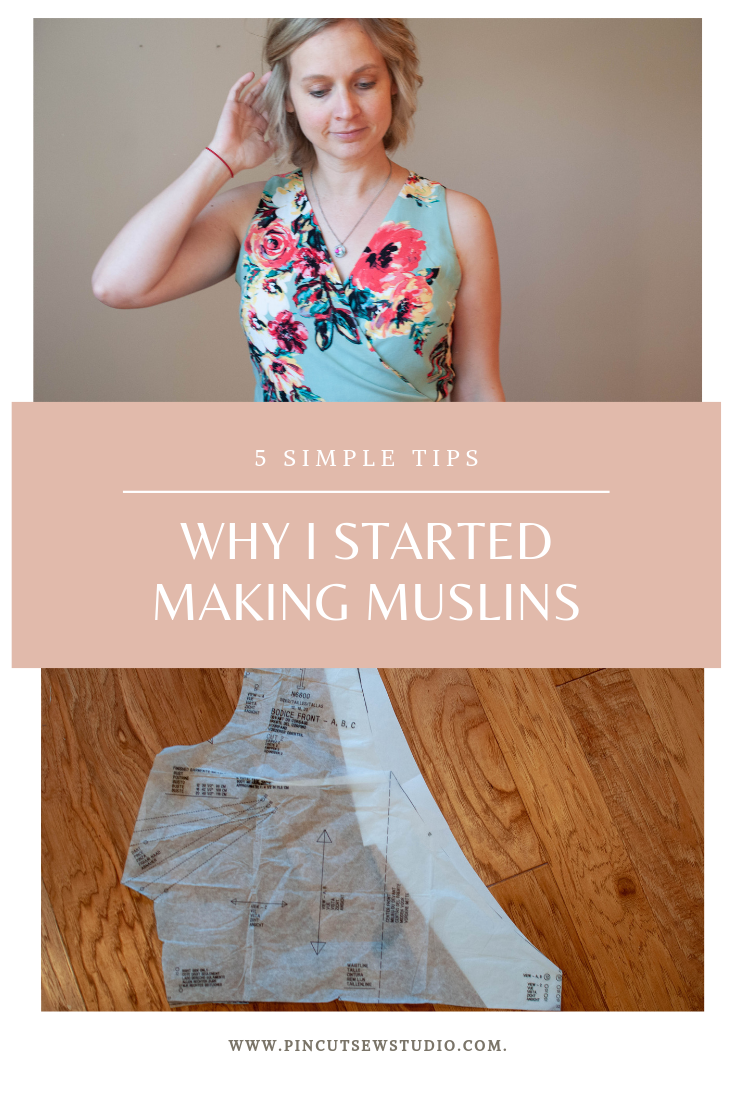
Many people prefer to trace their pattern pieces and make their changes there, but I usually just make my changes on my pattern pieces with good ol’ scotch tape. If you changes were extensive, you may need to cut a new muslin of one or several pieces. I promise it’s worth it! When I posted a wrap dress I made recently, I made the comment that the pattern would not have worked out if I hadn’t taken the time to make a muslin. The front would have gaped wide open and I would have been so sad if I’d had to throw that project away! You can see below how I taped up that front bodice pattern piece and added printer paper to heighten the neckline! I posted Natalie’s Easter dress here, where you can see the taped up pattern piece.

Proceed with confidence!
Now that you have your pattern perfected, you can cut into your nice fabric with confidence! Just make sure your print isn’t upside down. A muslin can’t help you there ;)